
It’s back to school time in our part of the country. Maybe you are trying to figure out how to afford the long list of school supplies required for each child. Then in looking at your children’s wardrobes, you realize the kids have grown several inches over the summer and nothing is going to fit them for the fall!
A friend of mine wanted to take her granddaughter shopping for some new clothes for school. At the store where her granddaughter preferred shopping (which shall remain unnamed), it was going to cost about $90 for one outfit. She wasn’t going to be able to help out much with clothing for her granddaughter at that rate. They did, however, manage to find some really good deals on the clearance racks. So, if your budget is tight, the clearance racks are an obvious place to check out.
If you have a wallet that is crying out for relief, we decided to offer you some suggestions this week to help with clothing your kids by doing some easy transformations. We are deviating from our normal weekly schedule and making every day Transform It Today!
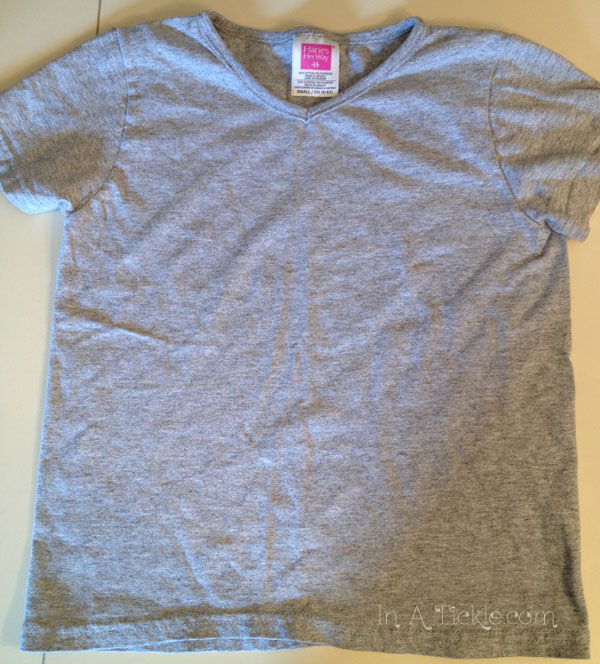
First of all, we are starting with a simple plain shirt. Plain t-shirts are usually much less expensive than ones with designs, appliques, and so forth. You may even find some at garage sales or thrift shops that are still in good condition for little cost.
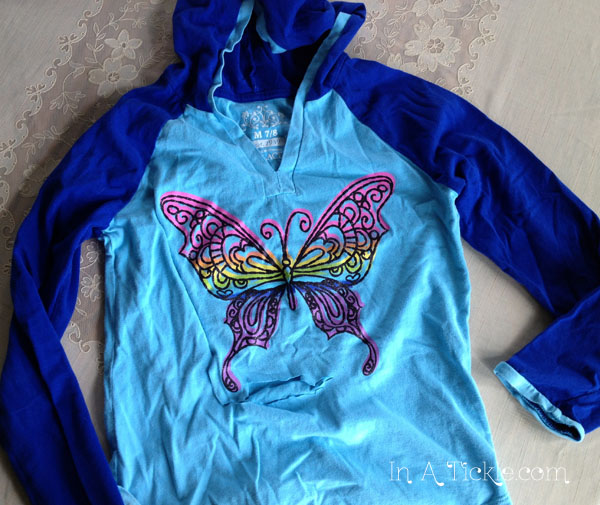
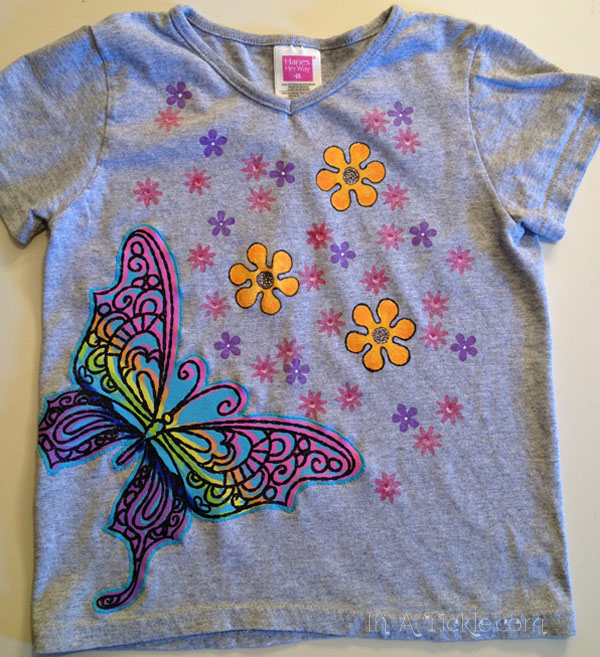
Then we pulled out of previous thrift store finds this shirt, which we bought mainly for the butterfly print. We really did not care much for the shirt itself, but the butterfly was pretty.
I started cutting out the butterfly before I remembered to take a picture!
I cut around the screen printed butterfly and ironed fusible webbing to the back side. Then I trimmed the fabric close to the screen print leaving a small blue edge around the butterfly for applique stitching.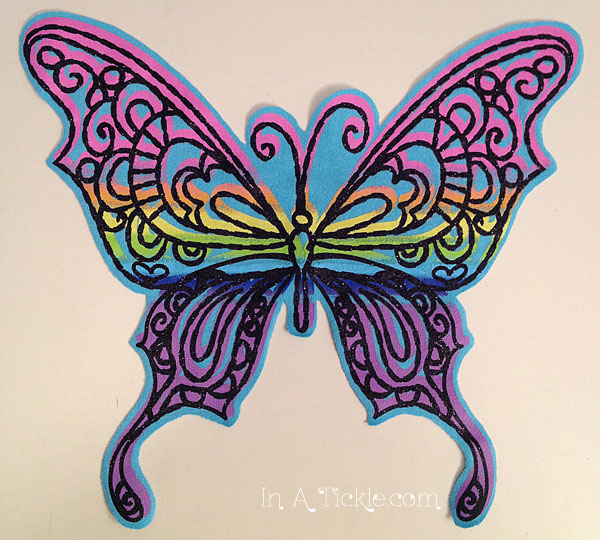 After removing the paper from the fusible webbing, I positioned the butterfly on the shirt, laid a small cloth over the applique to protect the screen printing and pressed with the iron according to the directions on the fusible webbing. Because of the stretchy fabric on both the shirt and the applique, I did a small zig-zag stitch around the butterfly, rather than a satin applique stitch.
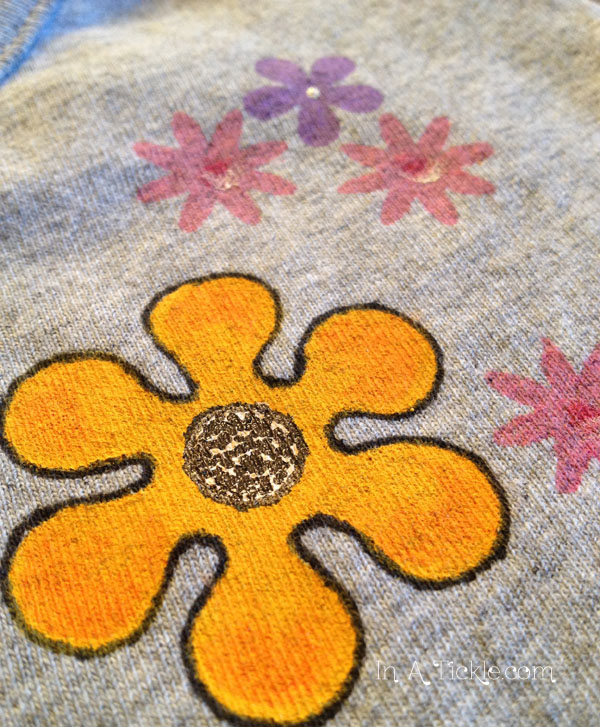
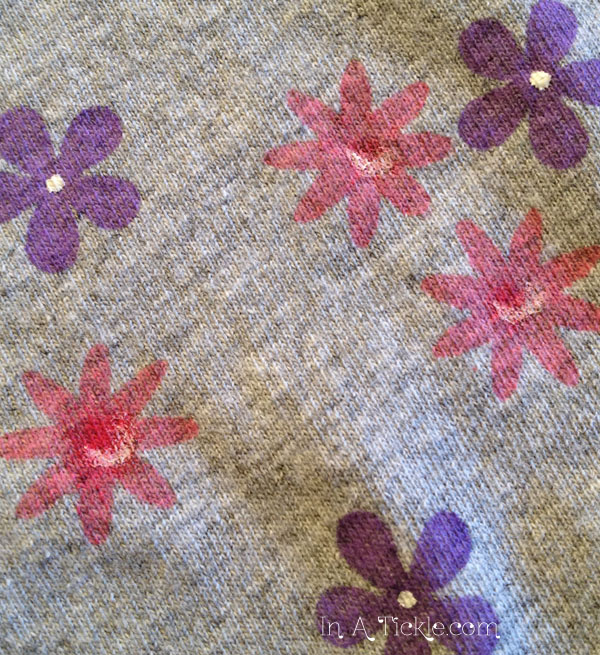
It certainly brightened up the gray shirt, but needed something more. So I pulled out the craft foam stamps we were experimenting with a couple weeks ago and stamped some flowers with fabric paint. Before stamping, I covered a piece of cardboard with wax paper and slipped it between the front and back of the shirt so the paint would not bleed through to the back of the shirt. Then I added a little more detail to the stamped flowers using a brush with fabric paint. When the fabric paint had dried for 24 hours, I ironed the shirt to heat set the paint using paper towel between the shirt layers and between the shirt and iron. (When doing this be sure to follow your paint instructions for heat setting.) Now we no longer have a plain gray shirt, we have a beautiful bright butterfly looking for some flowers. I think My Princess will enjoy wearing this transformed shirt.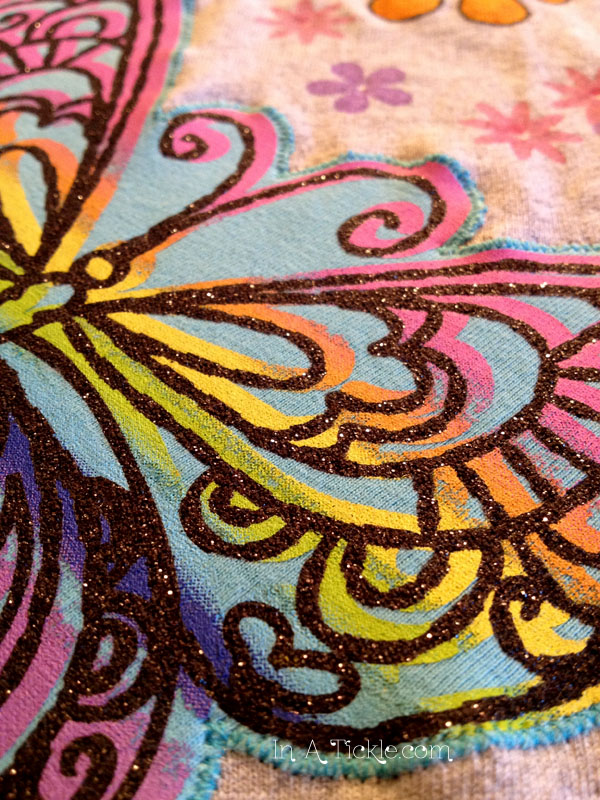
 What can you transform this week?
Back to School: Transform It Today! {Part 1}
Back to School: Transform It Today! {Part 2}
Back to School: Transform It Today! {Part 3}
Back to School: Transform It Today! {Part 4}
Back to School: Transform It Today! {Part 5}
Back to School: Transform It Today! {Part 6}