
 Do you have pillows on your couch but wish you had some festive pillows for Christmas decorations? You don’t have to buy new pillows, just make some new slip covers for the pillows you already have.
My sister came to visit at Thanksgiving, and while she was here, she got busy playing with my mom’s new Spellbinders die cut machine. She cut out a bunch of poinsettia petals from a piece of red card stock. She handed me the paper she had cut from and suggested I use it for a stencil to print some fabric like I had done for my fall table runner.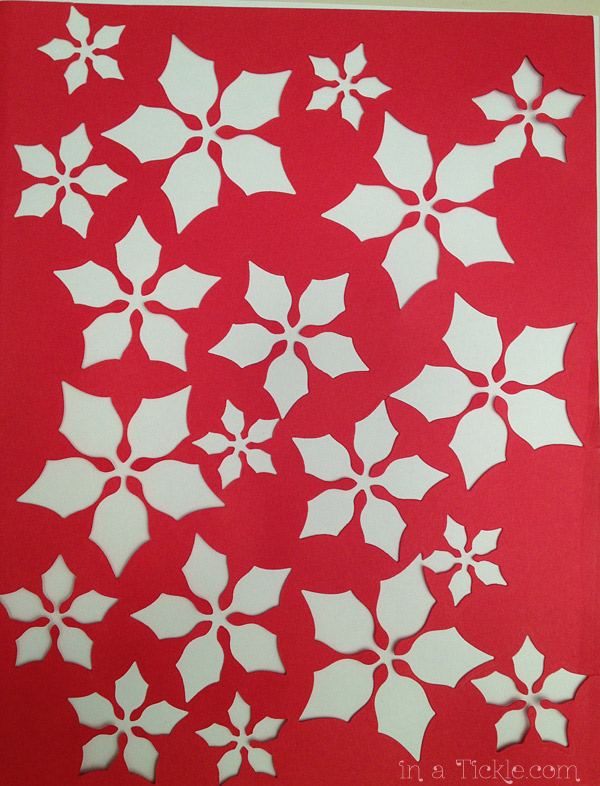 Sounded like a great idea to me, but I decided to make pillow covers instead. I pulled out some old Christmas fabric I already had with tiny designs (vintage fabric from the same era as my tree skirt.) Since the fabric was red, I decided to make white poinsettias. I used a sea sponge to put my layers of fabric paint on the material.
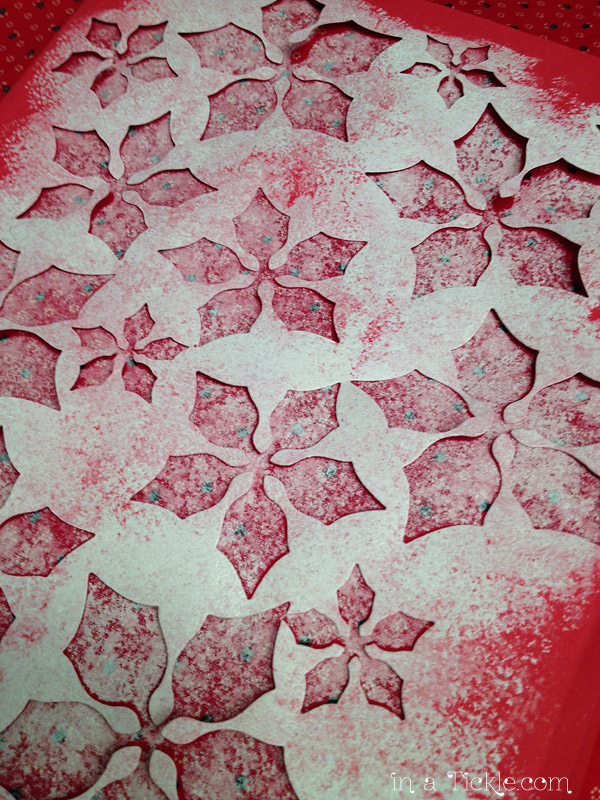
This was my first layer: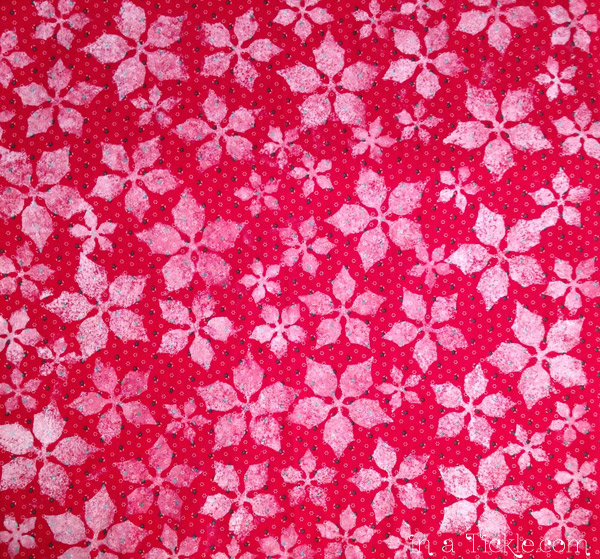 Then I laid the stencil over the flowers varying the angle to add more petal layers. I had to do each flower individually. I even added a little light sponging of the white paint between flowers (that’s how I covered up the “overspray” from my flower stenciling.) When the white paint dried, I added flower centers of yellow and green paint.
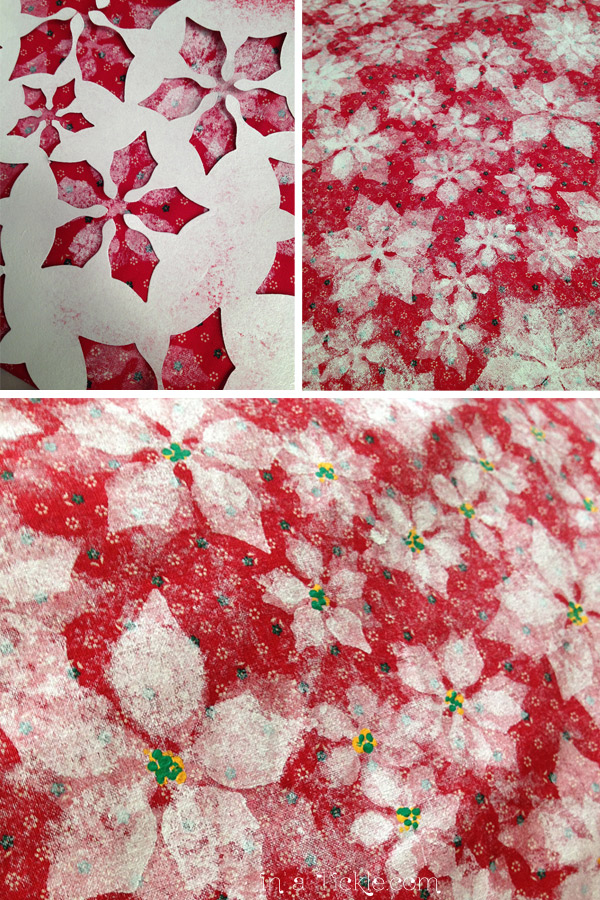 I decided to cover a couple of smaller pillows with the word JOY stenciled on the fabric. I drew and cut a stencil out of a piece of thin cardboard, sponged it with the same white fabric paint and added a poinsettia flower in the middle of the “O”.
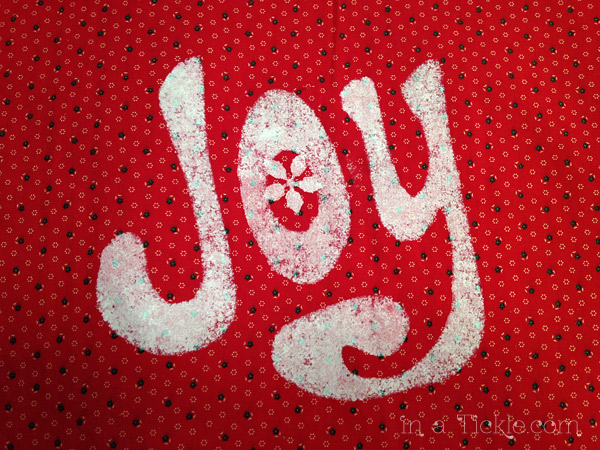
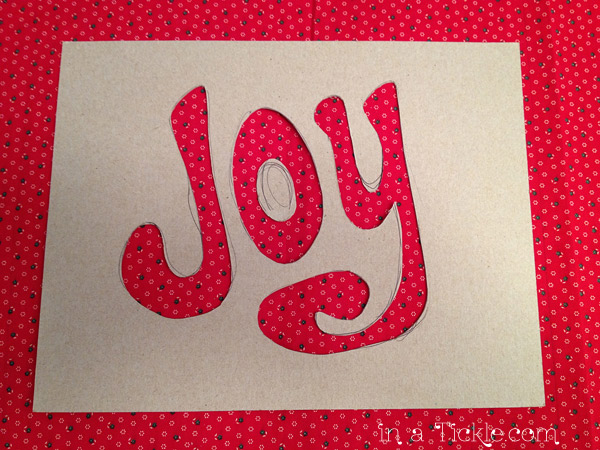
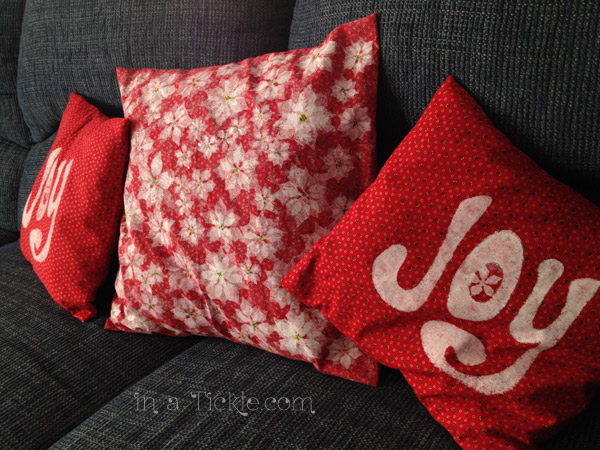
 These are the pillows I was covering. (They’ve been around my house for a long time. Melinda’s older sister designed them years ago for her Grandma to make for her bed. This is only three of the many! Grandma used new sheets for fabric and except for a few missing buttons they still look great.)
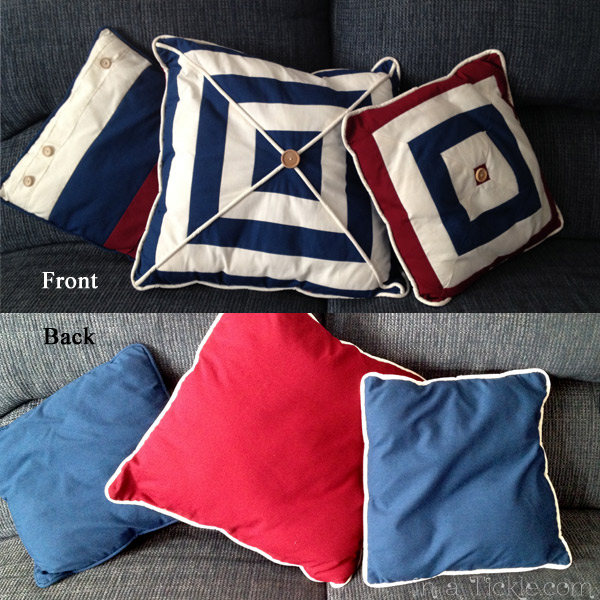 For each pillow, I cut panels double the width of the pillows plus an additional 6 inches and the height plus 1 inch. I zig zag stitched the shorter ends and turned those edges under 1/2″ and straight stitched along the edge. Then I folded the panel with right sides together overlapping the ends so that the panel measured the correct width of the pillow and pinned in place. I also made sure that my stenciled design was centered. I stitched the top and bottom edges of the pillow cover 1/2″ from the edge and then zig zagged the raw edges to finish.
 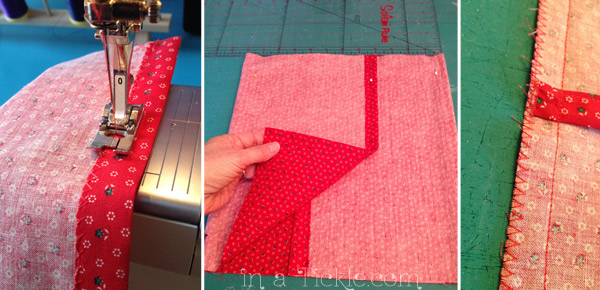 I turned the pillow cover right side out and stuffed the old pillow into one side first and then scrunched it down to fit into other side. I put my pillows into the covers with the button on the back side.
 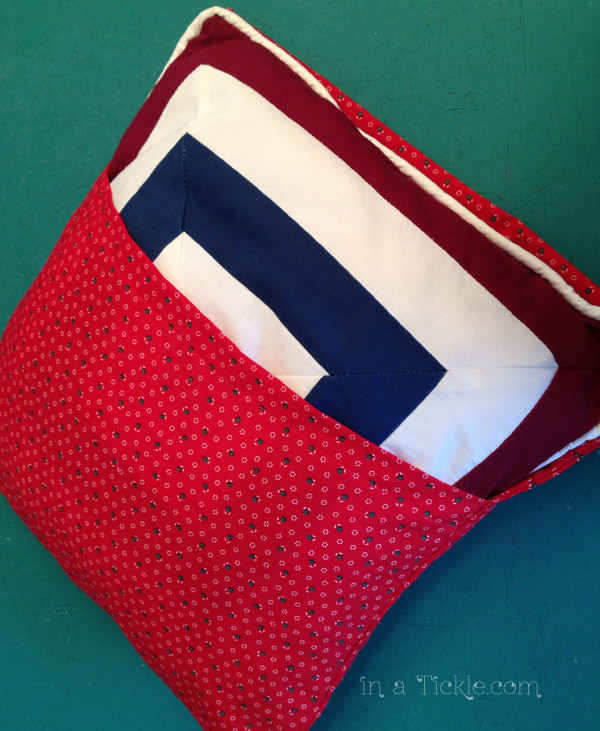 New Christmas pillows for the couch!
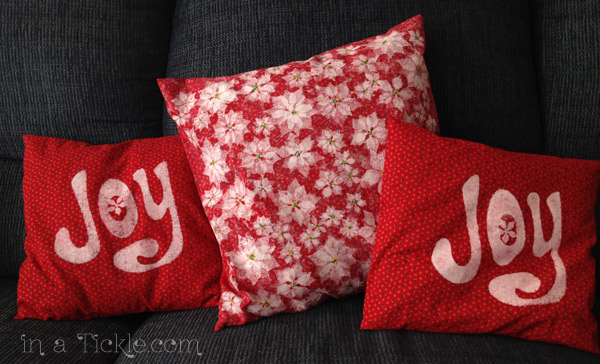 The really nice feature to these Christmas pillow covers is that when it is time to put the Christmas decorations away for another year, they only take up this much space:
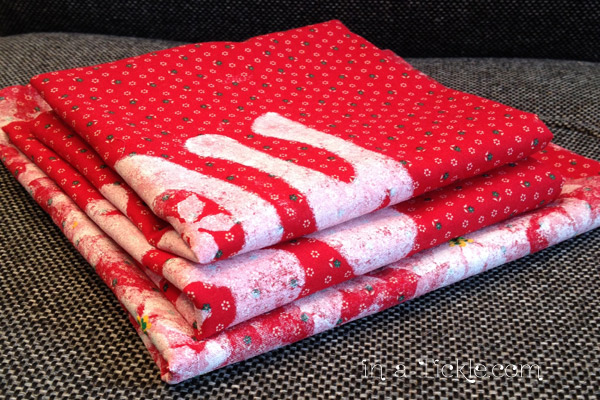 If I had bought new pillows (or made my pillows and stuffed them with regular stuffing) I would have to find room to store this:
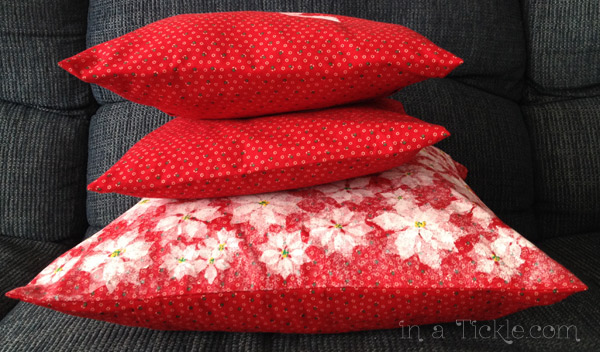
 Do you have some pillows you can cover for the season?
Pat and I knew you would come up with some creative thing to do with those poinsettia stencils. I have used some snowflake stencils on Christmas cards and made some with the white snowflakes. The possibilities are endless.
These are very creative and simple ideas, as well as inexpensive. I am impressed!