Ninja Boy was working on a super hero activity book the other day. One of the activities was to draw a side view of a face on a large grid of squares while looking at a smaller drawing of the face, with smaller squares.
I have used that process many times when I wanted to enlarge a design from a small image to a much bigger image, for instance, to make a large sign, poster or wall mural. The process breaks the image down into smaller segments that are easier to draw and still keep the same proportion in the enlargement.
This process of using a grid to draw is not new. Many artists in the Renaissance period used a grid to help them draw proportions correctly. The artist, Albrecht Dürer, is one who is credited with making a drawing grid, named the Dürer Grid, which was a wooden square frame on which strings were placed to form a grid of equal sized squares. The grid was placed between the artist and the subject of the drawing. The artist had paper with similar squares on which to draw. You can see pictures and read more here and here.
Suppose you are working on a creative project and find a teddy bear shape that you want to cut out of fancy paper, but it is not the size you need. A drawing grid is a great “tool” to use when you want a different size image and don’t have access to a copier or scanner to be able to enlarge or reduce the image size. Today we are going to practice drawing with a grid to enlarge or reduce an image. Don’t worry, the practice pages we are going to work on are not near as complicated as the one Ninja Boy did for his first attempt! For five years old, I think he did a great job.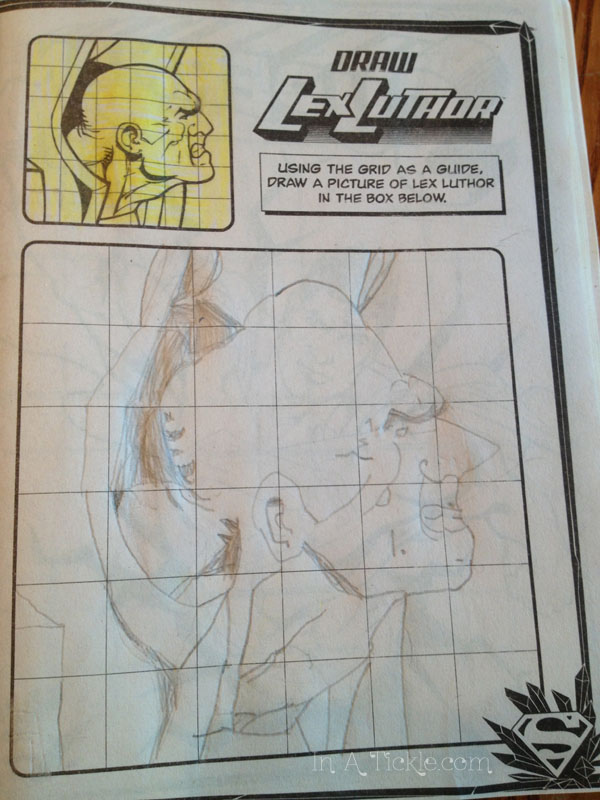
I found some simple drawings in coloring books for you to use. On the original picture, I have placed a grid for you. If you find it easier to keep track of where you are, you can number or letter each square across the top and side of the image and then do the same on the squares of the blank grid.
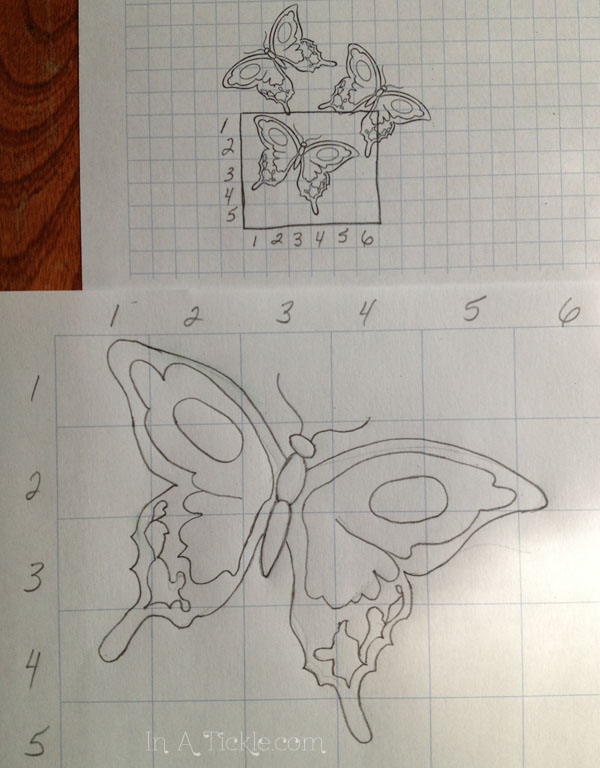
This first image is of butterflies. Notice that I have three butterflies on the original image with a grid of quarter inch squares. I only wanted to enlarge one butterfly, so I drew lines around the outer edges of the squares surrounding the butterfly positioned the way I wanted. I enlarged the butterfly on a sheet with one inch squares. You will find the pdf files of the images at the bottom of the post, which you can print to try drawing yourself.
Start with one box and draw the lines you see in that box on your enlargement. If the line starts at the top left corner of one square in the original drawing and goes to the middle of the bottom edge of that square, do the same on your enlargement. Since you are working with only one small square at a time, it is easier to estimate with your eyes where the middle, or fourth of the way down the edge, etc. would be. If you only want the outline of the object, just draw the outside lines.
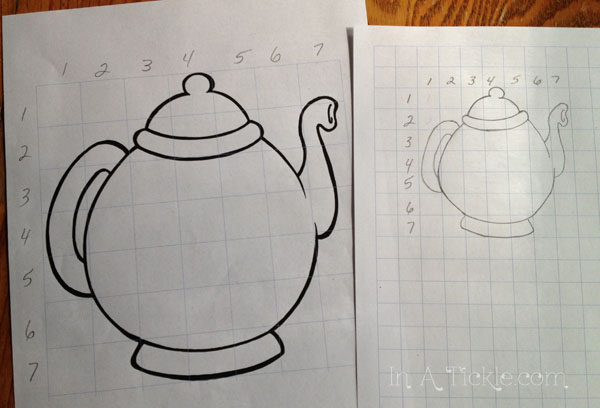
Let’s try reducing the size of an image. This teapot image is on a one inch grid. I did the reduced size on a half inch grid.
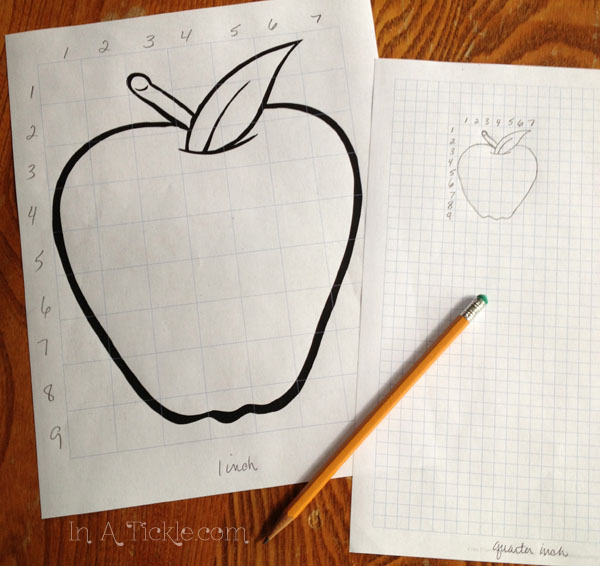
The original apple image is on a one inch grid and I reduced it in size on a quater inch grid for a much smaller apple.
I decided to reduce the frog image from a one inch grid to a half inch grid.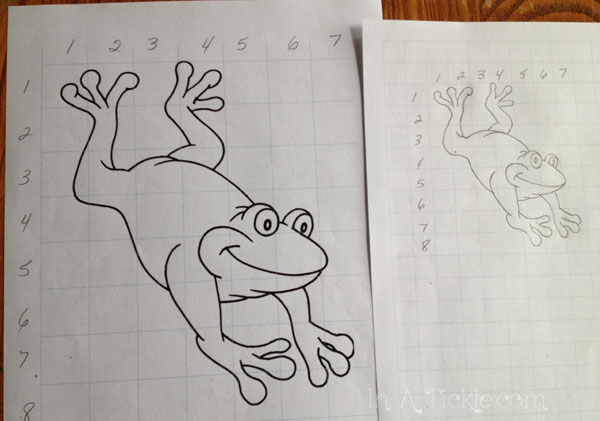
You can print off any size grid you want with this handy online tool. I used this tool to make a graph to put the grid lines on the original pictures for you. Of course, if you had a scanner to put your image onto your computer to begin with you would not need to reduce it or enlarge it by hand. You could easily do it with the computer, that is unless you are making a very big enlargement!
But we are assuming you don’t have one and need to do it by hand. So on any original image that you want to enlarge or reduce, you can measure the sides and draw straight lines every one inch (or whatever size you want) horizontally and vertically. Print off the size grid you desire for your final image and start drawing.
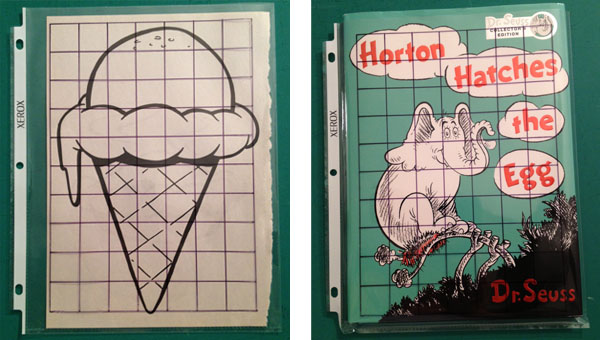
You could even stick a book inside the sheet protector, or lay the sheet protector grid on top of an image (but you might have to tape it to hold it in place.)
If you don’t want to draw lines on the original image, you can make a drawing grid that you can use over and over. Just print off one of the grids and slip it into a transparent sheet protector. Using a fine permanent marker and straight edge, trace the lines on top of the sheet protector. Now you can slip any image into the pocket and you have an instant grid on top of it! While you’re at it, you can make several sheet protector grids with different sized grids and then they will be ready to use whenever you need one.
Now it’s your turn to try out grid drawing. Print out these files and have fun!
1. Butterfly Image
2. Teapot Image
3. Apple Image
4. Frog Image


I am an elementary art teacher and I would love to write about this lesson and link back to your page if that is ok with you. You did such a great job of showing how to use and make a grid! Thanks so much!
Glad you found it helpful, Wendy! Yes, you may write about it and we’d love the link back.
Thank you so much Jan! Sorry it took me a while. Studying for a Praxis 2 exam!
Here is the link to my blog and the post linking back to your blog. Many blessings.
This is a wonderful lesson. Thank you so much for providing the materials. I am teaching 7th grade mathematics and I will use this as an opening activity to have the kids formulate ideas of comparing the area, perimeter, and length segments of the original and scaled images.