
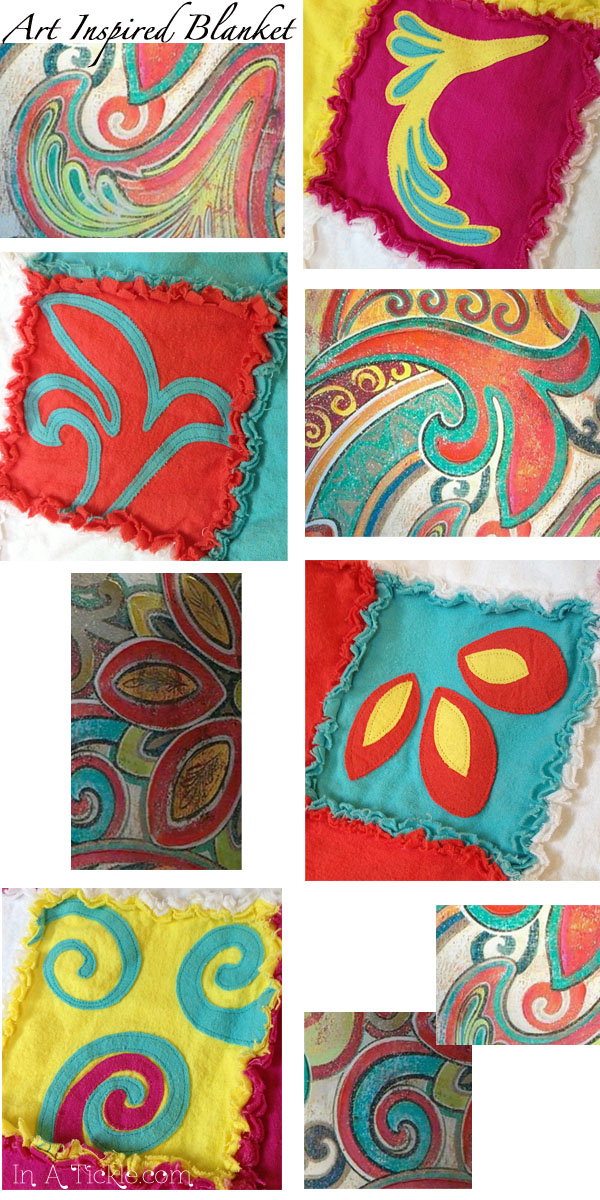
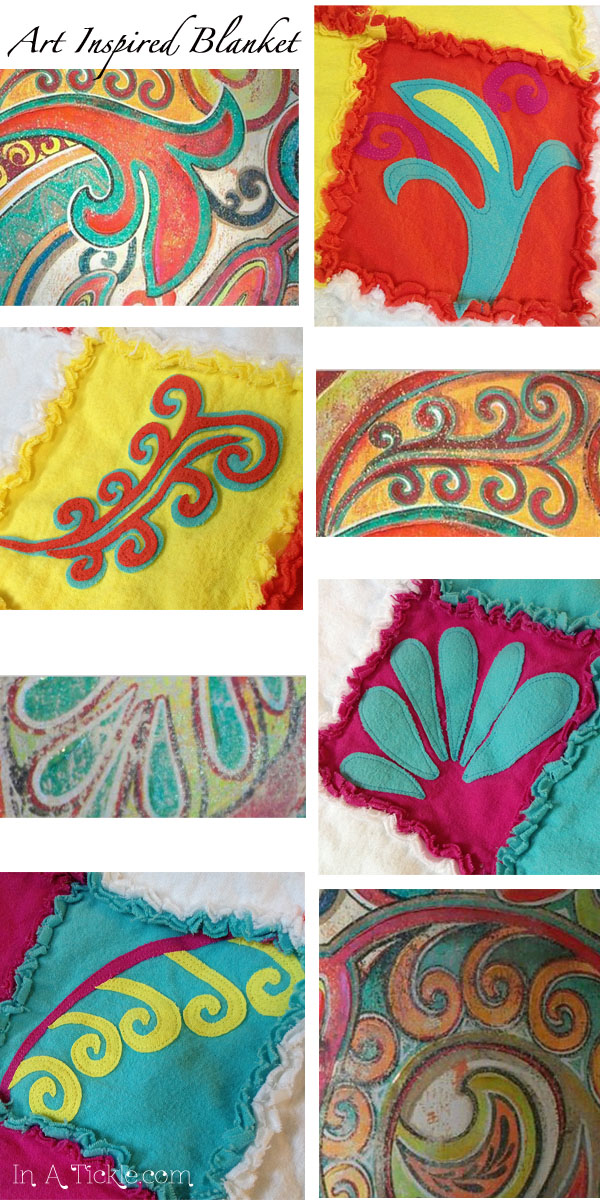
A very dear friend is having twins, and I wanted to make something special for her girls. She sent me a picture of the art she chose to put on the wall of the nursery. It’s not your typical nursery art, and I spent a lot of time looking at it trying to figure out what I wanted to make. 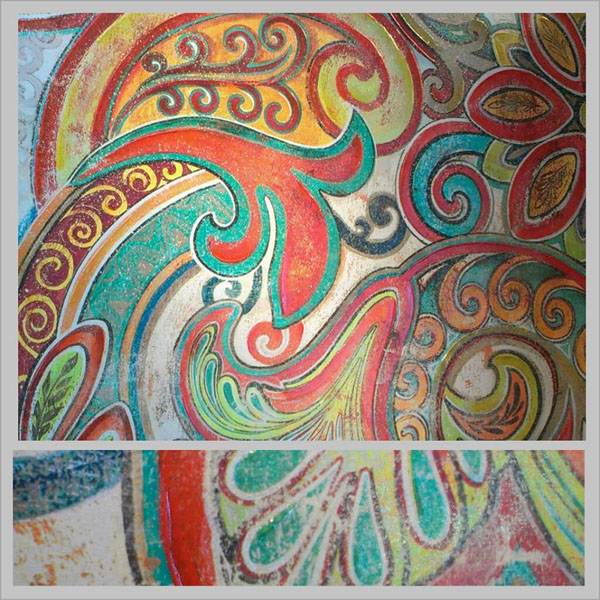 Finally inspiration hit me! I decided to make rag baby blankets and use some elements of designs from the artwork for the blankets. I am not going to tell you how to make rag blankets. You can do a search online and find all kinds of tutorials for rag blankets. The purpose of this post is to encourage you to keep your eyes open for inspiration from all kinds of sources for your creative endeavors. You never know what may inspire you!
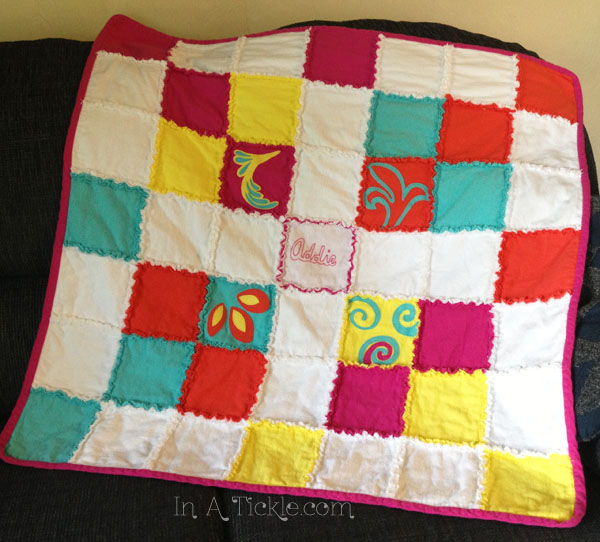


This week I start a new adventure (I know! Another one). I am taking on the role of being a tap teacher! Never in my life would I think that would ever be something I would do.

I took tap class when I was younger but quit around thirteen years old. I hadn’t done any tapping other than a random time step or two since then. This last June during recital time, I committed myself to learning my class’ tap dance a week before the recital. I was not wonderful, but it was fun to get back into it.
While my teacher was working out the fall schedule this summer, she realized the only way she could teach the boys tap and tumbling class would be if someone else taught the two youngest age groups their tap portion of class, and she would teach their ballet when the boys were done.
Since my life was taking a big change with my hubby changing his job, she thought it would be a great way to help her out as well as offset some of our dance cost.
After committing to do it, I woke up many mornings thinking….I CAN’T DO THIS! What was I thinking?? I just got back in to tap class this summer. Why would I be able to teach it? I’ve never wanted to be a teacher like that. Even though it’s the little kids, what if I don’t know what to do?
All the “I can’ts” were running through my head until I realized a few things that I needed to fight against them.
1. Positive thoughts and prayer
Thinking about all the things that I can’t do or am worried about would not be helpful. Every time I thought something negative, it made the knot in my stomach get worse. Saying a prayer and thinking about all the things I can do would be a lot better for my mind and my stomach.
2. Confidence (even if it’s not your own)
My teacher thinks I can do it. That’s enough. She has seen me dance, has taught me to dance, so she has complete confidence in my abilities. She wouldn’t let me or ask me to do it if I didn’t have what it takes. There will be some things I will have to learn, but she knows that I can do it. I have to use the confidence that she has in me to boost my own.
If you decide to have confidence it gives you what you need to move forward. Maybe your mom or dad, your husband or wife, or your kids will give you the confidence that you need to take the first step. As you see that you can do it then your confidence will grow.
3. Plan of Action
Part of the problem was that I wasn’t quite sure what I was going to be doing. I knew that as soon as she gave me the lesson plans then it would take care of a lot of my nerves. I also participated in the last class of the summer to get a feel again for how she does it.
If you sit down and write out or if someone else needs to write out a plan for what you are going to do then that takes away a lot of the unknown. You have a way to move forward because you know the next step. If you are starting a business venture or a creative business (wink wink), put your ideas on paper or an idea board to show yourself that you have a plan. Seeing it written out shows you that you just have to take it one step at a time.
You can do so much more than you think. You just have to start. Just try it and see. You might be surprised that all those “I can’ts” are actually “I cans.”
UPDATE: 8-30-13
So I taught my first tap class. It wasn’t a complete disaster, but…I will just be the helper from now on. I learned that I can do anything, but sometimes, I just shouldn’t. So how do you know when you shouldn’t?:
1. You try and it’s obvious it’s not for you.
Sometimes you don’t know until you try. You may not think you can do it, but you won’t know if you don’t step out and give it a go. I learned that I could do it, but I would have to work really hard to make it good. I don’t want the girls there for tap class to have to put up with me all semester so I can learn to do it better. They deserve more.
2. Someone else is better suited for it.
My helper was AMAZING. She was so much better at teaching the girls than I was. She related to them well, and they all seemed so much more excited when she was leading. The energy level dropped when I was in charge. It came alive with her! I knew that she would do a better job, and I needed to step back so she could do it well.
I am glad that I tried. It gave me opportunity to learn more about myself. I am so happy to be able to assist, and I have so much more respect for my teacher and the others that teach at the Studio. It takes a lot of energy and a special kind of person to teach these sweet girls.

My hubby shared these videos with me, and I thought it would be a good inspiration. You can make just about anything if you put your mind to it!
They took household items and recreated the trailer or portion of a movie scene by scene of popular movies.
Watch the comparison.
And how it was made.
You can see more Homemade Movies at CineFX on YouTube.
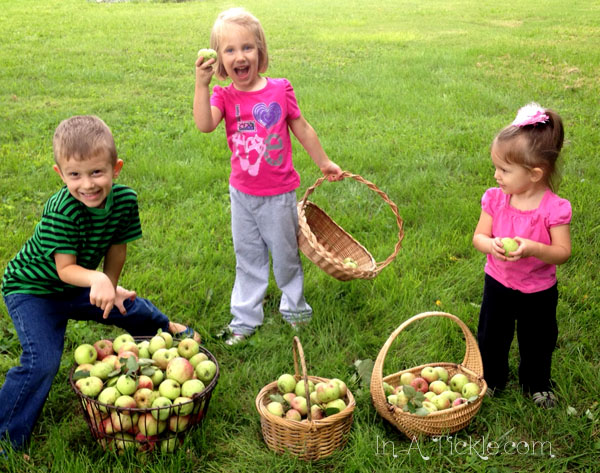
 It was time to pack up the kids and head to the nearest apple orchard (a.k.a Pa and Grandma’s backyard) I am not sure if you can call four or five trees an orchard, but it works for the grandkids! And they love apples.
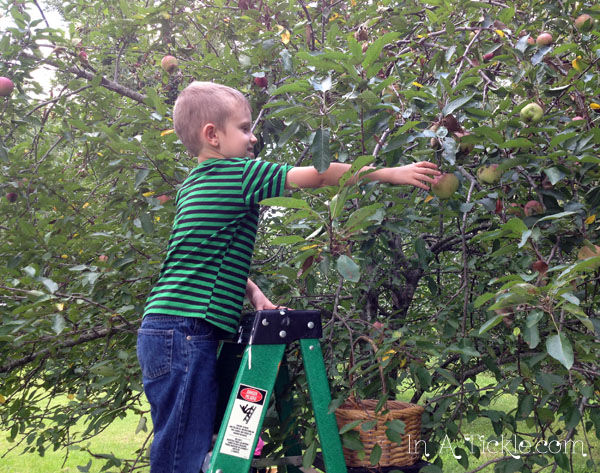
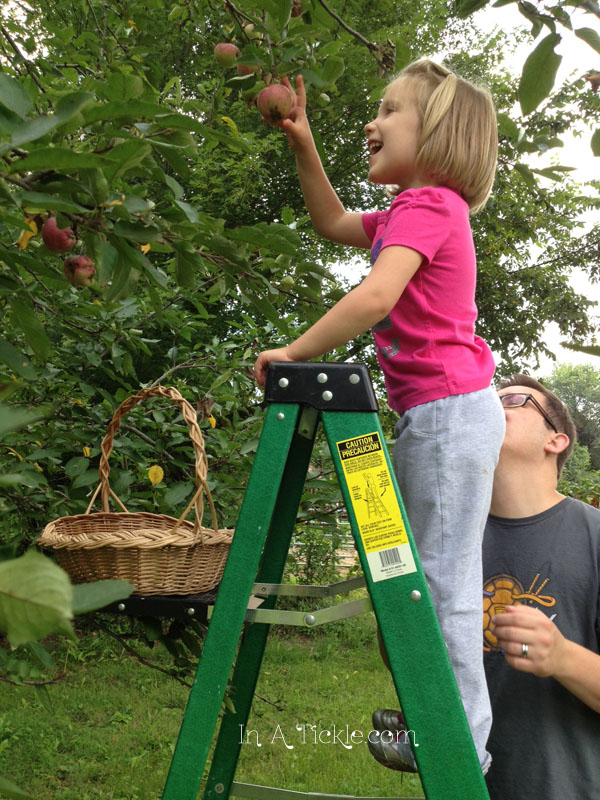


The horses next door wanted to see what was going on!
After picking, we started the process of peeling, coring, and slicing a bunch of the apples to make applesauce. With a knife, it is a slow process, but with an apple peeler/corer/slicer, it’s a whole lot more fun and faster too!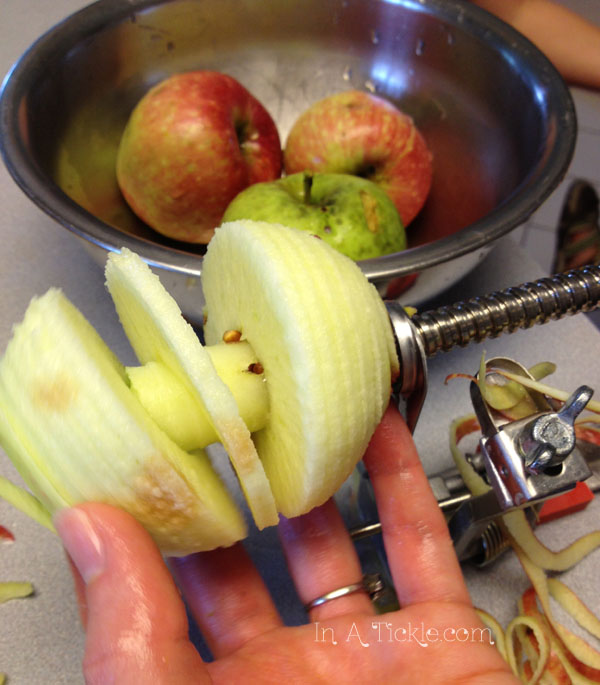
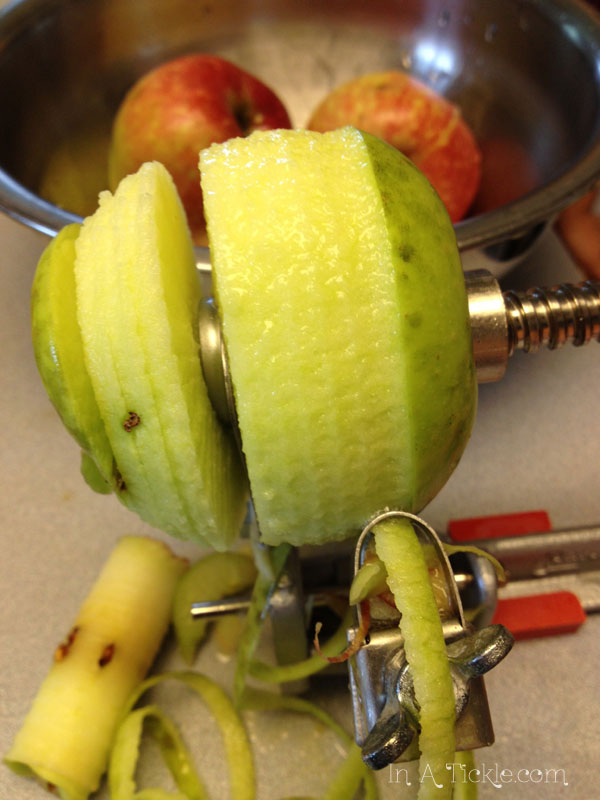

No, Grandma, the peelings don’t go into the applesauce!
To make applesauce, I just put the peeled/cored/sliced apples into a pan, add a little bit of water and start cooking on medium heat. After it heats up, I turn it to low, cover and let it simmer. As it cooks, I stir occasionally and when the apples are getting very soft, I use my potato masher to break it down. I like to leave the applesauce somewhat chunky.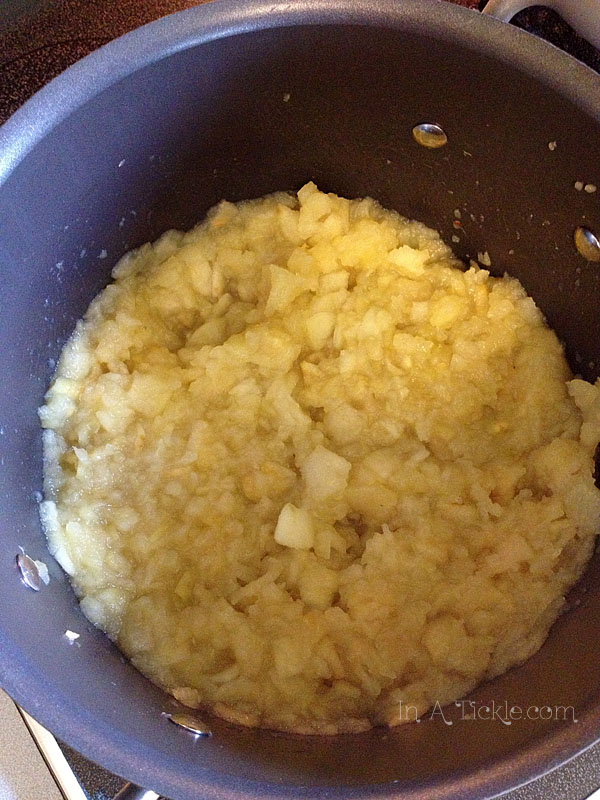 I don’t add anything else to the apples as they cook. No sugar is needed, after all, we don’t sprinkle sugar on the apple when we eat it fresh. Sometimes the kids like to sprinkle a little cinnamon on the applesauce, but they gobble it down plain as well. Yummy!
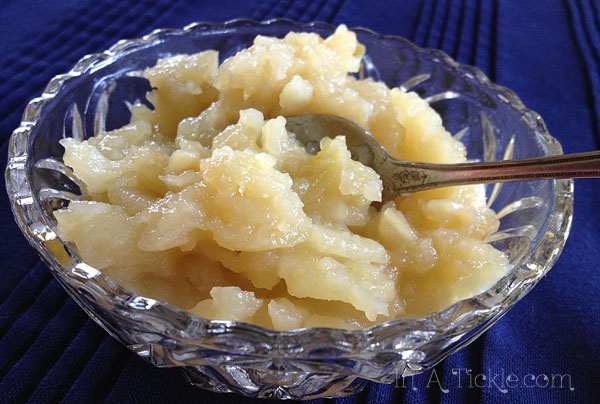 Since Melinda and I have been using applesauce in many baked goods (you can substitute applesauce for the oil on a 1:1 ratio) I decided to freeze the applesauce in 1/2 cup portions for later use. Using my handy measuring tool from Pampered Chef, I measured out 1/2 cup portions of cold applesauce into nice little piles on a cookie sheet covered with plastic wrap. Then I placed the sheet into the freezer. After the piles of applesauce were completely frozen, I put them into a freezer bag. Then when, a small portion is needed for a recipe (or for kid’s snack) it’s easy to pull out whatever is needed and keep the rest frozen.
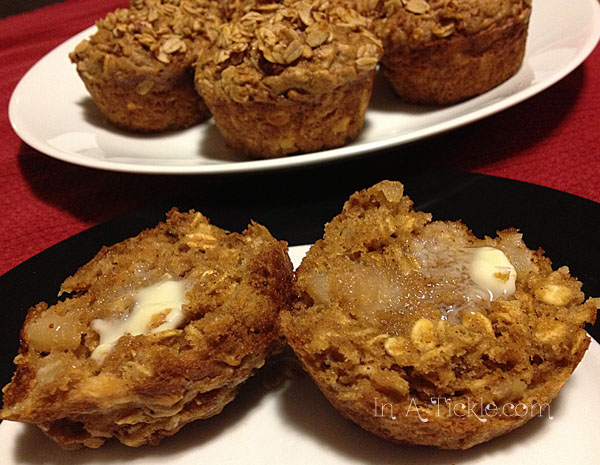
 Melinda makes these delicious Applesauce Oat Muffins for her family. (She copied the recipe from a magazine several years ago, so we are not sure who to give the credit to.) She switches out the oil in this recipe with coconut oil, now that she’s learned how good coconut oil is for you. She also uses coconut sugar instead of the brown sugar, and regular oats works fine if you don’t use quick-cooking oats.
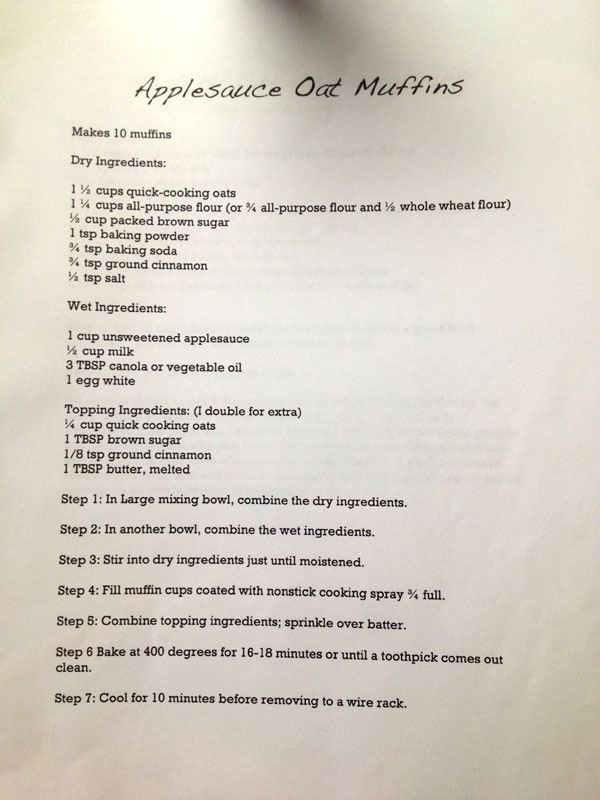


My grandkids love to paint. I used to set them up with a paper plate onto which I squirted piles of whatever colors of paint they wanted to use.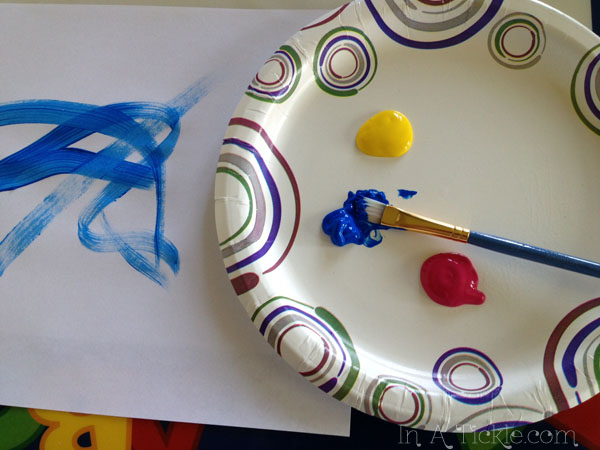 That worked and they had a blast. However, after a while, they usually ended up swirling all the paints left on the plate together into one brownish blob. That was fine too. They were learning what happens when colors mix together. But since they love to paint often, I would rather they have plenty of paint to make their pictures instead of throwing away a plate full of a color they don’t want to paint with!
I found a good deal on a paint easel (two sided) so more than one can paint at a time. It is really a chalkboard on one side and white board on the other, but we tape paper to each side and it’s a paint easel! When we first set it up, I put some little plastic cups, that I had saved years ago for my painting, into the tray. That worked great.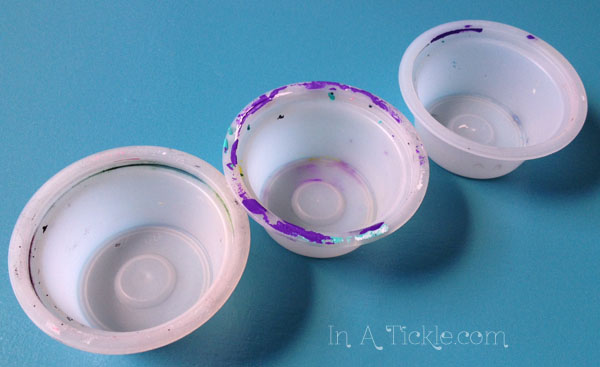 But I wanted to find something that I could seal and the kids could use the leftover paint again. On the next trip to the craft store, I found the perfect thing…
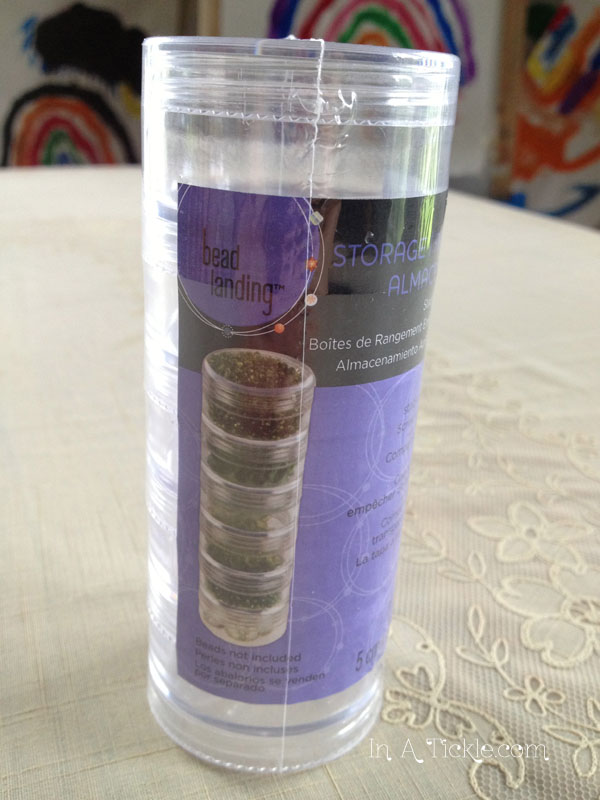 It was a package of containers for storing beads that screw together so the bottom of one container is the top for the container below it. The top container has a small lid that screws on to seal it. So now I squirt some paint into each container and when the kids are finished painting, I screw them all together and save them for the next painting session (which could be later in the same day.)
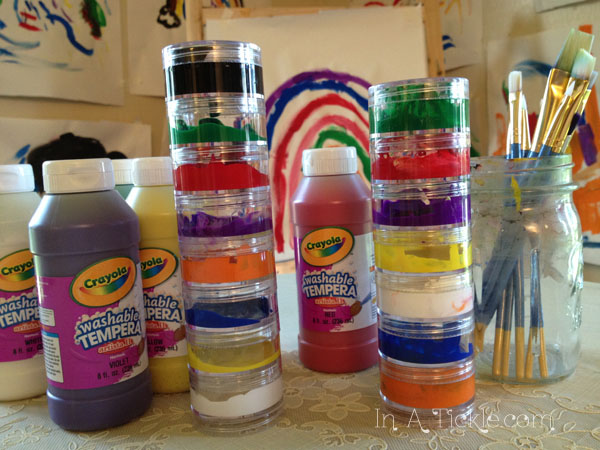 When they want to experiment with making their own colors, I let them use the plastic cups that did not have lids to mix their paint in.
 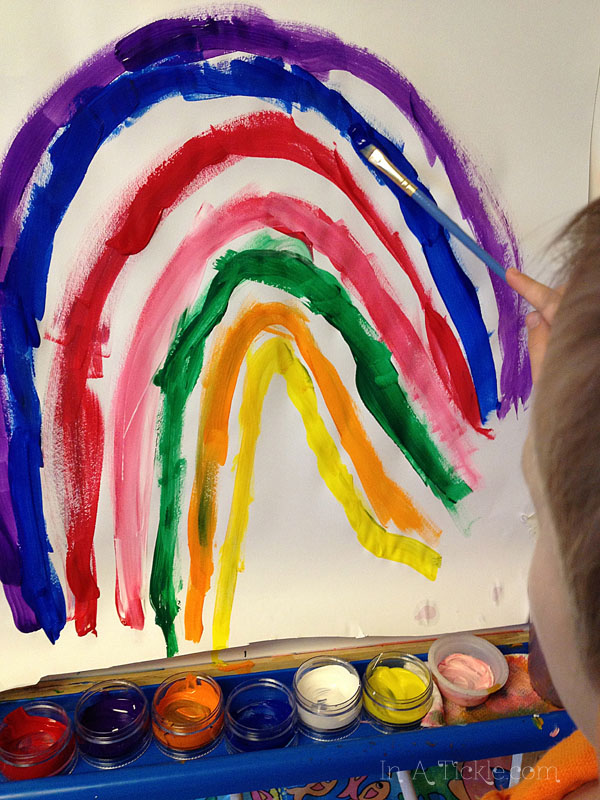 I did shop for containers that were specifically for paint (in the painting sections of the craft store) but was not finding any that would fit the tray. What I was finding was also much more expensive than the bead containers and would not have stored as compactly. Sometimes you have to be creative and think outside the isle! These bead containers (which I found in the jewelry making section) would also work great for storing paint for a special small project you may be working on.
Save money, save paint! Create!
 My family went regularly to the library when I was a kid. I remember each of us bringing stacks of books home every couple weeks, mom included! We loved the library so much that we even played library at home.
We would do the summer reading program where you would keep track of the books you read, and you would get a prize based on the number of books. I don’t even remember my own prize, but I remember my sister got a set of pogs. I think I was a little jealous. I actually have those pogs at my house now, and my kids play with them.
I have been to the library quite a few times with my kids since becoming a mom, but I realized when going the other day what an asset libraries are for creativity.
Libraries rule and here are my library rules:
1. Go often.
…Even if you don’t finish reading every book that you check out. Keep in the habit of going regularly (and taking your kids if you have them). You can’t always buy new books whenever you want, but you can still read new books by checking them out at the library. If you don’t like the book it’s ok because you didn’t pay for it. You can take it back and get a new one. Make a certain day of the week library day and stick to it.
2. Check out all the books you can and keep them in one spot at home.
Our library let’s us check out six books per library card. Right now we have two cards so every time we go we get twelve books (Ninja boy gets to get his first library card the next time we go, and I think that is one of the most exciting mom moments ever).
My kids like taking the books into their rooms, and I’m sure you can guess that it makes it a lot easier to lose books that way. I started making them put the books back in a box in the same spot just for our library books. I check it every couple days to make sure we have the right amount accounted for. This is a great way to help you avoid late fees and scrambling to find books on library day.

Our library book spot
3. Don’t just stick to the grown up section for yourself.
I have been checking out young adult fiction lately because they are fast reads. I know that I can get through them quickly so I don’t feel overwhelmed if I am busy. I can still finish a story while still getting things done in the rest of my life.
Also, we found this great art book for kids the last time we went that is going to help me with my creative projects probably even more than my kids.
The Usborne Book of Art Projects (Usborne Art Ideas)
4. Read non-fiction AND fiction.
Don’t ever tell me that you can’t learn something from a fiction book. I might go Hulk on you. I read somewhere that fiction literature doesn’t answer questions but asks questions, and the reader can draw his or her own conclusions. I love this description. Non-fiction is often for a purpose. You read it because you want an answer to a question. . .who was Abraham Lincoln? How do I change the oil in my car? How can I get more organized? This is good. We need to answer these questions. But I love to read a book that asks ME something…what would you do in this situation? Is this right and good? How can you relate to people in life that are going through situations like this character? Fiction makes you think while wrapped in an entertaining story.
If you want your children to be intelligent, read them fairy tales. If you want them to be more intelligent, read them more fairy tales. -Albert Einstein
This is one of my favorite quotes. Non-fiction is awesome. Fiction is awesome. They both fulfill the same purpose–to make you more intelligent. Fiction just adds a little extra creativity to it.
5. Support your library.
Our library is privately funded. This means that they don’t always have enough money for growth. They have a thrift store and book store in the lower level to help with funding, and starting this fall we will have to pay for a yearly library card. I am GLAD. I would love to pay less than a $1 a month to read. If your library charges for a card, pay for it GLADLY! If you forget a book and end up with a late fee, pay the fine GLADLY! This fee supports your library to be able to provide you with this wonderful service. Be nice–most of the people working there are volunteer. Maybe you could be a volunteer yourself! If you are getting rid of books, consider donating them to the library. Then you could always check them out if you want to read them again.
Remember this PSA from the 90’s??

I love my grandma! She gets what we are doing here. A couple weeks ago she came over to our house and handed me this dress. She found it at a garage sale and thought that I could do something with it. It’s a Junior size strapless dress that is not all that pretty as is (in my opinion), but as soon as I saw the dress, it was begging me to turn it into a skirt for My Princess.
 It already had seams in the middle for me to rip to make a casing for elastic. I started on it right away. All I had to do was sew the band over and add elastic to fit My Princess.
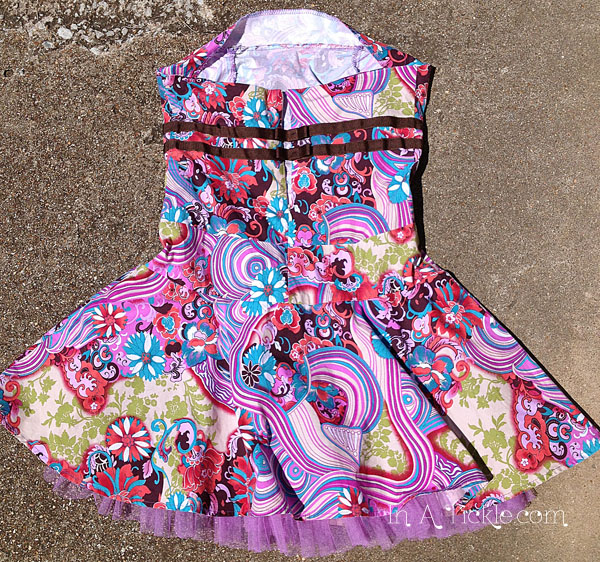
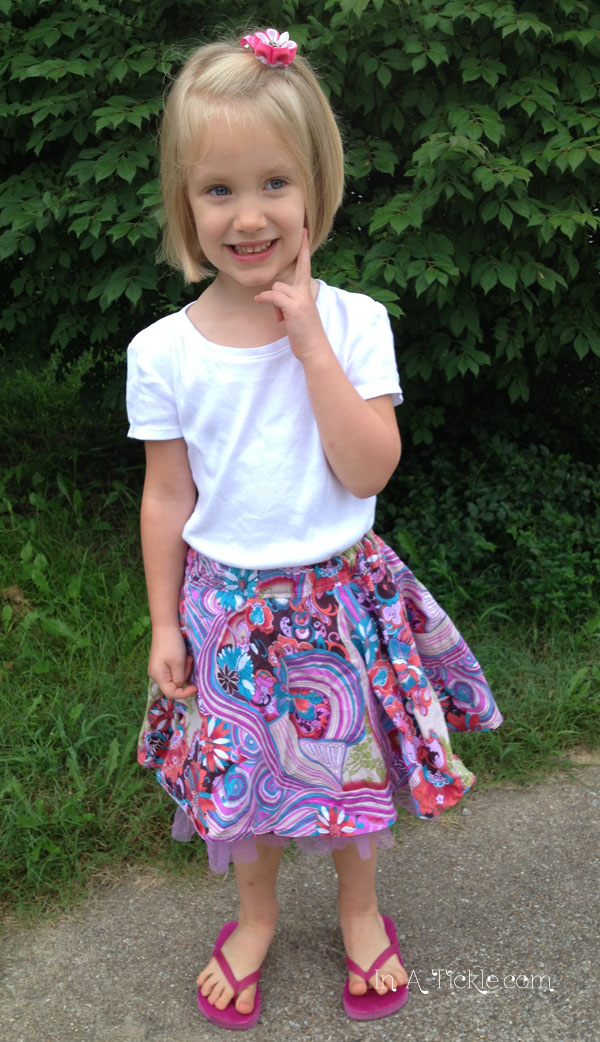
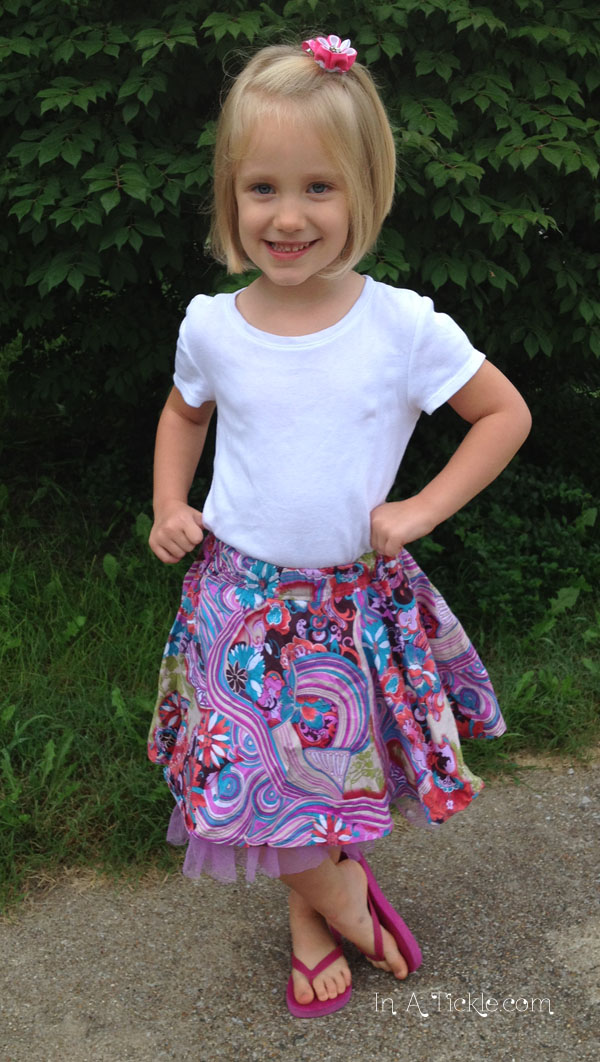 She’s a fan! I still have the top half of the dress to make into something else…
Today, we are happy once again to have Jan’s husband, Tom Johnson, share a guest post. He is a wonderful husband, dad, accomplished entertainer, actor, singer, and musician, all around fix-it guy, remodeler, furniture builder, biker, and most of all–his grandkids adore him! You can find out more about the group he performs with here.
Last month I wrote a blog post about “two being better than one.” Well, when it comes to income, it’s even more true! So, I decided to open up a little side business online this week at a little site called Etsy. It has helped that I have been preparing for it for almost 38 years.
Here’s how it all started. I was in college here in the Ozarks when I met the father of one of my fellow students. Big John was quite a character, and one of his favorite hobbies/side businesses was wood carving. Well, he thought everyone should “whittle” and proceeded to set my college roommate and I up with carving knives and wood. I told him right off that I had done a little whittling at home in Wisconsin and he asked me to show him my project the next time I saw him.
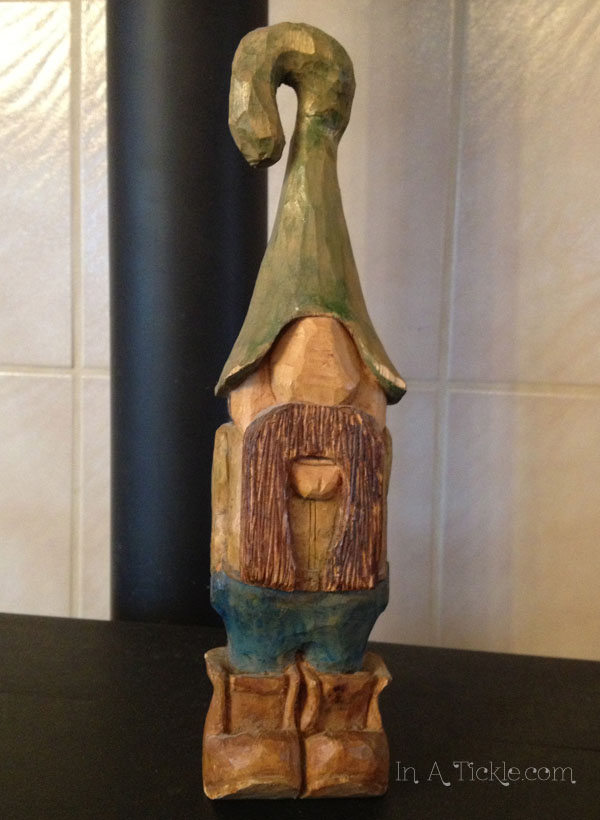
Tom’s First Carving
Well, I did, and he laughed. The elf that I had carved was quite square and featureless. He assured me that it was a common novice effort and then we got down to the business of learning the art of shaping wood.
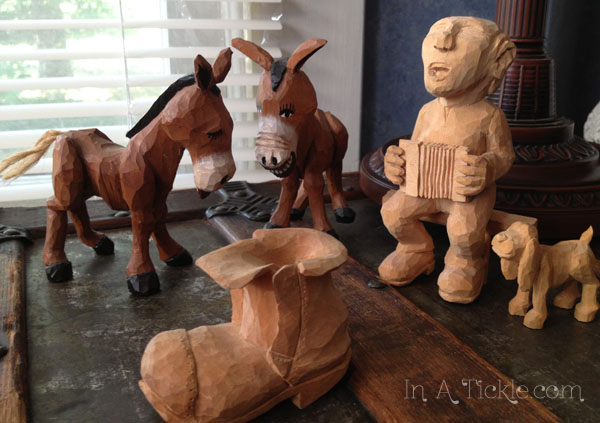
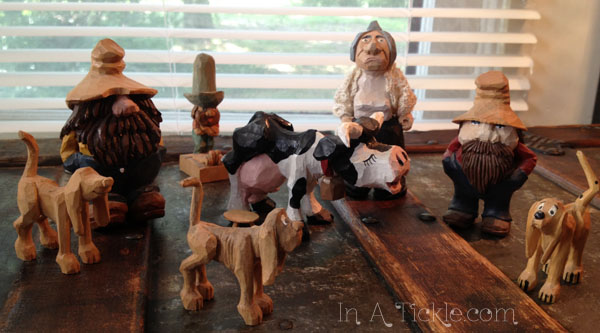
Results after a little coaching from a master carver…
 As I remembered this, the following inspiration came to mind that can encourage you in your pursuit of creativity. I think we can break down your pursuit into two categories with corresponding considerations:
The first is the old “Trial and Error” (and maybe success.) The second is “The Apprentice” or find someone who is proficient at what you want to learn and be their pupil.
To some, the act of jumping into a project with both feet and giving it the “old college try” is the red cape in front of the bull. In fact, just tell them they could never do it and watch them go. To others, they never try to venture because of a variety of reasons: fear, discouragement, lack of a starting point, need of tools, to name only a few.
I relate some of this to computer owners. Windows people tend to be manual and update readers. They usually learn as much as they can before they even plug in the thing. Mac or Apple people tend to plug and play, then learn more by doing and ask questions later. You could say “different strokes for different folks.” Millions of computers have been sold in both formats and more power to each user.
So, too, with us creative types. Some learn by doing and others do by learning. Now either way is great, but it takes a different path to reach the goal of a successful pursuit.
If you are on the front side of starting in your creative venture, consider the following three “rules of thumb” and maybe it will spur you on to less frustration and more accomplishment.
1. If you want to make a career out of it, learn from the master. The faster you learn the most efficient way to create, the faster you can begin to see your goals. The tricks of the trade are best learned by the apprentice.
If you want a hobby, dive in and learn it as you go. The hobbyist may or may not learn the tricks for efficiency, but it’s less important to them.
2. If you are easily frustrated by seeming failure or complicated procedures, learn from a master. A great teacher will do the task in front of you, then do the task with you and then let you do the task by yourself until you learn it well enough to not only do it but maybe even teach someone else.
If you even think you have a knack for the project, don’t wait another day. Just do it, as they say. (Hey, that rhymes!) If you have the skills, enjoy the thrills (ha, there it is again) and polish them as you go.
3. If you are a stickler for perfection, learn from a master.Whether you are trying to earn from your venture or can’t look at something after it’s done without noticing tiny imperfections, let someone guide your hands and give you what you need to be the best.
If you are satisfied with “E’s” for effort, don’t even hesitate to give it a try. On the other hand, I made many “pencil holders” from pottery that I tried to throw on my own. But they are nice pencil holders!
So what do you think? If you want the instruction, do the online courses, vo-tech classes, community groups are some of the other ways that you can get the instruction you need to advance your skills and knowledge.
One last story. In the early 90’s I was between jobs and was talking to a potter friend. He was needing some short term help, and I almost begged him for the job. Oddly enough, the night before I was to start work I had a dream about how to make a mug on the potter’s wheel. I saw how I was to hold my hands, how to pressure the clay into the center of the wheel and then how to form it into a mug. And, viola, the first time I tried it, it worked. The only problem was that the 8 ounces of clay was to make a 12 ounce mug. Mine was, well, a little more clunky and bottom heavy. But then the fun began, and I quickly learned to throw my own mugs.

Tom’s First Thrown Pottery Mug
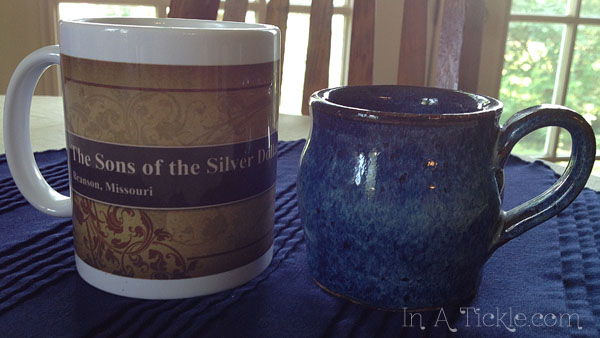
A little comparison on the mug size!
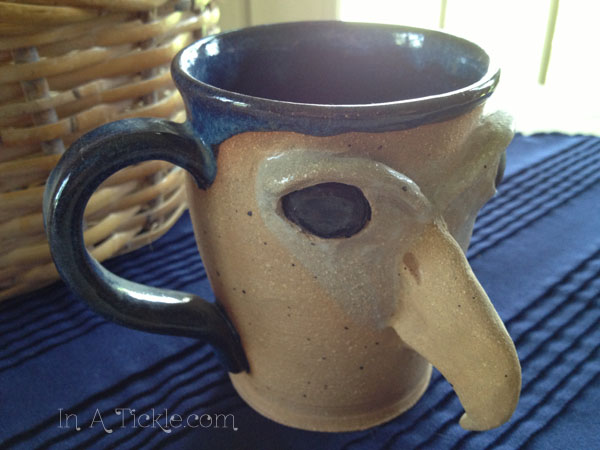
Story, part two. My skills as a carver suddenly rose to the surface. Mugs with faces! Soon, Tom’s Ugly Mugs were born. What a hoot!
Today is the last day of our special week of inspiring you to transform clothing for back to school. On Monday we showed you a shirt that was transformed with a screen printed butterfly applique from another shirt as well as some stamped flowers with fabric paint. On Tuesday and Wednesday, machine embroidered appliques were taken from shirts that were not only outgrown but badly stained, and sewn onto other shirts, one with additional lace embellishments. Thursday, we headed in a different direction and added some unique fabric flowers to a plain shirt. On Friday, we showed you a way to transform a shirt with embroidery.
Today’s transformation started with a very badly stained shirt.  It seemed a shame to throw away a shirt with such a cute design. We thought about cutting out the screen printed design at the bottom of the shirt, since it seemed to have escaped the permanent stains.
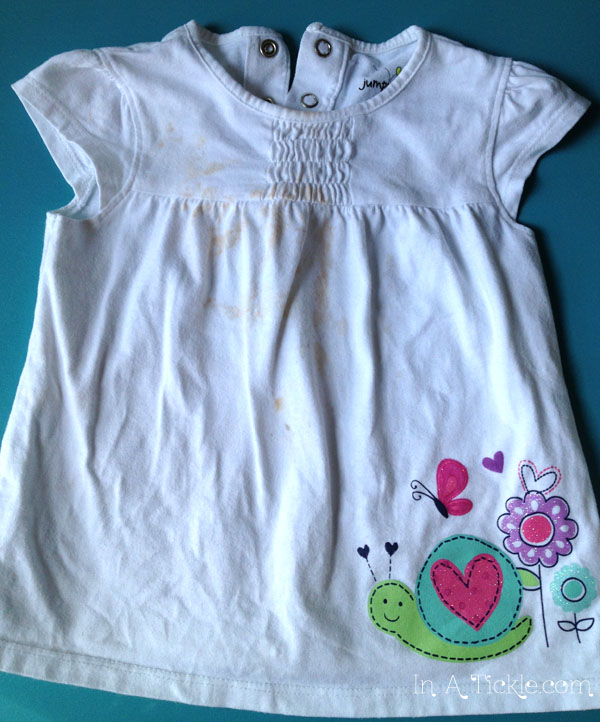 So before cutting up the shirt, I decided to play around with painting on it. I wasn’t going to paint any of the printed design at the bottom, so if it didn’t work out, we could still salvage that part. Why not give it a try? I used fabric paints and here’s what I did.
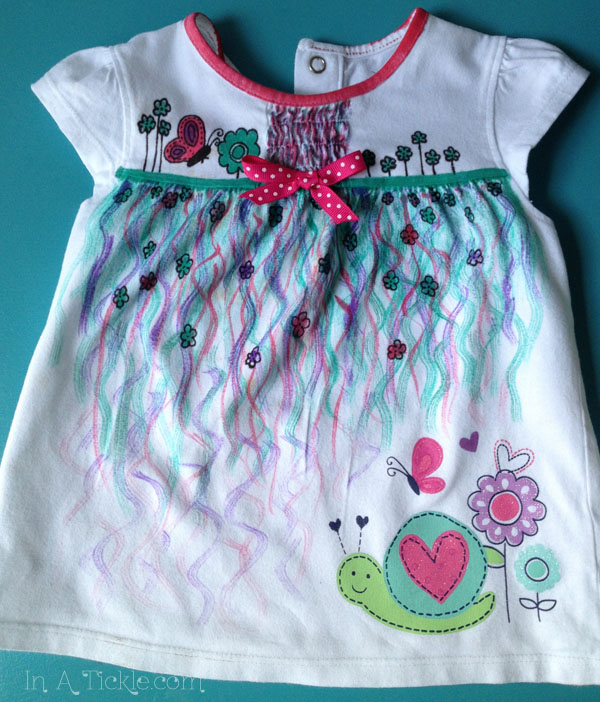 Miss Tickles likes it!
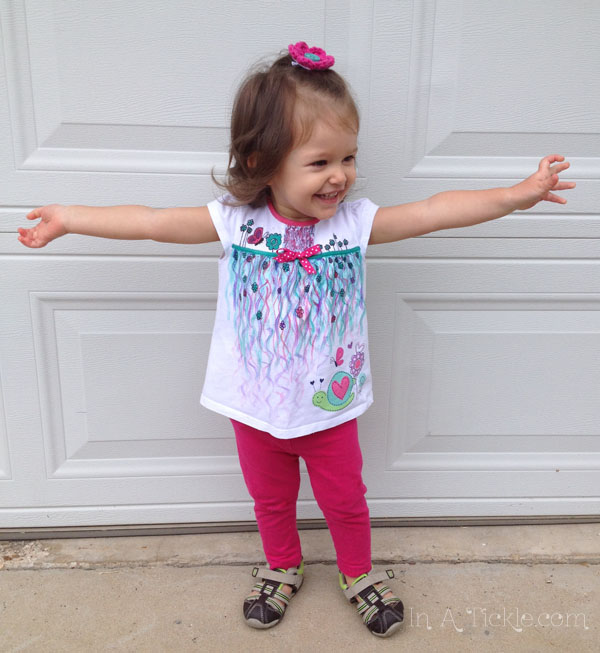
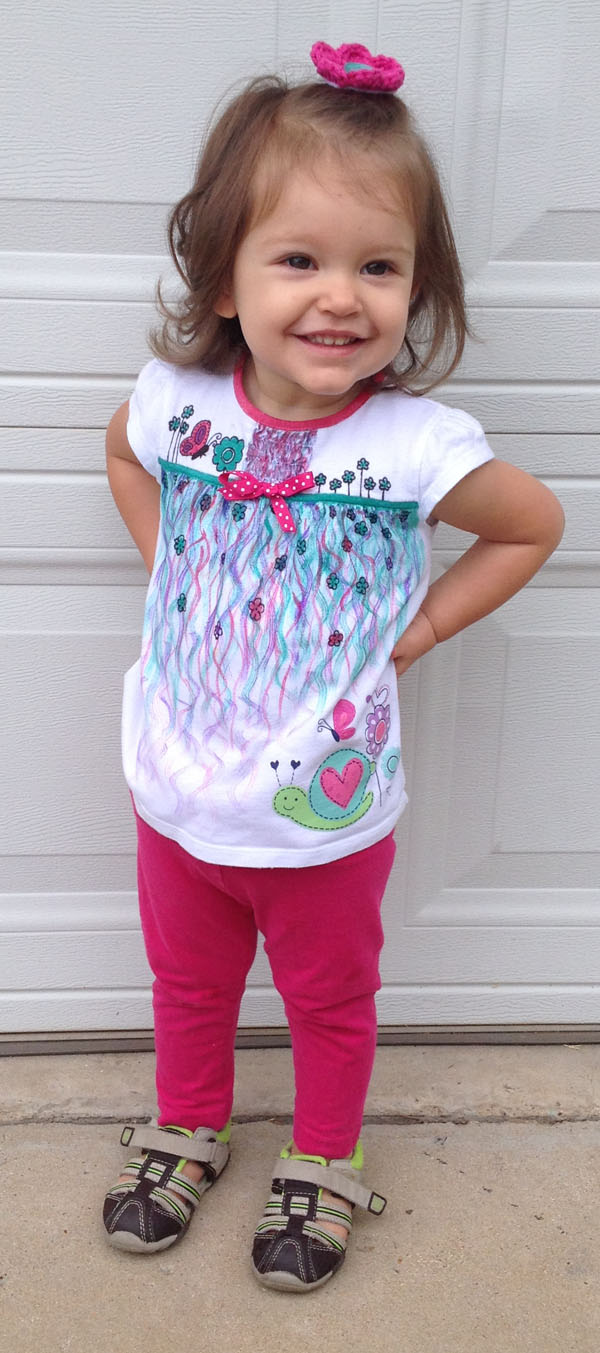 I realize that she is not ready to head back to school, but this was to give you an idea to try painting on clothing for any age. If you have a shirt that you are not sure you want to keep, let it be a canvas on which you can paint. On the one hand, so what if doesn’t turn out? You weren’t planning to keep it anyway and it gave you an opportunity to create. On the other hand, you just might be surprised with what you create and have a new transformed garment! Be brave and have fun creating!
Back to School: Transform It Today! {Part 1}
Back to School: Transform It Today! {Part 2}
Back to School: Transform It Today! {Part 3}
Back to School: Transform It Today! {Part 4}
Back to School: Transform It Today! {Part 5}
Back to School: Transform It Today! {Part 6}
Did you start a new hobby a few weeks ago when we shared with you the basics you would need to start embroidering? If so, then today you can add some embroidery to a shirt to give it a new transformation. This shirt was a hand me down for My Princess. It’s a cute shirt, but I decided to add a touch of embroidery to it.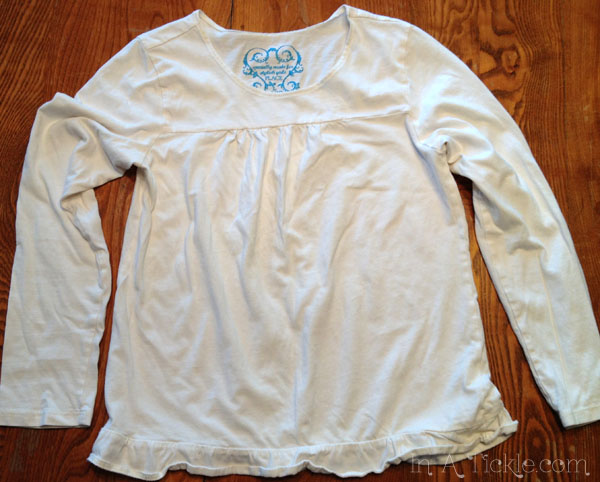 I decided on a very simple design using a lazy daisy stitch for the flowers and leaves and back stitch to form the stem. I drew my design on the shirt with a vanishing marker, put the shirt fabric into an embroidery hoop (as much as would fit) and started stitching. It did not take long at all and the shirt had a whole new look. It will look adorable with pink jeans or leggings.
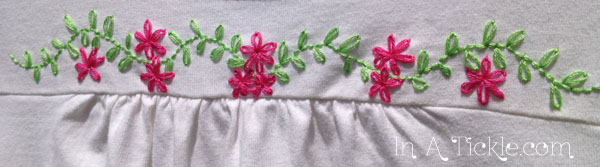
 Adding a touch of embroidery to clothing is an easy way to give the garment that extra something special that will not look like anything available in the stores. I remembered something this morning that I still have hanging in the closet. Years ago my daughters were in a production that required them to wear white dresses for a scene in which they were part of an angel choir. I made the dresses with large rounded collars. The collars seemed too plain to me and I decided to add an embroidered design. Of course, since the collars and dresses were white and the embroidery floss was white, the design could not be seen on stage, but up close it was pretty. (And I knew it was there!)
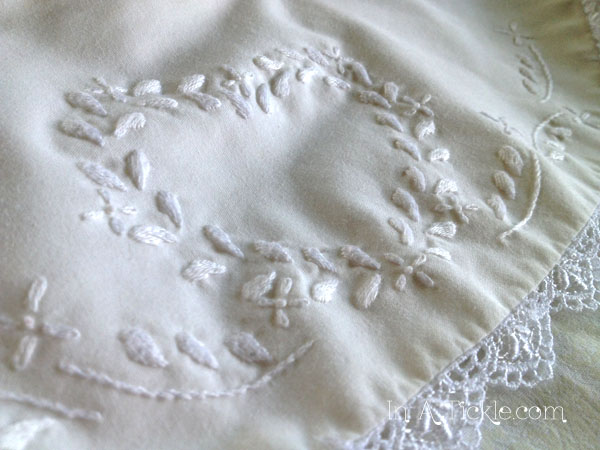
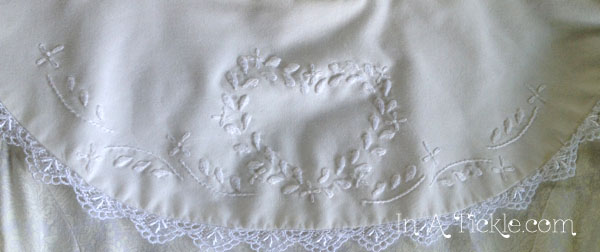
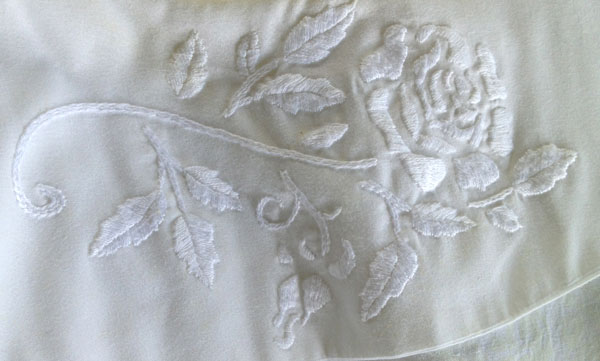 Look in the closet. What can you add a touch of embroidery to today? Try out those new skills you are learning. Be creatively courageous!
Back to School: Transform It Today! {Part 1}
Back to School: Transform It Today! {Part 2}
Back to School: Transform It Today! {Part 3}
Back to School: Transform It Today! {Part 4}
Back to School: Transform It Today! {Part 5}
Back to School: Transform It Today! {Part 6}