Cookie Cutter Gift Tags

Thoroughly Thrifty Thursday

Need a quick gift tag for a package? Look in your cupboard for your cookie cutters. Unless you bake a lot of cookies, they probably sit in the back of your cupboard hardly ever used. You can probably put them to use more often as stencils for crafting projects. A big tub of cookie cutters is also more economical than purchasing crafting stencils. Melinda got this big tub of 100 cookie cutters for $10.Cookie Cutters

You can trace the edges of the cookie cutter onto the back of scrapbook paper, cut out the shape, and then embellish the front (if you have time). Write on the tag and tape it to your present. The recipient of your gift will think you are amazingly creative!

Here are a few tags we made and added a some ribbons, buttons, beads and wood cutouts to embellish them.Cookie Cutter Gift TagsGift Tags


Special thanks to a friend (you know who you are) for this wonderful suggestion!


Word Doodles

Draw with me Wednesday

Are you a doodler?

The dictionary defines doodle as:
verb- scribble absentmindedly
noun- a rough drawing made absentmindedly

Do you find yourself scribbling absentmindedly on the agenda during a meeting at work? Do you feel guilty doodling on the edges of the bulletin during the sermon? Did your teacher accuse you of not paying attention when you were doodling around the notes you took during a lecture? Well, turns out you are doing something good for your brain! A study done in 2009 showed that the doodlers retained 29% more information than the non-doodlers. That’s good news for those who love to doodle and for those who don’t, maybe you should start.

Today, we are going to give you some encouragement to doodle with words. The inspiration came from the children’s TV program called Word World. The body’s of the characters in the program are made of the letters of what they are (dog, pig, sheep, etc.) They work on building words with new letters that end up in the shape of that new word. If you have not seen it, watch:

I made a list of “summer” words, and then chose three of them to make word doodles. Here’s what I chose:Doodle word walkWord doodle summerWord doodle rest

Now pull out your pen or pencil and paper. Choose some words from my list, or make your own list and START DOODLING!

Summer Words:
beach
summer
walk
flowers
garden
water drop
rest
relax
play
flip flop
tourist
pool
waves
splash
boat
picnic

If you still think doodling is a waste of time, just remember that a whole division at Google is dedicated to creating doodles. People do that for a job! They even have an annual contest for kids grades K-12 to create a doodle for their homepage. The winner receives a $30,000 scholarship and the child’s school also receives a huge technology grant. So if you have kids, get them doodling with you. Not only will it help them retain information better, they could potentially win a scholarship for college.

Have fun doodling!

Rocking Chair Inspiration

Transform it Tuesday

A couple weeks ago we showed you the chairs we found at a thrift store that we transformed into playroom chairs for the two older kids.

Before and After Chairs

Well, Miss Tickles felt left out. She needed a chair of her own. Melinda had been given an old wooden rocker that needed a face lift:Original Rocking Chair

It got a coating of yellow paint, but seemed too plain. So we added a little bit of scrapbook paper to make it match the  bigger chairs.

While my sisters were in town, we made a trip to Eureka Springs, AR. Lovely little town to visit if you are ever in this neck of the woods, by the way. The town is filled with quaint Victorian houses. As we rode around looking at the homes, I got a revelation for the rocking chair. On so many of the porches, the balusters were painted in multiple colors. Here’s just a sampling of what I saw:victorian balusters

I decided to paint the rocking chair in a similar fashion. If it didn’t look good, I could always paint back over it with the solid yellow paint. It’s tedious work and I decided after painting the chair, I would not want to have to paint a whole porch this way! But it turned out great. It was just the touch needed to go with the seat cushion to match the big chairs.

Rocking Chair

Miss Tickles loved it too. She had observed all the progress up until that point. After I painted the white, orange and pink sections, the first time she saw it she kept pointing to the paint and jabbering about it. I’m pretty sure she said, “This is awesome, Grandma! I love it! Where did you come up with the idea to paint it this way?” Or something like that.

Side of Rocking Chair

Keep your eyes open to possibilities every where you go. You never know what may inspire you for your next creative project.

Rocking Chair before after

Declaration of Creativity

Fireworks

The Unites States of America celebrates its birthday this week. When was the last time you read the Declaration of Independence? Probably you are most familiar with the following words:

We hold these truths to be self-evident, that all men are created equal,
that they are endowed by their Creator with certain unalienable Rights,
that among these are Life, Liberty and the pursuit of Happiness.

I encourage you to take a few minutes this week to read the Declaration of Independence and watch the following video:

Our forefathers had to make a Declaration of Independence in order to separate the colonies from British rule and birth the new nation of the United States of America. For those who signed the document, they knew it was a matter of life or death for themselves. And signing the document did not mean they were suddenly free from British rule. They still had to go through the battles to obtain their freedom as a new nation.

As we contemplate the birth of our nation this week and celebrate the freedoms we enjoy because of the sacrifice of so many, Melinda and I want to challenge you to make your own Declaration of Creativity. You were created by the Creator of the universe in His image. That means He put creativity inside of you. You were born to be creative like your Father God. But somewhere along the path of your life, that creativity may have been put down, or stifled and shoved into a box tucked away in a closet of lies. Your creativity needs to be set free!

According to Ann VosKamp, “All our lives we all need to create because creativity is the life breath of our Creator Father and if we don’t create we breathe stale air and we wither dry.”

Write your own Declaration of Creativity or print off this one that Melinda and I wrote. Decorate the edges with scraps of magazine pictures, or scrapbook papers, or doodle and color with crayons or paint around your declaration. Remember it doesn’t have to be perfect…it’s a start to the rebirthing of the creative you. Then hang it in a place where you will see it everyday and read it. There will be battles as your inner self continues to listen to the lies that say “you are not creative.” But each time you read your declaration, you will take another step in the battle to winning your freedom to be the creative person you were meant to be in every area of your life.Declaration of Creativity

Enjoy your week of 4th of July celebrations and the declaration of your creativity. Melinda and I are taking a break and will be back with you next Monday!

Cherry Apple Salad Recipe

Foody Friday

Cherry Apple Salad was a staple when it came to church potlucks and picnics as a kid. Mom would make a huge bowl of it, and it became expected at every get together. Most of it was gone the first time through the line.
The original recipe use canned cherry pie filling that made the salad bright red. Nowadays we try to use fewer canned goods especially if they have that extra sugary syrup and red dye.
Since Fourth of July is coming up, we thought we would give our old go to picnic recipe a healthier update.

Cherry Apple Salad

We used frozen Rainier Cherries. California Bing Cherries will turn out a brighter color.

Cherry Apple Salad Recipe:

1 lb cherries (fresh or frozen) 1 tsp coconut sugar (or other sugar, stevia, honey, etc)
2-3 apples chopped
1/4 cup raisins
1/2-1 cup Fresh pineapple chopped (optional)

1. Put cherries in a pot (add a little water if using fresh cherries) and add about 1 tsp sugar. On medium heat, cook until boiling, turn down and simmer until 3/4 of liquid has cooked out. It should have a syrup consistency with the cherries somewhat whole still.
2. Let the cherry syrup cool.
3. Mix cherry syrup with apples, raisins, and pineapple (if using).
4. Chill for 30 min to an hour before serving. And Enjoy!

You Don’t Need to Spend a Lot of Money to Start Making cards!

Thoroughly Thrifty Thursday

Last week I shared with you about my sisters’ visit and our card making activities. My east sister got to stay longer, and the card creating adventures have continued. We’ve been doing lots of experimenting with different methods and materials. It’s been loads of fun. But when she goes home and takes the supplies she brought, we mail back the supplies west sister left for us to play with, and we give back the Cuddle Bug embosser/die cutter that we borrowed from a friend of mom’s, Melinda and I will be left with very little card making equipment.

We realized that it can be rather overwhelming for someone who wants to make their own cards to figure out how to get started. You walk down the isles of the craft store and know you only have a few dollars to spend, but the shelves are packed with so many options you don’t know where to start– even if you knew what half that stuff was! So we decided to simplify it for you. You don’t need a lot to start.

Basic supplies that would help you start making cards:
• Pair of small sharp scissors
• Paper*- white card stock and a few pieces of colored card stock
• Adhesive- glue stick, or refillable double-sided tape dispenser
• Small cutting board- makes cutting straight lines so much easier
• Basic Stamps and ink pad- Happy Birthday, Thank You, Thinking of You, and Congratulations stamps are good ones to start with. Look for stamps sets or stamps in the bargain bins at the craft store.
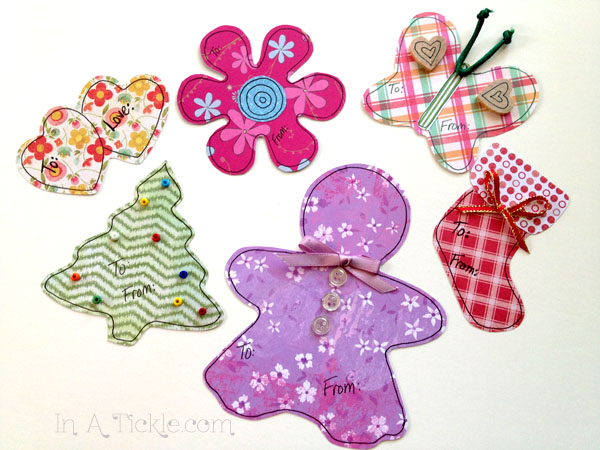
• Embellishments- buttons, ribbons, silk flowers- many items you can find already in your home if you have done any kind of crafting.
• Invitation size envelopes for your cards

*Standard card size is 5 1/2 x 4 1/4in (basically, cut a 8 1/2 x 11in paper on the 11in side so that each half is 5 1/2 inches tall, and when you fold the card, the width will be 4 1/4).

Keep your eyes open for bargain bin items and be sure to use coupons for some of the higher priced items as you add to your supplies. With just a few simple items, you can let your creativity go to work making cards for your loved ones and friends. If you need inspiration, just type in “card making ideas” online, and you will find more ideas than you could ever begin to make. Because there are so many to look at, just spend a few minutes to get your creative juices flowing then step away from the computer and start creating!

To show you that you really don’t need any special equipment or supplies to make cards, besides what you probably already have at your house, I gave my sister and Melinda a challenge to each create a card using the following simple items: brown grocery bag, glue, pen, white copy paper, a magazine.

(Melinda’s college roommate used to give cards like this all the time using construction paper and stuff cut out of magazines. She had a shoebox filled with magazine cut outs. Anytime she got a magazine she would cut out words and phrases or pictures that she liked and save them for card making).

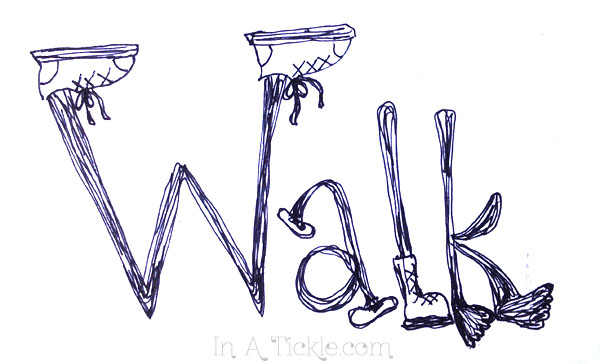
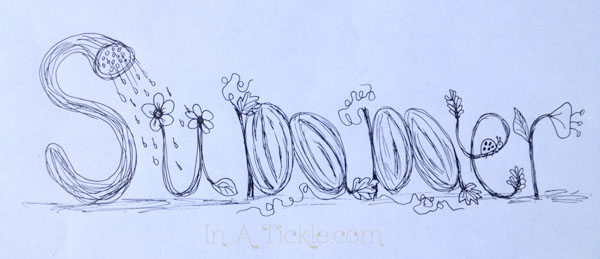
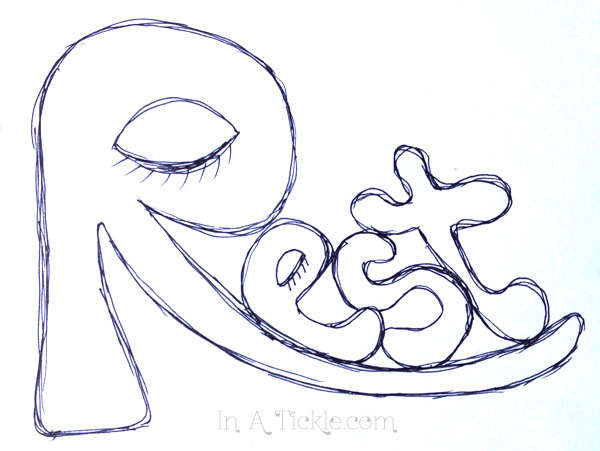
Here is what they came up with:Card front 1Card Inside 1Card 2

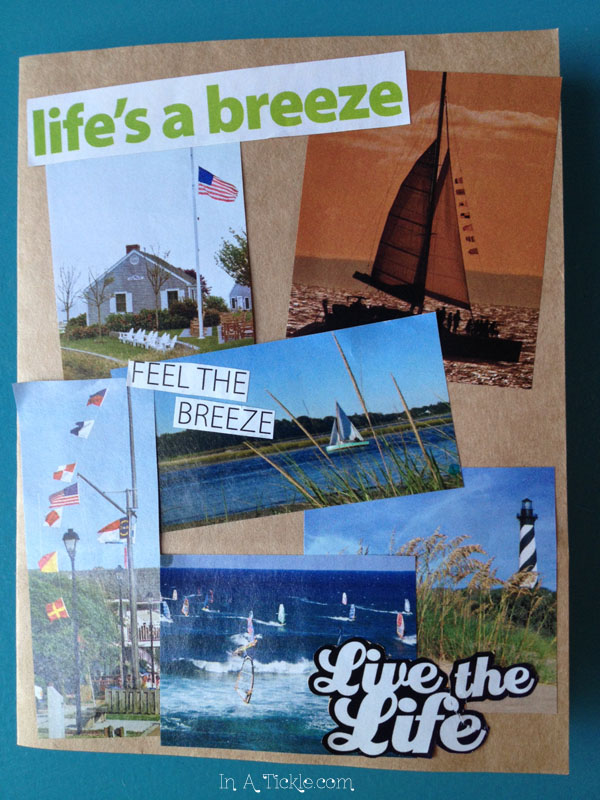
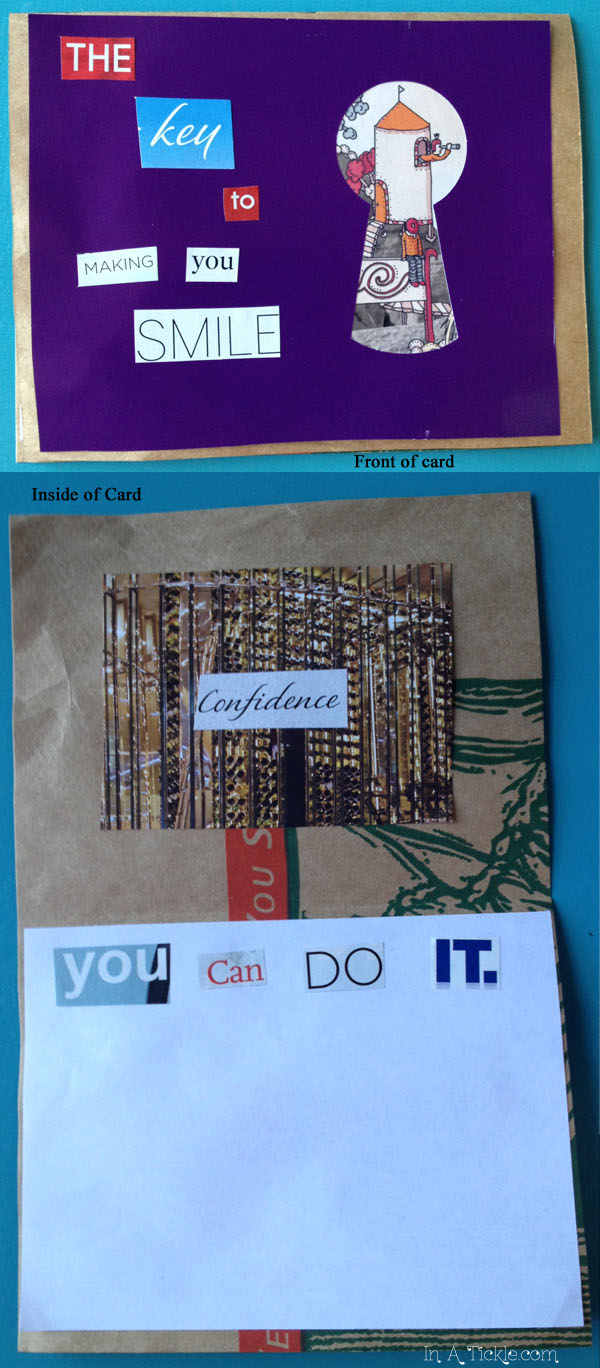
The cards may not be fancy, but they definitely are creative and one of a kind. And they did not require a lot of fancy, expensive equipment, just some time and a little love!

Kid Snippets: Watch With Me Wednesday

Watch With Me Wednesday

I don’t often look up things on YouTube. Usually someone has to show me something and then I get hooked on a certain channel. I was introduced to one the other day and laughed harder than I have in a while. My hubby and I started watching a few, and I said we would watch only one more. About ten videos later, we finally put the ipad away to go to bed.

Kid Snippets on the Bored Shorts TV channel are some of the most creative YouTube videos I have seen. They are scenes imagined by kids and acted out by adults with the kid voices playing over it. The kids are hilarious, and I imagine my kids saying some of the sames things they say. The acting by the adults is above par!

Check it out! Good luck making yourself stop.

New Chairs for Playroom

Transform it Tuesday

In May, Melinda, her sister and I were checking out the thrift stores for treasures. We found two chairs that were begging to be transformed into new chairs for Melinda’s garage/playroom transformation. thrift store chairsThey were sturdy, well built chairs that looked a little dull. New seat covers would have done wonders, but we had something more creative in mind. It took a while to get started on them. But once we did, the kids were excited to help transform their chairs. The girls jumped in to help clean the wood.girls cleaning chairs

My Princess eagerly helped me put on the first base coat of paint. And then I painted the legs and lower part with several coats of yellow paint.painting chairs

Then it was time to take the old seat covers off. It was hard work pulling out the staples, but the kids had fun using the tools like big people!

kids taking seats apart

Melinda and I chose scrapbook paper that coordinated with the colors for the new playroom and cut an assortment of shapes and sizes. We papered the front and backs of the chairs and the sides of the seats in a patchwork design using mod podge to stick the paper to the wood.papering chairspapered chairsWhen the paper dried, I sealed it with several coats of clear acrylic finish. Last step was recovering the seats. we used the old cover to make a pattern for the new fabric and then surged the edges of the covers to keep them from raveling. We assumed we could use the staple gun to attach the fabric to the seat board, but it was made from solid oak and the staples we had were too thick to go into the wood easily. Not having the right equipment (as in upholstery tools), we decided to try using thumbtacks, which worked quite nicely. covering seat

And here is the finished product. They will look great in the new playroom!

New Chairssides and  back of chairs

In case you are new to our blog, you can read about the garage and new playroom here and here. It is getting closer to being finished and we can’t wait to show you the pictures of the final project (because that means it will be done.) In the meantime, we will keep showing you sneak peaks!Before  and After Chairs


Identify This: The Thing

Real Me Monday

We went to the small playground in my grandma’s neighborhood the other day to play. While we were there, I discovered three strange looking things on the ground. I unfortunately didn’t have a stick handy to poke at it with, but I looked as closely as I could. Of course, I had to take some pictures too. I couldn’t figure out what it could be.

thing

I sent the pictures to my mom and dad to see if they could identify The Thing, and they had no idea.

Thing 3

I tried googling and that didn’t help any either.

Thing 2

Though I didn’t touch it, just by looking it seemed to be dry except for the sap like looking spots and the sticky looking junk underneath. The largest one was about six inches, and each one was several feet away from each other. There was no odor from a standing position (I didn’t lean down far enough to get close to smell it).

My thought was some kind of insect nest? There were a lot of damselflies flying around there, but googling didn’t help shed any light on whether that could be true or not.

Anybody know what it could be?


UPDATE:

Guess what! I know what it is now. Thanks, Kasey for finding the answer. Science lesson coming your way. . .

It’s Dog Vomit Slime Mold, otherwise known as Fuligo Septica. It’s actually a fungus and is completely harmless. It’s often found in mulch playgrounds and gardens. Read more about it! Instead of being grossed out now I am fascinated.