Save a Sweater–Shave a Sweater: Thoroughly Thrifty Thursday

Thoroughly Thrifty ThursdaySpring seems as if it has finally come to our neck of the woods! Every time I thought about putting away the coats and sweaters, the temperature would drop back down to the 30’s. My 10 day forecast says it will be in the 70-80″s and not get below 50 degrees. Let’s hope it sticks! So with that in mind, I think it’s finally time to pack up the winter clothes. If you are in a location that is heading to spring, you might be thinking about packing those coats, scarves, and sweaters away too. As you check through your clothes to see what will still be nice for next winter, don’t be too quick to toss out those pilled sweaters.

The other day, I had a shrug that looked like it would not be redeemed. It had gotten washed with a napkin and there was little white specks and pilled spots all over. I remembered the sweater shaver I had tucked away in a drawer in my desk. It worked so well, it got me thinking about my other sweaters and some of the sweaters we picked up at thrift stores.Purple sweater 1Purple sweater 2Purple wool sweaterBird sweaterBird Sweater

Sweater Shavers can cost anywhere between $6-$25, which can save you a lot of money if can save a sweater and not have to buy new ones next year. Also, if you are wanting to sell some of those sweaters because they don’t fit or aren’t your style anymore, you might be able to get more out of them if they look less worn.

Do you have any tips for packing away your winter clothing? Share them in the comments below.

Repeating Pattern Design: Draw With Me Wednesday

Draw with me Wednesday

Have you ever wondered how they make the designs on fabric and wallpaper so they match up perfectly? How do the artists know how much to draw on each edge so they do match? I wondered too, so I searched to find out. This post on Design Sponge shows how to do it the old fashioned way- you know, the way they had to do it before computers and photoshop. I have made repeating tiles in photoshop, using the offset filter, to use as background on web pages, but after doing it by hand, it all makes more sense to me!

Pull out your pencil and paper and give it a try! Who knows, you might have so much fun you’ll want to find out more about the surface pattern design industry. That might just be the creative outlet you’ve been looking for. After all, someone has to design all those fabrics, wallpapers, scrapbooking papers, and stationery, why not you? If you want to know more about that industry, check out the courses offered by Do What You Love.

To begin with, I drew a design of a butterfly and circles on a piece of paper. In order to make this work right, you cannot draw to the edges of the paper. You can come close, just don’t draw to the very edge!Butterfly and circles designWhen I felt I had drawn enough design, I cut the paper exactly in half length-wise.Pattern 2

I placed the papers with the undrawn edges together, flipped them over and carefully taped the pieces together, so it looked like this:Pattern 3

Seems crazy doesn’t it? But the next step is going to seem even more so! I cut the paper in half width-wise in the middle:Pattern 4

Again, I put the undrawn top and bottom edges together, flipped it over and taped them together.Pattern 5

You are probably wondering how this is ever going to turn into a repeating design. Trust me, it worked! Now, with all the white space in the middle, I decided to add more circles and some straight and diagonal lines. The extra I am adding in still could not touch any outside edge!Pattern 6

Now my repeating pattern is finished! I know, it looks rather strange. So to check it out, I scanned it into my computer and printed out 4 copies of it. My printer does not print all the way to the egde, so I had to scan it and print it slightly smaller to get the whole design. It would have been better if I had started with a smaller piece of paper when I began my design. So, after trimming off the unprinted edges, I taped the 4 papers together and it worked! I have a repeating design!

Butterflies and Circle repeating Pattern Design

The scanner picked up the lines where I taped the pieces together and didn’t pick up all of my pencil drawn lines!

That was so much fun, I want to try more designs! How about you? Start with something very simple, like geometric shapes, and see how it turns out.

What to Do with Stained Shirts: Transform it Tuesday

Transform it Tuesday


When I was a young girl, I became a part of an exclusive club that my aunt created. It was the Spillers Club. I was constantly spilling on me and the things around me, and so I was dubbed “a spiller.” It was embarrassing, but thanks to my aunt, she helped me feel more normal, and I knew I wasn’t alone. She helped make it into something to celebrate instead of get embarrassed about.Spiller's Mug

It just so happens that we have added to the number in the spillers club, My Princess has joined the ranks. She is a star member for sure! Ever since she was a baby, she has been good at spilling her food, drinks, art supplies, etc. Because of this, I almost never buy anything white for her clothing. Every new shirt she gets quickly blends in with the rest of her shirts as being quite used.

This can be frustrating as clothing gets passed down to Miss Tickles. What do you do with stained shirts? How many getting muddy, play shirts does a kid need?

Stained Shirt

It’s hard to tell in the picture but there are small light brown spots all over the front of the shirt

There is a particular brand of shirt that I love for my girls. They are soft and stretchy, making them cozy and easy to put on. This pink shirt that once belonged to My Princess, is one of those kinds of shirts. I wanted to be able to pass it down to Miss Tickles, but I was bummed about the stains.

I was inspired by a sweatshirt that my grandma had on when she came over one day. She said she had gotten bleach stains on it so she used some cute butterfly fabric to cover them up. I had my “aha!” moment then.

Transformed cardigan sweater

The shirt on the right was a nice sweatshirt she got at a thrift store that the decoration was coming off on the front. She used the beautiful embroidery work from an old denim skirt she had in order to transform the front

Those little stains all over the shirt just needed to be covered! So I used some heat and bond to attach some flower cut outs from a cute fabric I had on hand. I used different stitches on each flower to attach them more securely onto the shirt and give them their own unique look.Transformed Shirt

Of course, the shirt needed something to match. My mother-in-law had bought a pair of shorts that were a little too short for Miss Tickles cloth diaper bum, but the sparkly button was so cute on them that I wanted to figure out a way to still use them.Jeans Shorts

I cut off the cute little ruffle and rolled them up, sewed the bottom, and made them into flowers for some kind of hair thing.Removing Ruffle on shortsJean Ruffled Flowers

I made a ruffle using the same fabric that I used for the shirt and attached it to the bottom of what was the shorts to make a skirt. Then to finish it off, I made a headband with the jean ruffle flowers I started with!Finished Transformed Shirt and Jean Skirt and Headband


Miss Tickles in her new outfit

Unfortunately, she hates the headband and immediately took it off after taking pictures. Oh well.

Stained shirts don’t have to just be play shirts if you can cover them up with some cute fabric. Now she has a cute little church outfit that looks good as new!

The Birthday Breakfast Club: Real Me Monday

Real Me Monday


Today, we are happy to have Jan’s husband, Tom Johnson, share a guest post. He is a wonderful husband, dad, accomplished entertainer, actor, singer, and musician, all around fix-it guy, remodeler, furniture builder, biker, and most of all–his grandkids adore him! You can find out more about the group he performs with here.

My wife and daughter have been running this great website, In A Tickle, for a while now and some of the insights they’ve shared could be life changing. I pondered the idea of being a guest article writer but wasn’t sure what I could share that could make a difference in people’s lives. Then it hit me. Almost 30 years ago, I launched something that has been a favorite family tradition. Having stood the test of time through two generations, I want to encourage Dads with this.

As working men, we don’t get to spend as much time as we want with our children. Therefore, the time we spend needs to be quality and focused. And when we do, it pays dividends. Now your investment may not be realized immediately but, believe me, just like financial investments, you will reap incredible benefits later on down the road.

My particular investment has been and continues to be this–I take each of the kids out to eat on their birthday, just the two of us. It began with our oldest offspring when he turned three. There was a restaurant where we were living at the time called Pinocchio’s. It was a sit down style, full menu place that had cartoon characters painted all around the eating area. Son-O-Mine sat in a booster chair, I sat next to him, and we had breakfast together. It wasn’t as much of a disaster as I thought it could have been, though the clean up was mildly intensive. I cut up his pancake but let him shovel it in. He drank his juice through a straw and the fruit was hand delivered to his mouth. No one was injured in the process and we returned home happy and well fed.

Well, the tradition was birthed. Two daughters later, we all looked forward to Birthday Breakfast with Daddy. As they grew older, the breakfast turned into Birthday Lunch as our lifestyle became less early morning, and eventually, it turned into Dinner with Dad. One time I asked one of the kids if they wanted to take Mom with us. In no uncertain terms, I was reminded that this was Birthday Dinner with Dad. She could come any other time, but this was sacred.

As our kids have now scattered across the country pursuing their life dreams, I seldom get a chance to get together with them on their birthday. We get together when we can and enjoy our time together as much as we can.

HOWEVER! Breakfast with Dad has bridged to the next generation and has now become Breakfast with Pa. Now when I was a tike up in northern Wisconsin, we always referred to our grandparents using their last name. Grandpa and Grandma Droslum or Grandma and Grandpa Johnson. Down here it’s Papaw, Memaw, Nana, Big Daddy or Pawpaw. Ok, I succumbed to the nomenclature shift and decided it would be easiest for the grandkids to just call me “Pa.” Thus, Breakfast with Pa!

Pa and Ninja Boy

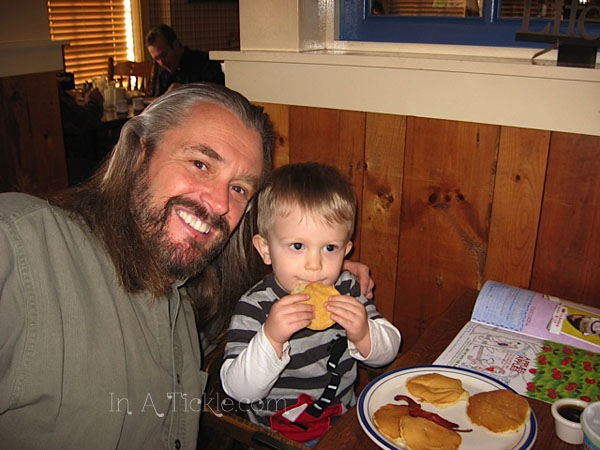
Ninja Boy’s First Birthday Breakfast with Pa

So, now I get to take my grandkids out on their birthday. It also helped that our first grandchild, Ninja Boy, was born on my birthday. But My Princess and I have had a blast, too.

Birthday Breakfast

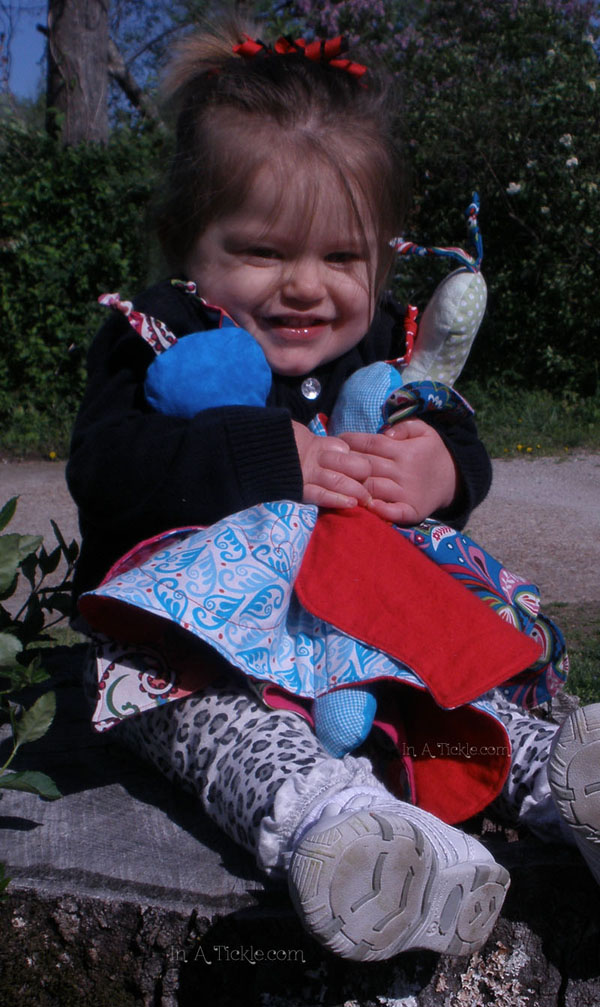
My Princess & Pa Birthday Breakfast

WORD OF CAUTION: Check out the place where you want to take your birthday celebrator. My Princess and I went to a local chain restaurant (that will remain nameless) and walked away $26 poorer with minimal culinary satisfaction. She wanted a waffle. Little did I know that they charged almost $7 for one! And the three year old only ate half of it!Birthday Breakfast with Pa

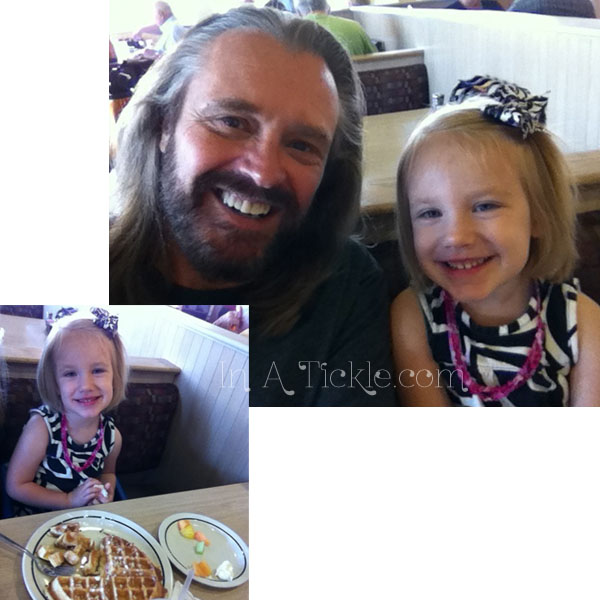
Ninja Boy and I have found our favorite place in Branson because they serve huge pancakes for the price and they also serve some major BACON! Ninja Boy Bacon

And, of course, make sure that the waitress knows you are celebrating their birthday, and, if she is any good at all, she will make sure the birthday child will feel like royalty.Ninja Boy Birthday Breakfast

My final encouragement is: Take pictures! Not only can you brag to anyone who will listen of your brilliant idea, but the memories that you capture can be relived with your children and grandchildren as the years race by. You will never regret the time you took to create these special memories.

~Tom

Note from Melinda: this tradition has been a very special thing in my life. In fact, I am 27 years old, and since I live close to Dad, when my birthday comes around, I ask when we are going out. Three kids later, I’ve taken babies along with me to birthday dates or left them at home with my Hubby. I plan to keep it up as long as he’ll let me.
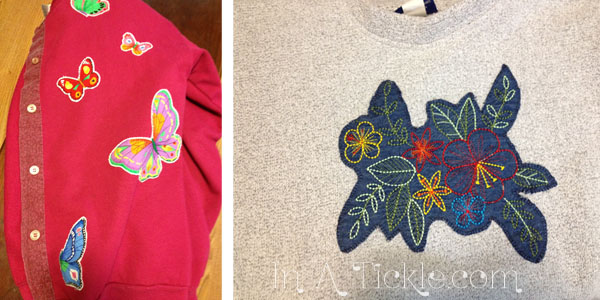
 

Jan’s 5 Favorite Inspiring Blogs: Weekend Wonderings

Weekend Wonderings

Tulips in Central Park

Since tomorrow is Mother’s Day and my kids who live far away sent me a tulip bouquet, in honor of them, I am posting a picture I took in Central Park one spring. Flowers are always inspiring to me!

I used to have a long list of blogs that I tried to keep up with daily in my RSS reader, but a few months ago, eliminated most of them from the list. Many of the ones I decided to stop following regularly of were business type blogs related to the job I had. Now I am trying to find and focus on blogs that inspire creativity, mental growth, and spiritual growth. Here are some that I like:

1. Kelly Rae Roberts– I first became interested in Kelly a couple of years ago because we carried some of her products in the store I managed. I decided to look her up online to find out more about her. Not long after making the change to pursue her heart and launch a creative business, she started seeing success. I decided to purchase her e-course, Flying Lessons, a few months ago, when my heart was longing to pursue creativity as a business. Her blog is filled with lots of fun inspiration as she shares not only her business adventures, but her life and family and heart with her readers.

2. Seth Godin- His blog is filled with posts to make you think- about marketing, about how ideas spread, about business ideas, about education. I also enjoy listening to his speeches and interviews, which can be found on You Tube.

3. Ann Voskamp- Ann is the author of the bestselling book, One Thousand Gifts: A Dare to Live Fully Right Where You Are, which focuses on her experiences of learning to be grateful in every little detail of her life. Her blog is a continuation of that theme. A quote I like from her book: “When we lay the soil of our hard lives open to the rain of grace and let joy penetrate our cracked and dry places, let joy soak into our broken skin and deep crevices, life grows. How can this not be the best thing for the world? For us?”  

4. How About Orange– This is a blog I just came across this week and think I will follow it a while and see where it leads. The author, Jessica Jones, is a graphic designer who loves crafts and all things creative. I found this in her FAQ, and it resonates with my heart:  “Everybody has creativity inside somewhere, and it’s gratifying to help people tap into it—especially if they don’t consider themselves artistic or creative. So I try to post simple projects that anyone could do, as well as useful tips or inspiring ideas or things that are delightful. Pretty much anything that’s fun.”

5. Design Sponge- This blog has a little bit of everything on it, from decorating living & working spaces, to places to visit, to transformations of furniture, rooms, floors, and so on, to DIY projects and entertaining. It’s a great place to wander through if you are looking for ideas and inspiration.

6. Just because the title says Jan’s 5 Favorite Inspiring Blogs, doesn’t mean I have to stick with that! So here are 3 more places to get inspired. They really are not blogs, but everyday you can get loads of information from them.

Pinterest- If you have not yet explored Pinterest, jump over there right now and take a peak. It is filled with images on about every topic. Each image links to a website with further information about that picture/topic. When I first started using Pinterest, I felt like I was thumbing through the pages of a magazine to get inspiration. If something caught my eye, I could read further. In A Tickle is now on Pinterest, so check it out!

TEDtalks- TED is an acronym for Technology, Entertainment and Design which started in 1984 as a non-profit devoted to Ideas Worth Spreading. On this site, you can find hundreds of videos of speeches on various topics. It’s a free site and you don’t have to join to listen. We posted a video by one of the favorite TED speakers, Sir Ken Robinson, on this post.

Houzz- If you like redecorating, remodeling, or just dreaming about new home ideas, this site will give you loads of inspiration. You will also find how-tos and gardening advice. I have always loved taking tours of houses and this is a way of doing it as often as you want, virtually (without having to pretend like you are in the market to buy a new house!)

What are some of your favorite blogs for inspiration?

Beef is NOT What’s for Dinner: Foodie Friday

Foody FridaySteak

Today, we are featuring a guest post from Melinda’s hubby, K Michael prince. He is not only good looking, but he is a great cook too. Hope you enjoy his take on food today. You can read more from him at kmichaelprince.com

I’m from Texas! No I didn’t live there for a few months and so I now root for the Dallas Cowboys and carry a gun. I was straight up born in Texas. I’m proud of that. So proud, in fact, that even though I’ve lived in the state of Missouri for over half my life (longer than I ever lived in Texas) I still proudly proclaim that I was born in Texas. If they gave out cards I’d even be a card carrying Texan. That said, I must confess that I have some concerns that the following post will jeopardize my status as a lone star state citizen. It’s confession time y’all! I no longer require meat with every meal.

OK, I’ve given any Texans reading this adequate time to get off the floor and complete their rant. It’s true that growing up meat and potatoes were the staples of every meal. When we’d ask what was for dinner there was no list it was simply one of three simple answers, chicken, pork, or beef. There would always be potatoes and every third or fourth meal there’d be a green of some kind. (Usually boiled all to you know where.) I had no problem with this. I still don’t really. I enjoy a meal with meat and potatoes. In fact, when I cook, that’s often what we have. I have learned, however, that the way I have been trained to eat is completely backwards to the way our bodies were designed to take in nutrients. I’m by no means an expert, anything I know I’ve learned from reading online, being preached at by my wife (Melinda) and watching documentaries on Netflix. (I’ll list those at the end of this post.) Even though I’m not a health food expert, I am someone who has been converted to a new way of life. Let me tell you why.

First of all, meat is expensive. It’s especially expensive for me. I have an allergy to the crap they put in most of our food. I can’t eat chicken that’s been pumped full of hormones, antibiotics, or what the heck ever else they put inside those poor things. I can’t eat veggies that have been sprayed with every insecticide known to man. I have to eat organic. Eating organic is expensive. Especially if you require a huge hunk of meat with every meal. I have learned that saving a few bucks by making meat a side instead of the feature of your meal is really helpful when I want to go play a round of golf or buy a new iPad app.

I’ve also learned some truth about the way our bodies digest food and obtain nutrients. I’ve learned that protein is one of the most readily available nutrients in most foods and that meat is often the least efficient way to take in protein. The astonishing thing is that eating too much protein is not healthy and, in fact, can even cause degenerative diseases. So contrary to what those who sell us our meat would have us think, we don’t need as much meat as we’ve been sold.

Lastly I have realized the joy of enjoying something because it’s a treat instead of not realizing the privileged it is because of how often you get it. I don’t eat a so so steak anymore. No way man, when I get a stake, it’s a special occasion. I buy the nicest looking piece of meat I can find, I season it with the best ingredients and cook it to a medium rare perfection. It’s a work of art. It’s no longer what’s for dinner. It’s a freakin’ experience man. When I fry some chicken to make chicken strips, the kid’s are so excited and awed that the angels sing. It’s like I won the super bowl. Chicken strip day makes Daddy the man. Quality has replaced quantity in our home and the benefits are astounding.

No. I’m not a vegetarian. I am not an animal activist. I promise I haven’t joined a cult or a fad and I’m most definitely on some kind of weird diet. I’m becoming educated and letting what I’ve learned change the way I behave. It’s a novel concept not valued highly in our society. I hope that can change. I’ve already said I’m no expert but I sure have heard and read a bunch of them. They are out there. While I don’t expect what I’ve written here to inspire you to change everything immediately. I do hope that you’ll look in to what some of these experts are saying. Do some research. Educate yourself and then act on what you’ll find. It’ll lead to better health financially and physically and a better life. If this meat and potatoes Texan can do it. You can do it.

Now those Netflix documentaries I promised you…

TEDTalks: Chew on This – An entire series of TED Talks centered around food. Some are mostly environmental and not so good in my opinion but a few really made me think. Try “Why I’m a Weekday Vegetarian.”

Food Matters – All about the food we eat and what it does to our health.

Ingredients – This is a great documentary about what goes into the food we eat and how eating locally can change the world.

Food Inc. – A crazy romp (that’s what they say in movie previews so…) through the food industry and how our food is treated on the way to our supermarkets.

Also, check out my post today over at KMichaelPrince.com.

Homemade Graduation Cards: Thoroughly Thrifty Thursday

Thoroughly Thrifty Thursday

“The man who will use his skill and constructive imagination to see how much he can give for a dollar, instead of how little he can give for a dollar, is bound to succeed.” -Henry Ford

I looked through some graduation quotes while I was getting ready for this post. At first, I was looking for a cheesy and cliché graduation quote for fun. Then I came across this one, and I liked it. What a great reminder to work at what we do and not cut corners. As we try to be thrifty, we also have to remember to think about the quality for every dollar we spend. Not just buying cheap for the sake of spending less, but getting the best for a good price. Is what I am buying worth the cost?

Anyway, the point of this post is about helping keep graduation cost down.
This is the last week of school for the kids in my youth group, and we have nine this year that are graduating. Friday night is the graduation, and the parties are all day Saturday. I want to be nice and give them unique and meaningful cards, but the really cool looking ones can cost $3-4 each. I could go out and buy a box of 12 for the same price, but then I run the risk of being one of a dozen of that same card because everyone had the same idea. Plus, those cards aren’t always awesome. They usually have those cliché quotes in them that I was talking about.

So here’s my solution. I made some cards out of some of the supplies I already had on hand. Since I already had the supplies, all it cost me was a little time.

I started out by drawing a graduation cap on a piece of paper, then cut it out for my pattern. You could just as easily print one off from online and use that as a pattern too. Then I cut out the hat from felt and freehand cut out a tassel.

Card1

I used hot glue because that was all I had handy and attached the piece onto some cardstock that I cut to be the size of a card.


Card2


Then using a black scrapbooking pen I wrote on the card…and then realized after all that, I added an “s” to graduation. “Congratulations on your graduations.” Unfortunately, I don’t know anyone who is having multiple graduations at this time.

Card3I didn’t want my hard work to be for nothing, so I just cut out around the hat and glued it to another piece of paper!

Card4


This time I paid attention better to what I was writing. I wrote a Bible verse on the inside. It might be a cliché verse for graduation, but I don’t know if there is such a thing as an overused verse. It’s appropriate for the occasion so I went with it.

Card5


It can be fancy or simple like this one, but you can save a lot of money making your own cards instead of buying them from the store. Also, you can write whatever you want in them and don’t have to stand there and decide which one says exactly what you want to say. Plus, your card will stand out from the others because it has a special handmade touch that shows that you care.

You can use whatever materials you have on hand: felt, paper, fabric, buttons, ribbons, etc. Your favorite graduate will appreciate it! And if you were already planning to buy a card and aren’t concerned about saving money, make a card anyway and put the $3-4 you would have spent in the card instead. Your grad will thank you for it!

(Don’t forget! This can be great for birthdays, weddings, anniversaries etc. too!)

Update: Check out this post for more graduation card ideas.


What’s the Story?: Write With Me Wednesday

Write with me WednesdayFlowers on PathThe other day, we were on a family walk on the path by the visitor center at the lake. At the beginning (or end depending on where you start) of the trail, we saw this pile of picked wildflowers laying on the asphalt path. My first thought was, what’s the story? How did those flowers come to be discarded in the middle of the path? The rest of the way was completely clear coming and going, except this one pile of lost foliage. It was obviously dropped there by a person on the trail, but why? Use your imagination and dream up a story about these abandoned wildflowers and how they came to be castoff on this lakeside path.Flowers on Path


New Look for Old Frames: Transform it Tuesday

Transform it Tuesday


Not too long ago I saw this pin on Pinterest and thought it would be a fun idea for our craft room:Weekday Calendar Memo FramesMelinda and I needed some place to jot down ideas we had for future posts. Now I know that the simple way to do it would be to write the ideas in a notebook or a document on the computer. But being the visual people that we are, we wanted something pretty to look at that would also hold our ideas for us. (I also like post-it-notes, but that just doesn’t look as nice on the wall!)

So, I gathered up some frames that were sitting in a box waiting for a LONG time to be put to use. The reason they were in a box is that they were scratched and banged up and I was not motivated to use them like that.Pile of frames

At first I thought I would just paint them all the same color, but decided they each needed a different look. So the first frame got to be covered in fabric scraps. I used random size pieces of fabric, covered the back side with mod-podge and stuck them to the frame. After I had the fabric stuck where I wanted it, I trimmed off the ends that stuck out. It was easier to do it after they were in place than trying to cut it to fit exactly before putting the mod-podge on the fabric. When the frame was dry, I put another coat of mod-podge over the top of the fabric to protect it. I cut a piece of scrapbook paper that went well with the frame to put behind the glass.Blue frame covered in fabric

Blue Frame

I was really happy with the way it turned out and then broke the glass trying to put it all together. Wouldn’t you know it, this frame is an odd size and I will probably have to get glass cut for it!

The next frame had a small groved edge around the center that I painted orange. Then using coordinating pieces of scrapbook paper, I tore pieces to put around the edge, giving the frame a patchwork look. Again, I put mod-podge on the back side of the paper before sticking them to the frame. A toothpick helped to push the paper into the groove. Again, after the paper was dried, I put a coat of mod-podge over the whole frame to protect it. The paper behind the glass already had the design shown printed on it (but it would be cute to cut and paste and layer a design like that!)

Orange patchwork frameOrange patchwork  frame

The next frame had way too many grooves to try putting paper or fabric on the front, so I painted it in two shades of turquoise instead. But it did have flat sides to the frame, so strips of paper cut from the same paper behind the glass, were mod-podged to the sides.

Turquoise Frame

Turquoise FrameThe next two frames got a lace treatment after painting.

Red frame with lace

The mod-podge looks white until it dries completely. Then the strips of lace fabric show through very nicely!

Red frame

Sponge painted frame with lace

The frame was sponge painted with colors similar to the scrapbook paper I planned to put behind the glass. When dry, lace trim was glued to the frame with fabric glue. Then when dry, the frame and lace got covered with a layer of mod-podge.

Sponge painted  frame with lace trim

This next frame was very similar to the orange one I did earlier, but instead of painting the grooved edge, I decided to glue strips of paper over that edge and it worked great! Gives a nice finish to the patchwork look on the rest of the frame.Gold Patchwork Frame Gold  Patchwork FrameThis frame has a wonderful flat groove in the center of the frame edges. So after painting the whole frame green, I put strips of the same scrapbook paper used behind the glass in those grooves and also on the flat sides of the frame. Green frameGreen Frame with grovesGreen Frame

The last frame had a nice flat face and was easy to cover with torn paper.Chevron frameChevron FrameThe frames are ready to be put on the wall (hopefully tomorrow), and we can begin to jot down the ideas we have for upcoming blog posts. Finished Frames

Have we given you some inspiration for ways you could add new life to some old frames you may have sitting in a box at your house? You don’t have to make dry erase memo boards out of them. Pictures of your kids or grandkids would look even more adorable with a cute frame!

“Fail Your Way to Success”: Real Me Monday

Real Me Monday

I just recently finished reading a book called Opening Moves by Steven James. It is a prequel to a series of crime novels about a Detective named Patrick Bowers. They are great reads if you enjoy detective/murder mystery/thriller fiction. In this one that I just read, one of the characters said,

“Every dead end shows you more clearly the pattern of the labyrinth. You now have one more piece of information that will help you fail your way to success” (page 365).

This stuck out to me because just this weekend, mom and I launched our In A Tickle Etsy Shop. We were nervous to press that “Open Shop” button, knowing that it was out there and actually happening. There is a little part of us that was afraid of failure, and maybe a little part of us that was afraid of success. What if nobody likes our designs? What if nobody buys any? What if tons of people love our designs and want to buy a whole bunch and we don’t have the time to make them all?

Everything we do brings a potential for a mistake, for a failure, but if we can’t just move on ahead and make them, then how will we learn? So much can be learned in a failure as long as we don’t give up. You just have to try.

And one thing I am learning is that being afraid of success is probably one of the silliest things you could ever be afraid of. NEVER be afraid of success. God wants YOU to succeed. God told Joshua in Joshua 1:7-9,

Be strong and very courageous. Be careful to obey all the instructions Moses gave you. Do not deviate from them, turning either to the right or to the left. Then you will be successful in everything you do. Study this Book of Instruction continually. Meditate on it day and night so you will be sure to obey everything written in it. Only then will you prosper and succeed in all you do. This is my command—be strong and courageous! Do not be afraid or discouraged. For the Lord your God is with you wherever you go.

So we decided to be courageous; we said a prayer and pushed that button.

We will soon see if our work up to this point was a success or a failure, but you can guarantee that if it fails, we will keep trying. We will keep designing. We will keep creating until we find that success.

Miss Tickles is a fan of our products at least!Miss Tickles with butterflies