
Gelli printing is a wonderful means to producing unique backgrounds for use with other art mediums or for creating your own paper to use in mixed media collage, card making, or scrapbooking. I enjoy experimenting with various items around my house to make new texture designs.
I am still using the same homemade gelli plate I made in January of 2014. I still rinse it off after use, break up the plate, put it back into the glass pan, microwave it for 2.5 minutes, and let it set back up. it remains covered on a shelf in my craft room until the next use.
Why not make a gelli plate of your own and create one of a kind papers to use in your craft projects?
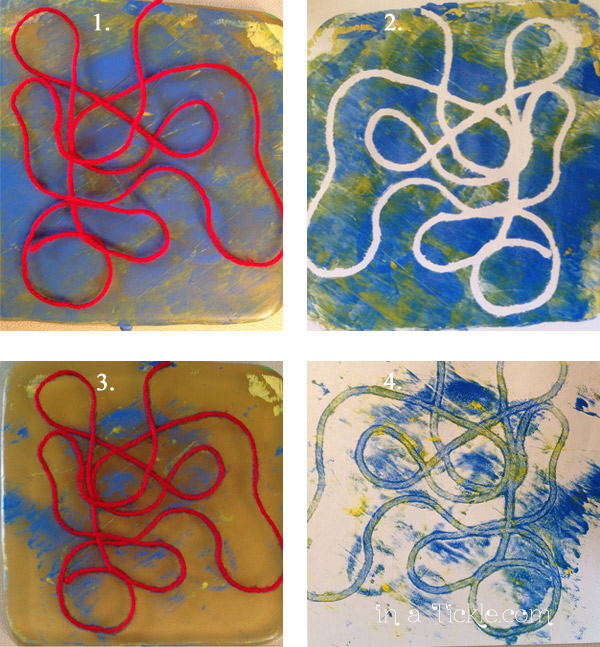
For this session of gelli print creating, I wanted to experiment with various threads. Yarn is an easy texture “tool” to use. (1) You can lay it on top of the paint spread on the gelli plate, (2) set a piece of paper on top, rub, and you get a design that looks like a road through the mountains or maybe the path in an ant farm! (3) When you pull up the yarn from the gelli plate after pulling your first print, the yarn leaves a nice texture on the plate from which you can pull a ghost print. (4) Notice you can even see the texture of the yarn in the ghost print.
I used crochet thread and got a similar look as the yarn, but the lines were not as thick as with the yarn (sorry no picture).
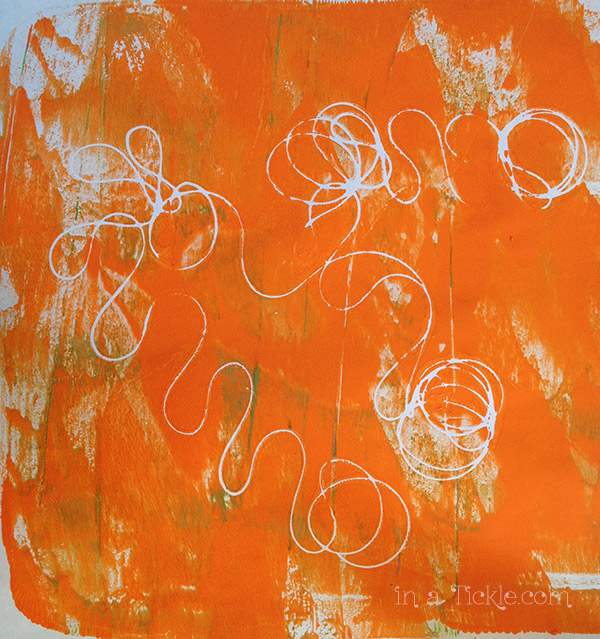
I was curious what thread would do and thought it would be too thin to leave any design, but I was very pleased with the results. In the photo below, you can see I lightly spread paint onto the gelli plate. The thread I took off a spool stayed curled in a spiral, and I laid it on the plate with the spirals sticking up.

When I laid paper on top and lightly rubbed, the thread pressed down and left a wonderful design.
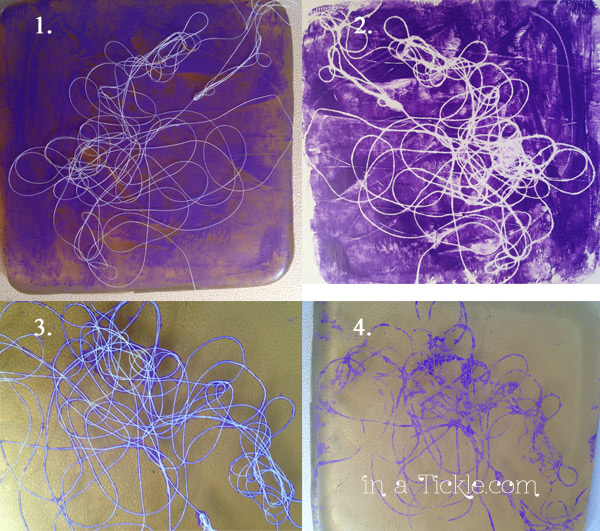
A print can be made with the leftover design when the thread is pulled off the plate, as shown below. (1) I used a different thread that laid flat on the gelli plate. (2) I pulled the first print by laying the paper on top of the thread. In picture 3 it doesn’t look like there is much paint left after pulling the first print, but when the thread was pulled off, you can see how much was left still on the plate (4).
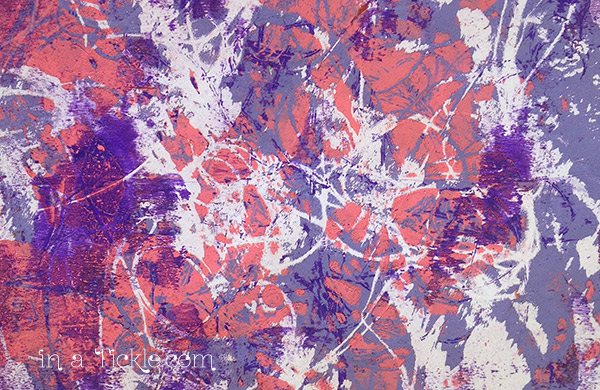
I used those lines on the following print. There are multiple layers in on this page but you can see some of the purple thread lines.
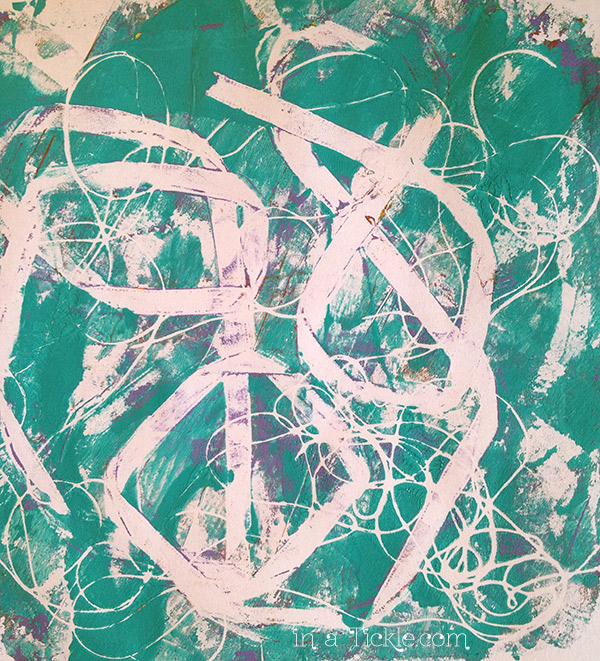
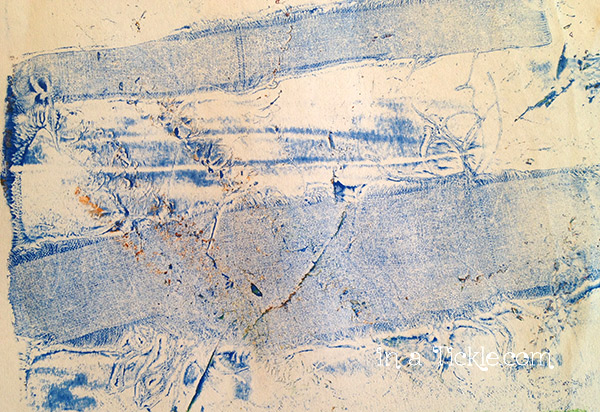
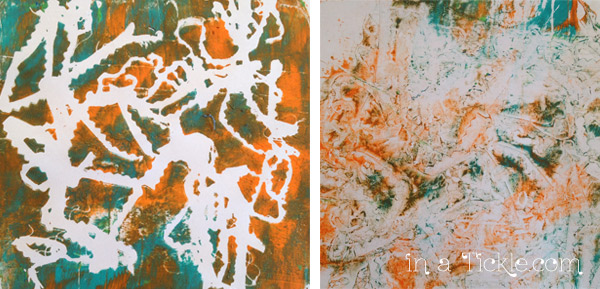
(1) I tried some thicker trim scraps. Because of their thickness, it was harder to rub the paper on top, (2) but some of the design on the trims showed through in the first print. (3) I took the trims off the gelli plate and pulled a ghost print, and you can see so much more of the trim design on that print.
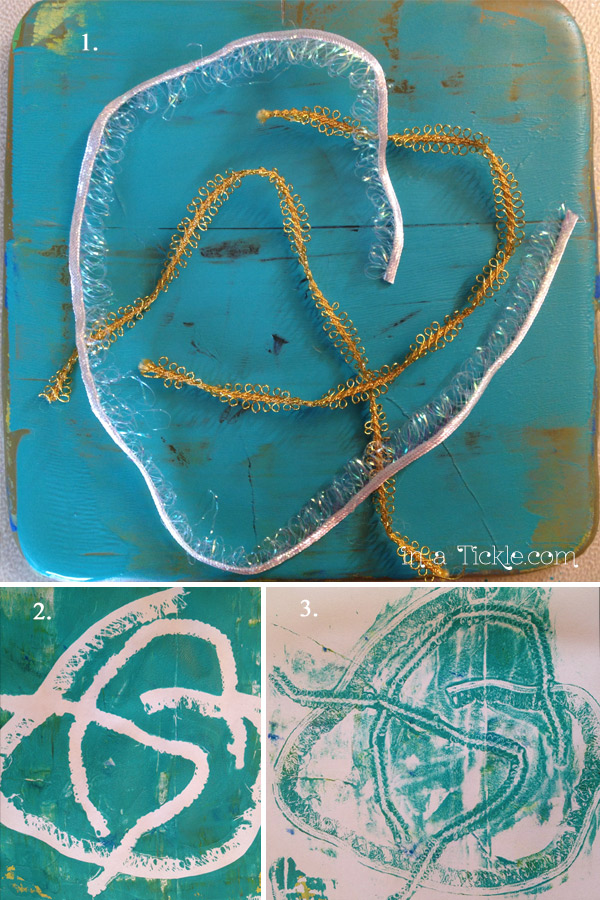
I next laid gold trim on top of paint on the gelli plate, lightly pressing it into the paint, and took the trim off the plate before pulling a print. The design of the trim is much more distinct.

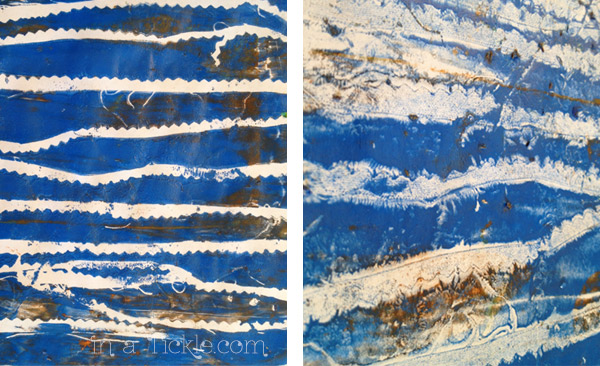
My next experiment was with ribbon. Picture 1 shows the 1/4″ ribbon laying on top of a thin layer of paint on the gelli plate. Picture 2 shows what was left on the gelli plate after pulling the print (3).

This time I left the ribbon on the plate and very slowly rolled some aqua paint over the ribbon with my brayer. The ribbon stayed in place! I then pulled the ribbon off the plate and laid a bunch of thread on the plate. This was the result when I pulled a new print. Notice the fine texture lines of purple where the ribbon had been.
It is hard for me to quit when I start experimenting with various texture “tools” for gelli printing. So I moved on to laying a couple of raveling strips of fabric on the gelli plate (on top of paint). The middle picture is the first print and the third picture is the ghost print.

I turned the fabric strips over so the side with paint was face up on the gelli plate and pulled another print. This time you can see the tiny details of the fabric weave as well as the raveled edges.
Then I tried some pieces of fabric cut with pinking shears and randomly scattered them on the paint on the gelli plate.
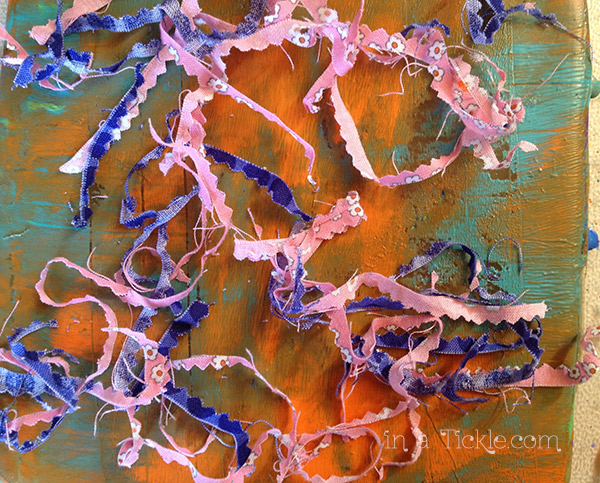
The first print left an interesting design and the ghost print shows more of the fabric texture.
Another print and ghost print with pinked edge fabric strips:
I printed a whole bunch more than what I am showing you here, but I hope I have sparked a desire in you to try creating with gelli printing. Learn how to make your own homemade gelli plate and get started! For other ideas of tools you can use for printing and to see ways we have used our prints, click on the Gelli Plate Printing category in the sidebar to read more gelli printing posts.