Buy One Shirt Get Two Outfits: Transform it Tuesday

Transform it Tuesday

Don’t you love a Buy One Get One Free sale? That’s how we felt when we got finished with this weeks transformation.

Original Shirt

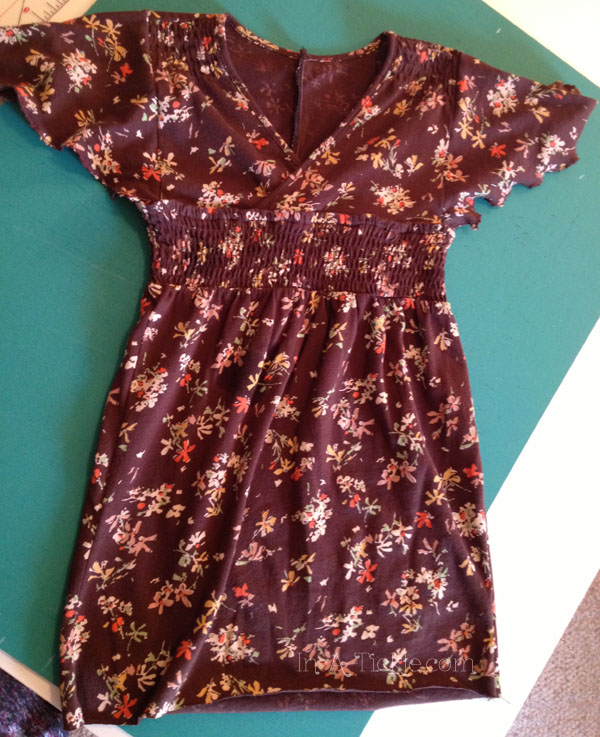
We were so proud that we got the picture of the shirt before we cut it (Yay! We are starting to remember).

In Part 2 of the Let’s Talk Fabric Series, we showed you a picture of what we had purchased at Kohl’s. One of the first items we had found in that shopping trip was a brown long sleeve adult small shirt. We were drawn to it because of the shirring at the waistband. We immediately thought of a sundress for one of the girls. I particularly loved the little buttons at the neckline and knew something had to be done with those. I’ve been drawn to little flower patterns on fabric lately, and thought these were cute. The brown, green, and orange are some of my favorite colors right now, and I thought those colors would be a nice change for the girls whose closets are full of pink and purple.

After staring at the shirt awhile, we decided that we needed to make the first cut so we could fully visualize what to do next. You will hear from me quite often, “Don’t be afraid of scissors. Sometimes you can’t see the potential until you make the first cut.”

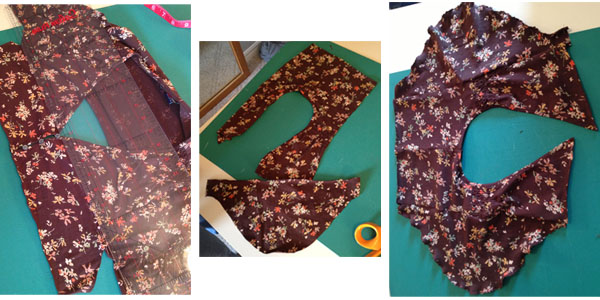
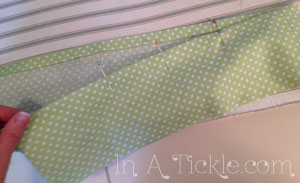
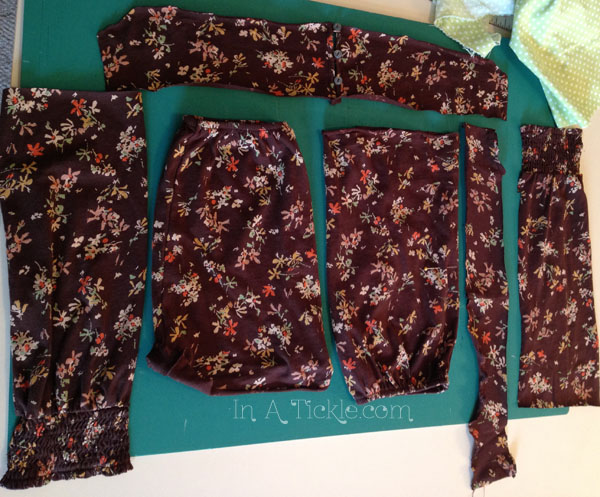
Since we knew we wanted to use the shirring for the top of a dress, we started by cutting the length that we needed and then cutting the width. We measured this one for My Princess.

Dress1

Cut the length. Measure around bust and cut needed width. Pin and sew new side seam. I used the serger.

This can’t be a complete tutorial because you probably won’t find a shirt exactly like this, but we will give you a basic idea of what we did. So much of the process was coming up with an idea and then looking at it on My Princess and then coming up with an even better idea. Our best advice is to not be afraid of the process. Remember that you are just experimenting and should not be afraid to make some mistakes.

4.23.13dress model1

Figuring out how to do the shoulders and sleeves.

We cut off the shoulders just above the cute little buttons. Then cut off the sleeves around the shoulder and cut straight across a few inches below that. the attached the sleeve back onto the shoulders on the straight cut side. We used a stitch along the bottom of the sleeve to give it a finished look without a hem.

We cut off the shoulders just above the cute little buttons. Then cut off the sleeves around the shoulder and cut straight across a few inches below that. We then attached the sleeve back onto the shoulders on the straight cut side and used a stitch along the bottom of the sleeve to give it a finished look without a hem.

4.23.13skirt

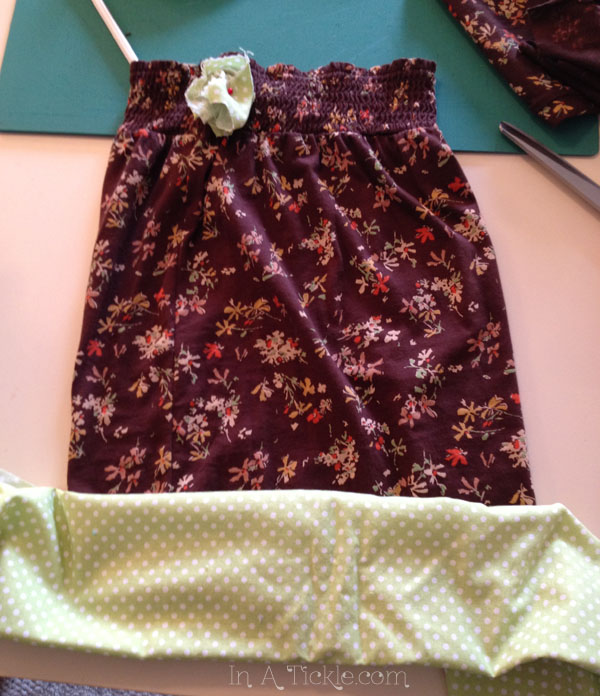
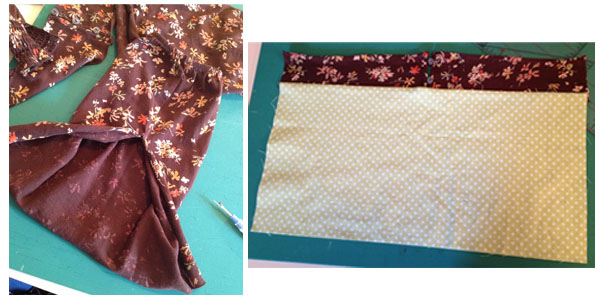
Found a scrap of green fabric from our remnant stash that matched the green of the leaves on the flowers and played around with some ideas.
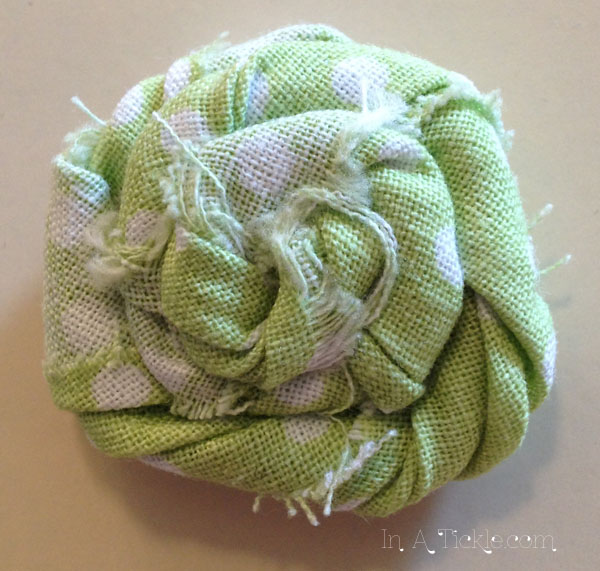
4.23.13rose

fabric rose

4.23.13dress.no ruffle

Attached the top to the bottom.

4.23.13dress ruffle

Sewing the hem

4.23.13dress model3

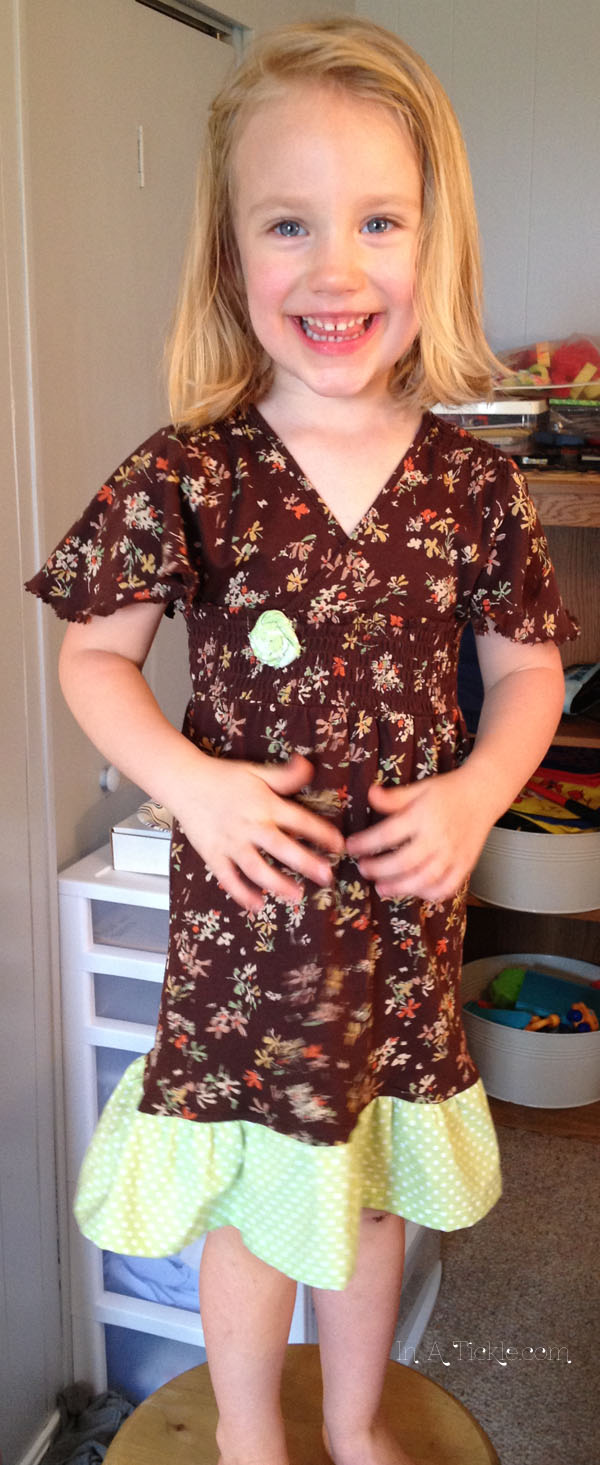
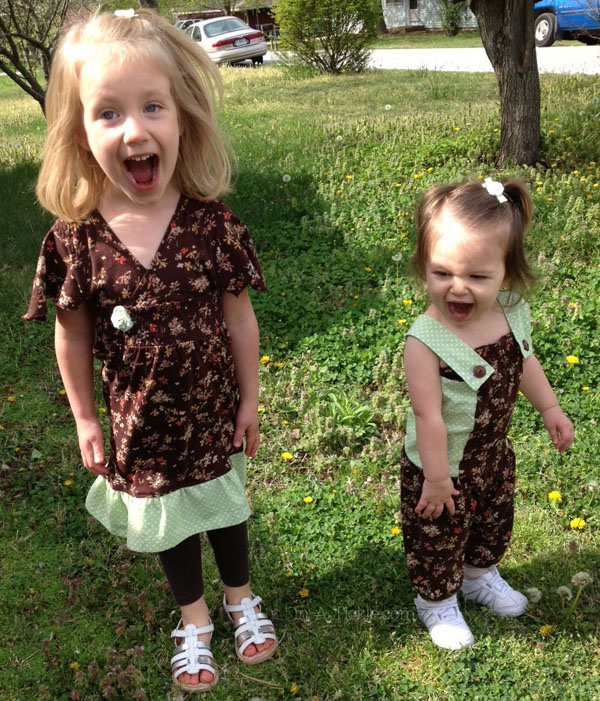
All done! She likes it so much she got all giddy for the picture!

4.23.13leftovers

Now what do we do with all these great leftover scraps?!

4.23.13romper idea

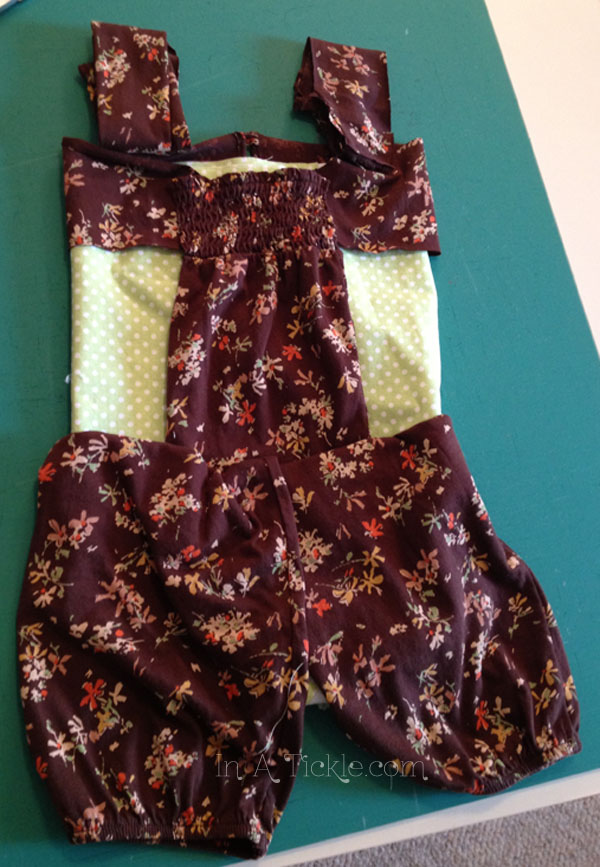
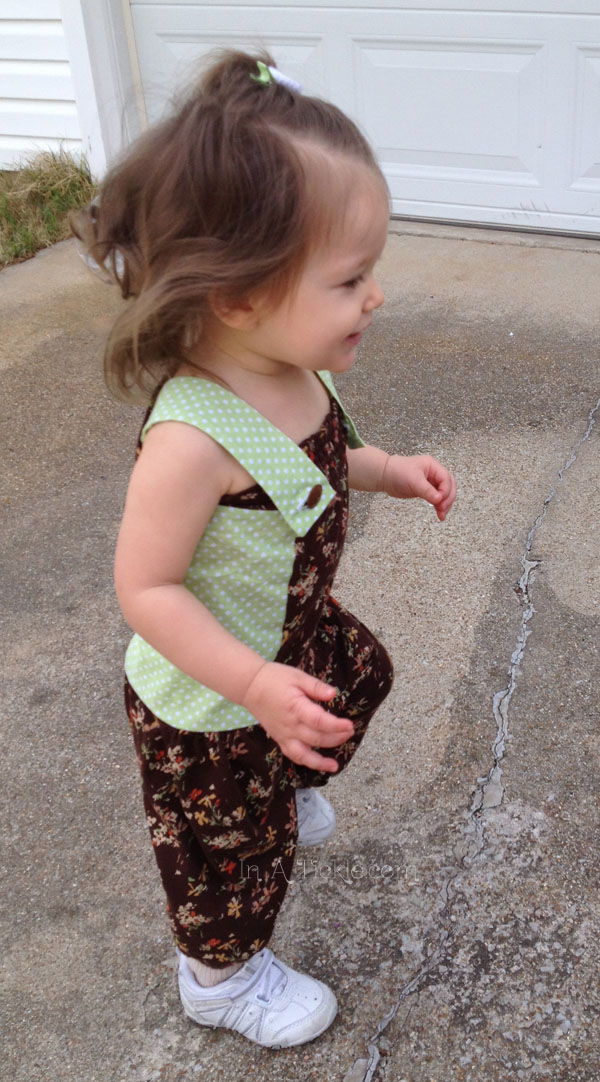
Here’s the idea we came up with for Miss Tickles!

Romper1

Making the bloomers out of the sleeves. We got to use those cute little buttons for the back!

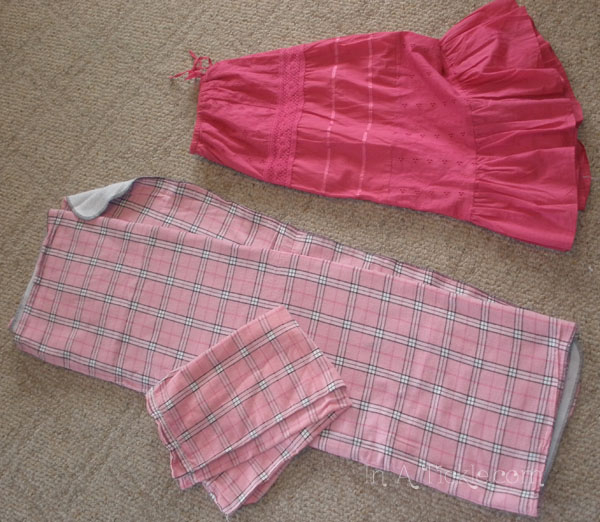
This is what we had left after making the romper outfit.

We didn’t take as many pictures of making the romper. We got a little distracted and our model wasn’t as excited to have us trying things on her in the process as her sister was. We were so excited to get two adorable outfits out of only one small adult shirt!

Before:

Original ShirtAfter:girls4girls3 girls2 girls1 girl1
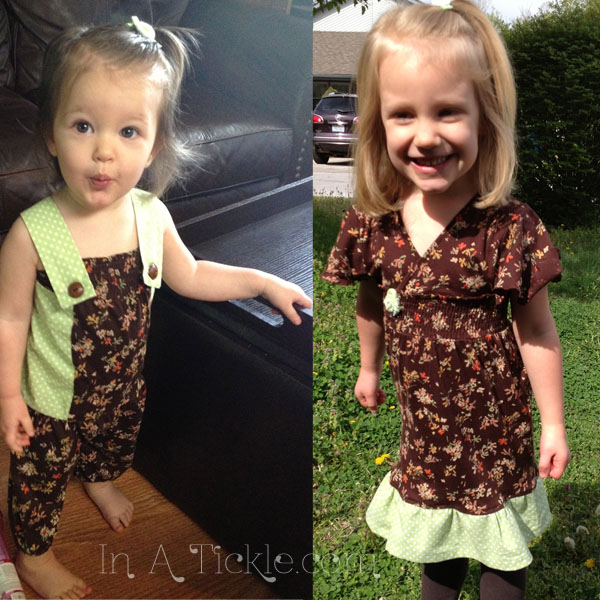
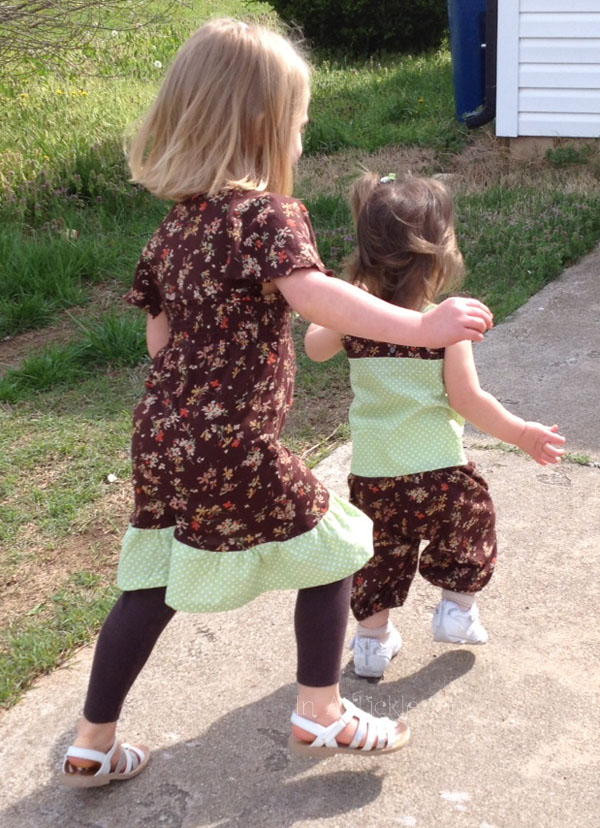
They love their new outfits!


Race to Do Something New: Real Me Monday

Real Me Monday

Last weekend, I did something I have never done before using tools I have never used before…and had a blast! At our church, we have Royal Rangers and Mpact (which are similar to boy and girl scouts but connected to the church). Every year we do a Ranger Derby car race. Ninja Boy and Hubby have participated the last couple years, while I just sat back and watched the fun. I wasn’t planning to get involved this year. In fact, My Princess was finally old enough to make one, and Hubby took her to the car craft day without me. I was perfectly happy to let them because I was not interested at all.

After talking to our Royal Rangers Commander, he informed me that we were short on adult and girl racers. I thought about it a little and told my Hubby that I would do it…for the sake of the race, you know.

Little did I know that I would like using the power tools a little too much! Now, if you know me at all, you know that I like to try new ways of being crafty, but woodworking had never really entered my mind as something I would venture into anytime soon. Have to rethink that now! Good thing my dad has stocked his garage with numerous power tools in the last couple years.

Below are some pictures of my crafting day and the race night, maybe they will inspire you to try something completely new too! My car was far from perfect (I got second to last place in the adult races). However, I had a lot of fun making it, and you can be sure that I will be making one again next year! Only this time, I think I will go for speed rather than geekiness (in case you didn’t know, my car is a bow tie because bow ties are cool. I’m sorry if you don’t know what that means and mostly because you are missing out on Doctor Who awesomeness).

Derby3

Watch your fingers!

Derby4

Getting smooth edges

Derby5

Sanding, sanding, and more sanding

Derby6

Spray paint time!

All done! Bow Ties are Cool!

All done! Bow Ties are Cool!

Derby2

The race is on! My car is in the middle!

Derby1

My Princess got first in her heat and 3rd overall in her age group. I got second to last in the adults. Ninja Boy got first place in his heat and second place in his age group, just barely beating his sister. My Hubby got third to last place in the adults, BUT he got the people’s choice award for craftsmanship in the adults with his Lego man.

I encourage you to try something new this week! Woodworking, sewing, crocheting, knitting, drawing, painting, cooking, etc. Whatever it is that you haven’t tried and maybe have wanted to do, just dive right in and try it.

What have you always wanted to do?

Washcloths in Space: Weekend Wonderings

Weekend Wonderings

I wonder what would happen to the water, if you get a washcloth very wet and wring it out?

Well, that’s not to hard to figure out! The water will fall out of the washcloth and onto the floor or into the sink, depending on where you do it! We all know how gravity affects things on earth and we have all rung water out of a washcloth before.

But what if that washcloth was being rung out in space where there was no gravity to affect it? Well, I’ve seen pictures of the astronauts in their space stations and things are floating all around them. So my answer would be that the water being rung out of the washcloth would just float around in drops around them. Is that what you think as well?

Some high school students had a Canadian astronaut try that very experiment. You may be very surprised to see what happens:

Did the water do what you thought it would?

Isn’t it fun to wonder (to be curious about something) and then find answers to your wondering?

Have a great weekend of wondering!

Washcloth in Space


Cook Outside the Box: Foody Friday

Foody Friday

“Some people like to paint pictures, or do gardening, or build a boat in the basement. Other people get a tremendous pleasure out of the kitchen, because cooking is just as creative and imaginative an activity as drawing, or wood carving, or music.” ~Julia Child

Most people know who Julia Child is–famous cookbook writer and cooking show host. If you don’t know her whole story, you can read about it here. She was 32 when she started cooking and wasn’t very good at it! She failed her exams at the french cooking school she enrolled in and didn’t graduate till another year later. Hard to believe that someone so famous for cooking could have started off so bad.Julia Child

I am much the same way…just kidding. I never was a bad cook, and I don’t aspire to be a famous one. However, I started off a novice cook just like anybody else. Julia Child said,

“No one is born a great cook, one learns by doing.”

I started learning about cooking when my husband and I had cable tv and watched Food Network shows all the time. It encouraged us to try new foods and techniques and over time started developing some cooking skills.

Once we had gotten a lot of the basic elements of cooking figured out, we started to get creative. We enjoyed watching the show Chopped where they have a certain number of ingredients they HAVE to use in a dish. We felt like we were on the show when dinner was in 30 minutes, and we hadn’t been to the grocery store in two weeks.

Sometimes it was due to pressure of what was left in the pantry that we would end up using an ingredient in a new way, or it was planning to do something different that caused us to purchase an ingredient we had never tried before. Being creative in the kitchen can be helpful to get your family eating healthier as well as save you money. Listen to Julia!

“Learn how to cook! That’s the way to save money. You don’t save it buying hamburger helpers, and prepared foods; you save it by buying fresh foods in season or in large supply, when they are cheapest and usually best, and you prepare them from scratch at home. Why pay for someone else’s work, when if you know how to do it, you can save all that money for yourself?”

I challenge you to think outside the box of hamburger helper, and learn to cook some real foods in a delicious way! You can do it! If Julia Child can, you can too. Just remember these words from that amazing lady. Julia Child…

“It’s all theory until you see for yourself whether or not something works.”

“One of the secrets of cooking is to learn to correct something if you can, and bear with it if you cannot.”

“The only real stumbling block in the kitchen is fear of failure. In cooking you’ve got to have a what-the-hell attitude.”

In the next few weeks, I am going to introduce some ingredients to you that I hope you, if you have not already, will try out in your own cooking. Get ready for the {Create Your Own} series starting next friday.

Let’s Talk Fabric Part 3: Thoroughly Thrifty Thursday

“Recycle, Reduce, Reuse…and close the loop”

Do you remember that song?? That’s what I keep singing in my head as I write this post.

Repurposing is such a popular thing these days. We think this is great for several reasons: When you reuse something, you reduce waste, save money, support a good cause, and have a greater chance of having something unique in your home or wardrobe that no one else will have!

This is part three of our talk on fabric. Our first two focused on new fabrics from fabric stores and clothing stores. Today we get to talk about repurposing fabric that has already been gently used by someone else.

Do you have any coins lying around in a jar somewhere? Well, put them in a baggy and head out on a weekend for your next fabric shopping trip. You can’t get too far with a few quarters when you go to a fabric store, but you can get a lot more out of your money when you are getting something used. Mom and I recently used a Saturday to go on a fabric hunt at thrift stores and garage sales. Just like in the post about buying fabric at the clothing store, you have to put on a different perspective and look at things a little creatively. Use your creativity to imagine, not what something already looks like, but what it COULD look like!

Buying something from a thrift store can often feel like you aren’t spending any money at all. For example, I often go to our Library thrift store. I get to support our local library that is funded only through the community and get a great deal on fabric too! Most thrift stores support some kind of cause or charity. If you buy something at a garage sale, you get to support a family that might be going through some hard times or just need some extra cash to help them with a project they are trying to fund.

For a few quarters, you can get yards of fabric for a project. Like this cotton flannel blanket and pillowcase that we bought for $1.50 and this pink skirt with fun detailing for $2:

Garage Sale Fabric

The flannel is going to be perfect for a sleep sack and the pink skirt could become an adorable sundress for the girls.

or thrift store shirts and sweaters that were purchased for a $1 or less each:

Thrift Store Fabric

These might become pjs, dresses, dance leg warmers…etc.

Reusing something that is already made helps the environment by eliminating waste and saving resources that would be used to make something new. Craft for a cause the next time you buy your fabric supplies by shopping at a thrift store or garage sale.

Are you a garage sale/thrift store pro or newbie?

Check out all the Let’s Talk Fabric posts:

Flower Power: Draw With Me Wednesday

It’s spring and I am fascinated with all the flowers blooming. I’ve always loved flowers, but this year is the first in a long time that I am able to watch the progress each day around my yard as they go from buds to full blossoms. Flowers, like all of God’s beautiful creation, have so much intricate detail. If you read the post a couple of weeks ago on Weekend Wonderings, I talked about getting close to the flowers to see those details.

Today we are going to take that a step further and play with drawing some flowers. Usually when I am doodling, my default flower to draw is a daisy- probably because daisies are my favorite flower. But there is so much more that can be drawn! But to get comfortable with it, you have to play with drawing other shapes.

Speaking of shapes, see how many geometric shapes you can find in the flowers as you look at them.

Grab your pencils and paper and get ready to draw. I am posting some pictures of some flowers that I thought would be fun to draw, but you might want to go out into your own yard and draw some flowers you have growing at your place. 

Don’t worry about making it look perfect. Just relax and start drawing what you see. We are just doing line drawings, so you don’t have to try to put in shading, etc. (unless you want to.)

Purple Wildflower

Notice the fine vein lines in the petals and the whiskers in the center of the flower!


Bradford Pear Blossom

The center of this flower reminds me of something that would be in a Dr. Seuss book!


Yellow Dandelion

Notice how the layers of petals are arranged in circles with each petal layer getting larger toward the back. If you look real closely, you can see little curly spikes sticking out all over the flower. Do those little spikes have something do to with the way the dandelion looks when it goes to seed?


Black & White Dandelion

Thought you might be able to see more detail in a black and white photo of the dandelion.


Purple Flower

Notice the star shaped center of this flower.


White Wildflower

This flower is very, very tiny and it looks like the green leaves around the flower have little hairy spikes to protect it!


Yellow Wildflower

Lots of star shape happening in this little flower and the green part of the flower looks furry.

Ok, I will let you see my drawings. After I sketched them I decided to pull out the colored pencils and add a little color to them. Jan's Flower Drawings

Have fun drawing! The sun has peeked out and I am going out to take more pictures in my yard. See ya!


Dull Magnet Boards are for the Birds: Transform it Tuesday

Transform it Tuesday

Just so you don’t think Melinda and I only work with fabric (we love all kinds of creative crafting), I am going to show you what I transformed from a store clearance, after Christmas purchase.

The purchase I made was of several metal desktop magnet boards. I really thought the design on the magnet boards was pretty dull, so I scraped off the design and was left with this…

Metal Magnet Board

I don’t want to offend whoever did the original design, so I am only showing you the scraped off version!

I transformed two of them into baby shower gifts before I knew I would need pictures of everything I do! So here are the transformed magnet boards for the baby gifts…

Pink Magnet Board

On this board, I used paper and fabric for the background. The magnets are made with fabric and buttons. These colors matched the new baby’s room.

Dinosaur Magnet Board

The background on this board is made from various scrapbooking papers. The magnets are dinosaur buttons. I cut off the button loop on the back and glued magnets to the back of each button.

Then I decided to make one for myself. I’ll let you sneak a peak at the finished product first…

Bird Magnet Board

I love the sound of birds outside, but these are the only kind I want inside my house!

I first painted the backside and edges of the metal with dark brown craft paint to coordinate with the colors I was using on the front.

Using these scrapbook papers, I cut out various elements that I wanted to use and glued them with Mod-Podge to the metal board. I let the glue from one layer dry before adding another. Scrapbook papers

For the magnets, I first tried cutting out bird shapes, laminating them and gluing magnets to the back, but I wasn’t happy with the look. Too plain!

Laminated birds

So on one of my trips to Michaels, I happened upon some little packages of chipboard shapes in their $1 bins. Two of the packages had birds (along with lots of other shapes), so I bought them with the thought in mind of using them for magnets. I used watercolor pencils to color the birds and then blended the color with water and a brush. After they dried, I glued magnets on the back.

Bird Magnets

The plain chipboard birds in the first picture are a different design from the ones I used since I didn’t take a picture of them before painting.

I sprayed the metal magnet board and the bird magnets with a clear acrylic sealer to protect the finish. To protect any furniture that the magnet board sits on, I cut a piece of felt the size of the bottom of the board and glued it in place.

So look around your home. Is there an item that you have sitting around that you don’t like the look of any more? Perhaps it matched your decor at one time, but no longer does. Before you toss it, think about what you might be able to do to transform it into something beautiful and useful for yourself or someone else!

P.S. Check out last week’s Transform It Tuesday to see the update. Melinda finished a pillowcase dress and added a cute bow. Have you started making a dress yet? Let us know if you want to participate in the challenge and we will let you know how to get the dresses to us.

My Messy Garage: Real Me Monday

Real Me Monday

The other day, a good friend of mine and her kids came over to play at our house. She has the sweetest girls and a precious boy. The girls are old enough to be in the stage where they say things just like any kid would. You know, the obvious things that nobody wants said out loud. Their house is very often clean, and they, fortunately, received the organizing genes from their mommy that never seemed to fit in my own gene pattern. While putting something out in the garage, one (or more) of the girls kept informing me over and over, “that’s messy!” Thankfully, knowing their mommy and their personalities, I was able to laugh it off. There was no ill intent, and I’m sure their mommy was embarrassed for them (ha ha! don’t be! you are all still loved. Plus it IS messy!).

My Messy Garage

I kept telling them we were sorting stuff for our upcoming project (I wish that was the only reason it was messy. It’s always been messy!). We are about to turn this mess into a storage area and a playroom/office/school room. I wish this was a before and after post because then it would be all done and beautiful! However, it’s still a mess. Just know that you are not the only one with projects that take more than a day! Hopefully in the next month I can show you the new space in a Transform it Tuesday post. For now, my garage is definitely a Real Me Monday post.

More of my messy garage

Thankfully over half of this stuff is going to be out and donated to the Library thrift store or something. Goodbye stuff!

What unfinished projects do you have lying around right now?

Why is the sky blue? Weekend Wonderings

Weekend WonderingsWondering: Desire or be curious to know something.

When was the last time you spent “wondering“…

You probably don’t remember asking question after question when you were a preschooler, but if you’ve had kids, you know. Not long after they begin to put more than two words together, most every thing that comes out of their mouth starts with “Why…?”

They don’t wake up one day and say to themselves, “I am going to start asking my mom question after question until I drive her nuts!” although it may seem that way.

They are just wondering! The whole world surrounding them is begging to be explored and discovered. How else are they going to learn?

Sadly, somewhere along the way, most of us stopped asking questions. Or maybe we ask them in our heads, but aren’t curious enough to find out an answer. Or we are too embarrassed to ask, because we do not want to appear ignorant. If that is you, it’s time to start asking questions. Be curious about the world around you. Learn something new (or re-learn something old)!

Do you know why the sky is blue or the grass is green? See what these people had to say:

Not long after my grandson started asking LOTS of questions, he wanted to know where his parents had gone for the evening. I told him they went out to dinner. He asked where. I told him I wasn’t sure where they decided to go. He told me, “Just Google it, Grandma!” Somehow he had figured out, if you wanted to know about something, that was the place to go for answers!

Decide right now, on your Weekend Wonderings, what you want to know about but have not taken the time to find the answers. Google it. Go to the library. Ask someone else. Get into the habit of being curious to know something!

I wonder…

Seeds

What kind of tree has seeds like this? Why are they shaped this way?

Bird House

What kind of bird can live in this house? Is there something already living in there? Do birds go back to the same house they lived in before?


Dandelions

How can a dandelion go from this…to this so quickly?


Lady Bug

Why does this lady bug only have one spot?


Leaves

What plant is this? Why doesn’t it shed it’s leaves in the fall, but it hangs on to its old leaves until the new ones come in the spring?


Light sensing flowers

Why do these flowers open when it is bright sunshine and close when it is cloudy or evening? Do they have a built in photo-sensor ?

What are you wondering about this weekend?


Zucchini Coin Trick: Foody Friday

Foody Friday

Ninja Boy is my picky eater of the bunch. According to him, I’m kind of a mean mommy because I cook whatever I am planning to make for the family, and it doesn’t matter much to me whether he thinks he likes it or not.

A couple nights earlier than this incident, I had already made zucchini for dinner. After much whining and possibly a trip or two to his room, he finally ate the two or three I had “forced” him to eat. Apparently, I didn’t learn my lesson and made it again for lunch. Poor, Ninja Boy! Such a tortured child. This time, however, I had a trick up my sleeve. Grandma had sent me a picture on my phone to let me know that she had made a fort for the kids that they could play in at her house that afternoon. I shared this news with Ninja Boy who, of course, became very excited and started talking about THAT instead of eating his food. In the midst of all his words, I heard something about needing coins to get in the fort, and this mommy got an idea.

“Ninja Boy, guess what! These zucchini are actually coins to get into the fort at Grandma’s house, and YOU are the machine that takes the coins. You put them in like this…”

And I showed him what to do.

Thankfully, he jumped on board with that and instead of only the three I Put on his plate, he ate seven! Mommy-1 Ninja Boy-0! Sometimes you need to get a little creative with the picky eaters.

Recipe for Fort Zucchini Coins

  • Zucchini
  • Olive Oil
  • Salt and Pepper

Slice Zucchini into coin shapes (about 1/4 in thick). Lay them out on the pan without overlapping. Spray or brush with olive oil and sprinkle with salt and pepper. Broil until the tops are slightly browned. Enjoy!

Zucchini Coins

He likes it!