


For the last three years my family has done something that I believe few people in the world do. We set up Christmas decorations on Halloween.
We aren’t doing it out of protest for Halloween. We just like Christmas that much. The first year we started this we had gone to Trunk or Treat at our church on the Sunday before Halloween, and this was the first time we had been home on Halloween night since having kids. We weren’t quite sure what to do. Our families had never been big about Halloween growing up, and we didn’t care to make a big deal about it with our kids either. With Ninja Boy’s peanut allergy and our desire to eat whole foods and natural treats, going out and getting candy just isn’t our thing. Between that and our itch to get the Christmas stuff out, a new tradition was born!
We are the types to turn on the Christmas music as soon as there is even a hint of cold in the air. We don’t get sick of Christmas, and we don’t care that anyone else does. We want to enjoy it as long as possible.
Every family needs traditions for the holidays, but they need to fit with the family. I encourage you as you make traditions with your families that you choose things that just easily come about and are not forced into being. If you are searching the internet for traditions for your family, you are doing it wrong. Create your own family traditions, even if it seems way out there like decorating for Christmas on Halloween. Don’t worry that other people don’t get it. If your family enjoys it then do it! Its about being together and having fun as a family.
We still dress up on Halloween because who really even needs a holiday as an excuse to dress up when you are a kid? Any day is dress up day at our house!
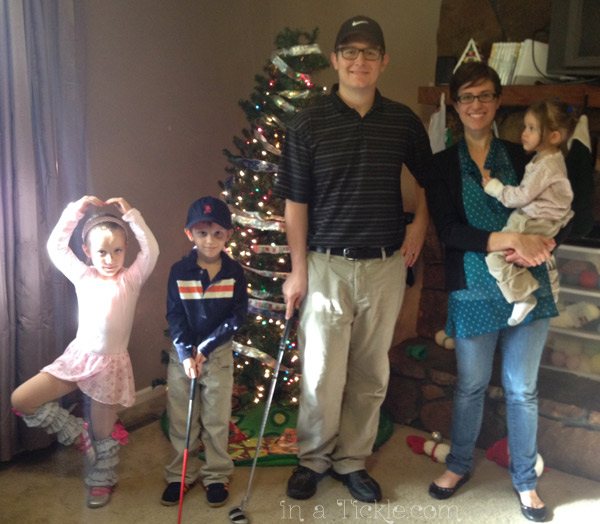
Ballerina, my two golfers, Mary Margaret from Once, and Kaylee from Firefly

Isn’t she the cutest little Kaylee Frye??

Ninja Boy would not look up from his golfer stance for the picture
What’s your out of the box tradition?
Many mornings this fall I faintly hear the drum beats of a marching band. It brings back memories. No, I am not hearing things in my head. The high school is just down the street.
In my school days, I played clarinet in the band both in elementary and high school. The only time we got to march for anything in elementary school years was in parades. Not only did we have to memorize the music so we could play and try to stay in a straight line while keeping your feet marching correctly with everyone else, but we had to march through a hazardous minefield of horse droppings. The town where I grew up in the west probably had twice as many horses in each parade as people, floats and cars. We looked forward to being in the high school marching band someday because they usually got to lead the parade– ahead of the horses!
In high school, the band also marched at half time on the football field in the fall. But I am sure what we did would look like we were standing still compared to this band:
What creativity!
Do you have marching band memories? What instrument did you play?
A few months ago I bought this jacket at a thrift store. It was a Jr. size so it would not fit anyone around here. But it had some unique features and I figured we could transform it into something else. 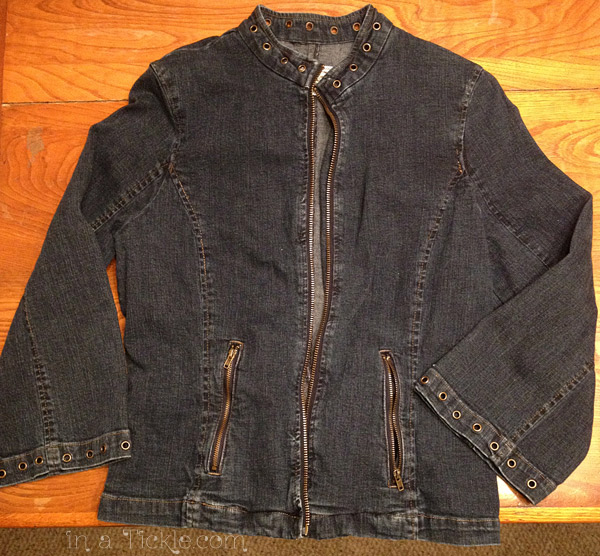 Since we have not done a “transform it” project for a while, I was ready to tackle the jacket this week. The problem was in deciding how to do it. So I followed Melinda’s advice, “Don’t be afraid of scissors. Sometimes you can’t see the potential until you make the first cut.” I made a bunch of cuts!
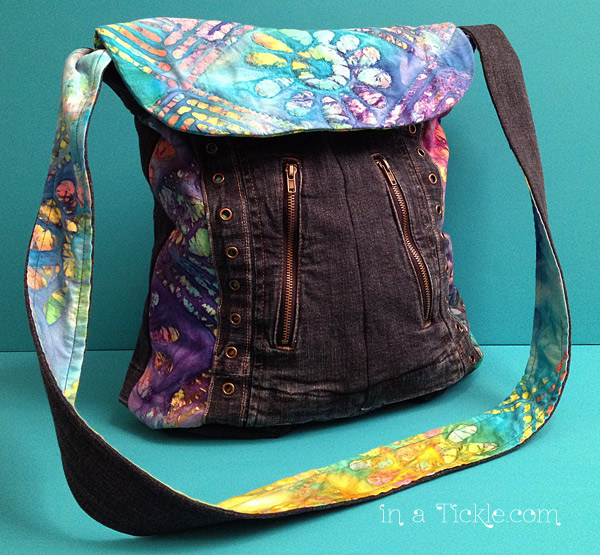
 It was easier to play around with the cut pieces to come up with a plan. I added print fabric from my stash to accent the denim as well as line the bag. Here is what this jacket transformed into:
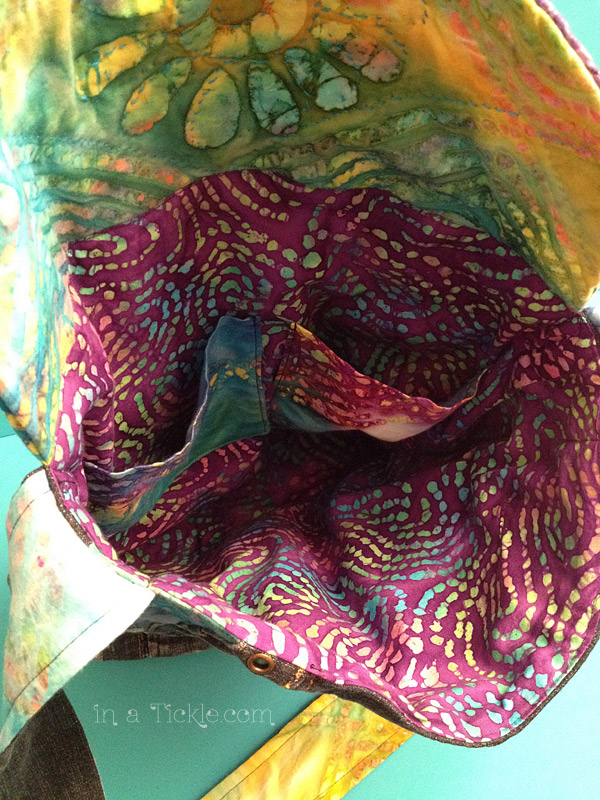
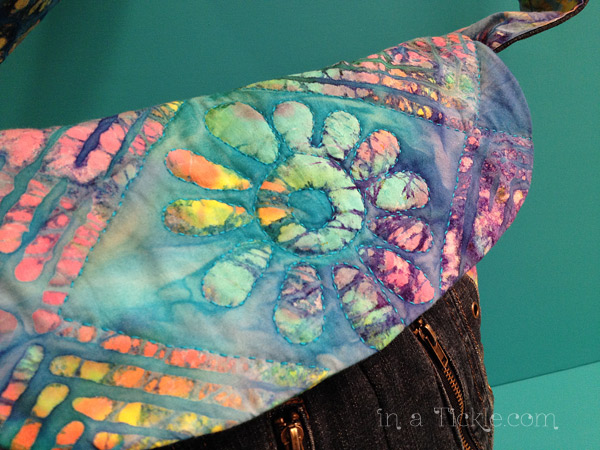
Added quilting stitches with embroidery floss around some of the fabric design

 There are still some useable pieces left (like a long zipper) that can be used on another project.
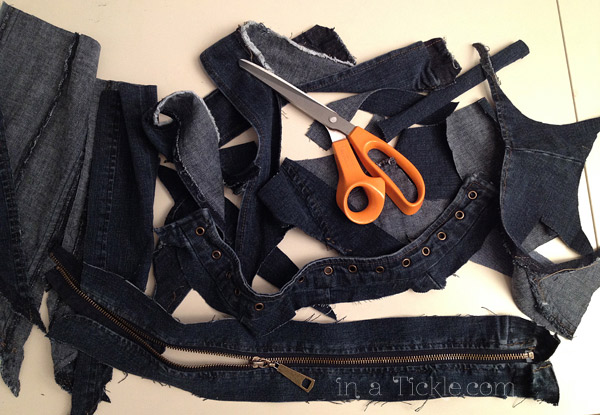
What transformation projects have you been working on?
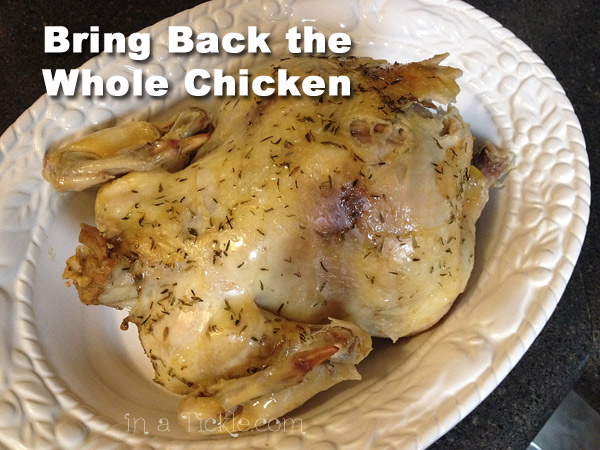 A couple months ago, I decided to get a whole chicken to cook. Changed my world. The chicken tastes yummy and then we made stock from the leftover bones. BEST chicken stock I’ve ever had. I decided from then on I was doing chicken no other way (or at least rarely any other way).
Not too long after I decided whole chicken was the way to go, I came across this article on Fooducate. It talks about the rise in chicken consumption over the years but the drop in people buying the whole chicken.
In the past, people bought a whole chicken and cut it up at home (or prepared it as is). Now, the most popular form is “further processed”. We can only assume this is McNuggets of various shapes and sizes. Indeed, convenience trumps all.
In my attempts to eat healthy and more whole foods, this information bothers me. Cooking a whole chicken is not difficult and tastes wonderful! Besides, in the long run it’s cheaper, especially if you make stock and use it for soups. Depending on the size of your family, you can get several meals out of one chicken. A little extra effort one day is worth the convenience of the days to follow when you can make chicken tacos, then chicken salad, then chicken noodle soup, and so on.
There are a couple ways we have cooked our birds–in the oven and in the crockpot. Both are super simple.
Chicken in the oven:
I have used the cooking instructions from this recipe, but I have been doing my own flavorings.
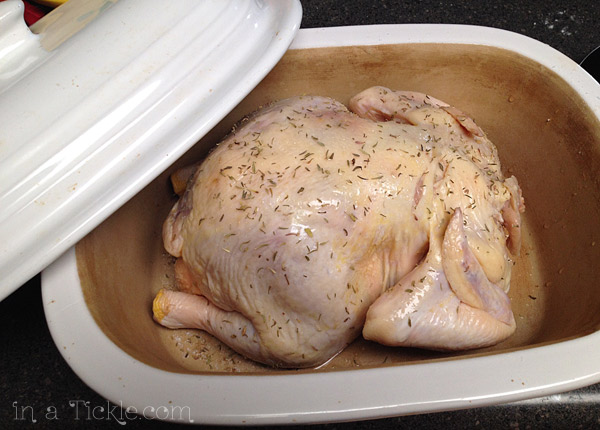
Set out your chicken 2 hours before cooking to get it closer to room temperature.
Preheat oven to 425º.
(Throughout the process you will be washing hands between each activity so you don’t spread raw chicken everywhere. I feel like I am constantly washing my hands when working with chicken.)
Take the guts out of the chicken cavity. Sometimes I use this, sometimes I don’t (If I do, while the bird is cooking, I will cook these down on the stove with water to make gravy for when the chicken is done).
Cut the stick of Butter in half and stuff in the bird.
Peel 6-8 Cloves of Garlic and smash just to open up the clove a little. Shove the Garlic Cloves under the skin and in the chicken cavity (wherever you can get them to fit).
Generously sprinkle the bird with Sea Salt on the inside and outside. Sprinkle Rosemary or Thyme on the inside and outside as well.
Place bird breast side down into your roasting pan (it keeps the breasts nice and juicy). I use my Pampered Chef Deep Covered Baker, but you could use a roasting pan and foil if you don’t have something like that. Just make sure it’s covered.
 Roast at 425º for 25-35 minutes depending on the size of the chicken.
Then turn the oven down to 325º and bake for another 60-75 minutes. Internal temperature should be 165º. The longer the bird cooks the drier it will be so make sure you don’t overcook. Let it rest for about 20 minutes before digging in. Eat it as is or take all the meat off and use it in your recipe of choice.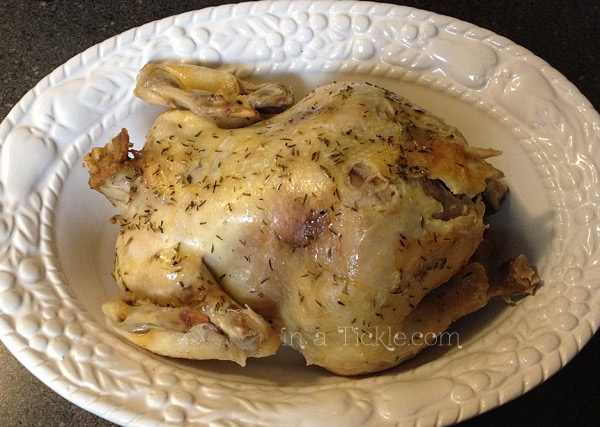
Chicken in the crockpot:
Mom likes to cook her whole chicken in the crockpot. She scrunches up foil and places it in the bottom of the crockpot.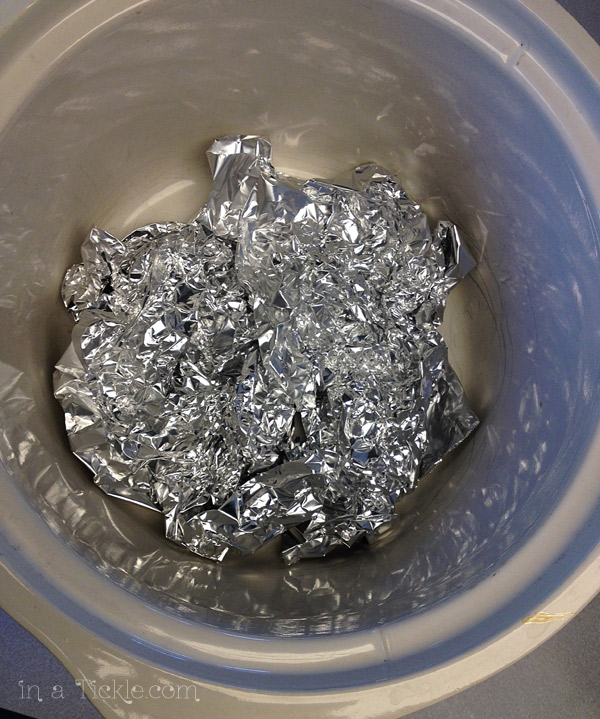
The chicken is seasoned with olive oil, sea salt, various herbs (pictured with fresh lemon thyme) and slices of lemon (or orange). She also puts lemon slices into the cavity of the chicken. 
The chicken cooks for approximately 4 hours on high in the crockpot or until internal temperature is 165 degrees. The chicken turns out very tender and moist. The juices can be used for gravy or saved for stock.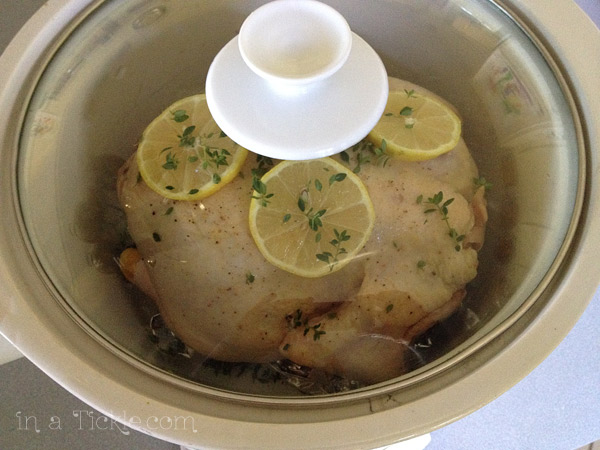
We will do another post soon about making stock and how we use it.
What’s your favorite way to eat chicken?
We want to share a wonderful opportunity with you to touch the life of a child this Christmas through Operation Christmas Child. It is very simple to do and has the potential to dramatically change the life of a child in need.
Here are the simple steps: (You can get more detailed instructions here.)
1. Get a shoebox. You can use any regular shoebox and cover the bottom and lid separately with wrapping paper. Or you can use a plastic storage box with a lid.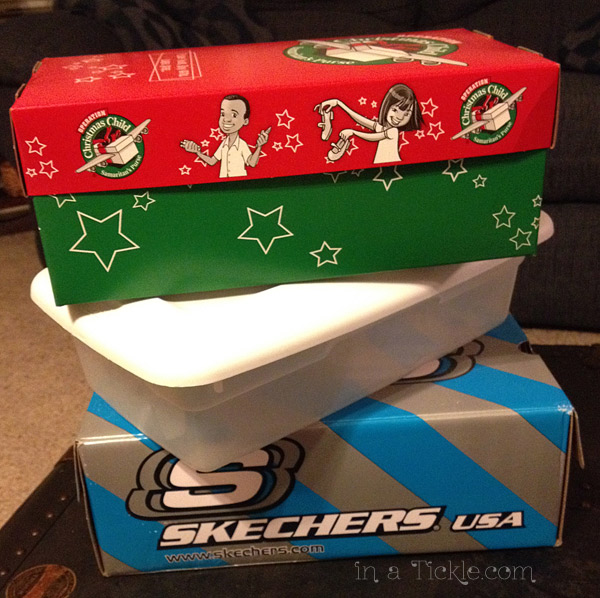
2. Choose who the gift will be for–whether your gift is going to a boy or girl and choose an age category: 2-4, 5-9, 10-14. Label the top of your box with appropriate label which you can print off here.
3. Fill the box with small gifts such as school supplies, toys, hygiene items, etc. (Suggestions)
4. Include a donation of $7 to help cover shipping costs.
5. Drop off your box at a collection point near you the week of
November 18-25, 2013. (Drop off locations.)
Samaritan’s Purse began Operation Christmas Child twenty years ago and has delivered over 100 million shoeboxes to children in over 130 countries. That’s a lot of lives touched! Some foreign students attending our local college received shoeboxes as children. Watch what they have to say about the impact it had on their lives:
If you don’t have time to find a box and shop and drop it off, you can still put together a shoebox online, choosing how you want the box filled and making your donation. Check it out here.
For those of you who want to put your creative skills to use in putting together shoeboxes, be inspired by this man who has made over 100,000 wooden toys:
One friend of ours plans all year long for Operation Christmas Child. She shops sales always keeping her eyes open for gifts and puts together about 100 shoeboxes by herself!
Get your own children or grandchildren involved in reaching out to bring joy to other children. Melinda and I are helping her children put together three shoeboxes. We went shopping today finding many fun items to pack and are also planning to add some handmade gifts as well. Boxes need to be collected the week before Thanksgiving, so make plans today to put together your shoebox.
Let us know in the comments if you plan to put together a shoebox.
I have purposely avoided looking through pinterest for fall craft ideas. I don’t want to get in my head that they have to look a certain way. I knew I wanted to do something with my kids, but in keeping my current stance to allow my kids to let their own creativity out without so many boundaries, I couldn’t trust myself to stick with it if I found a bunch of awesome crafts. I wanted a craft they could complete on their own (I wanted to do it too but with them, not for them).
I decided to do a simple garland with them.

All the supplies we needed:
string (I used yarn)
Construction or scrapbook paper in fall colors
Pencil
Scissors
Leaf pattern (totally optional)
Tapestry needle (optional but makes stringing the leaves easier)
Ninja Boy was excited to get started and jumped into drawing and cutting out leaves before I ever printed off the leaf pattern (I just googled “free leaf pattern clip art”).
After I printed the leaf pattern, he tried tracing and cutting those out, but went back and forth between that and making his own (which I fully supported).
My Princess traced several but lost interest in cutting out. So I cut out some because I wanted to.
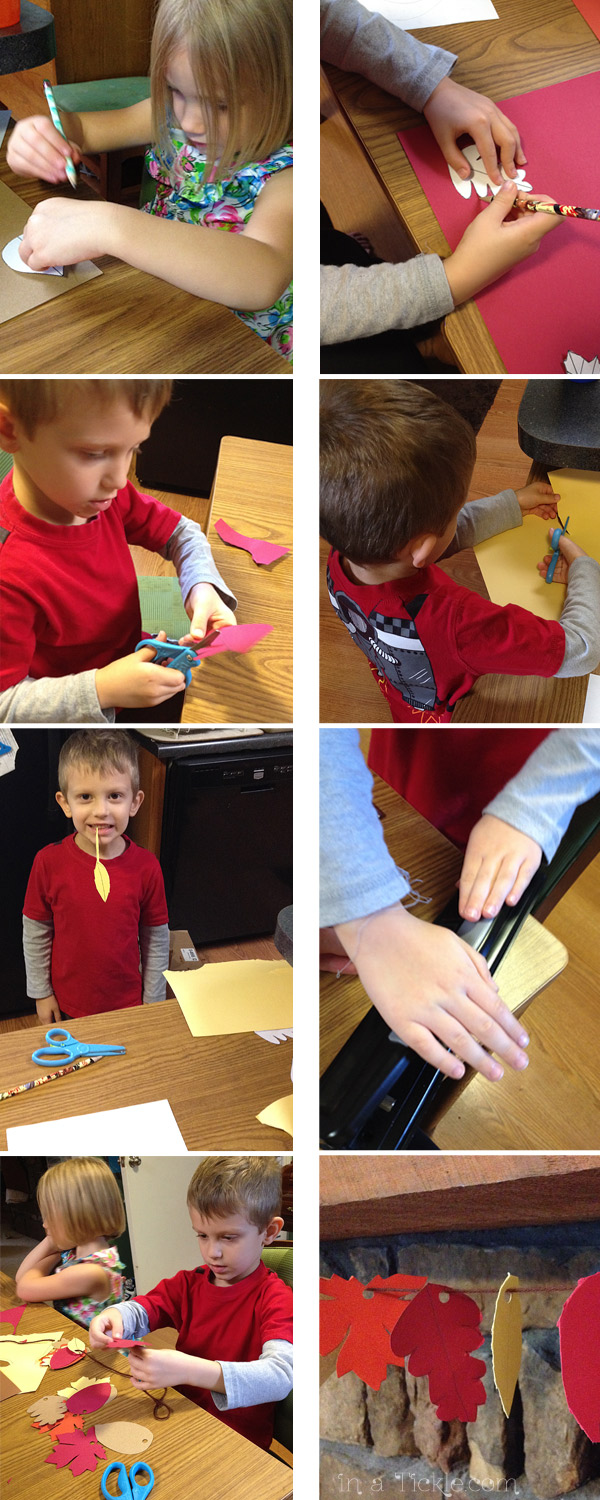
After we got all the leaves cut out, Ninja Boy used the hole punch to make a hole in the end of the leaf. He put a couple leaves on the yarn before I gave him the plastic tapestry needle to use, which then made the stringing a lot faster. I suggested he do a pattern with the colors, which he promptly switched the kind of pattern he was making after every sequence, therefore making no pattern whatsoever. That didn’t seem to bother him at all.
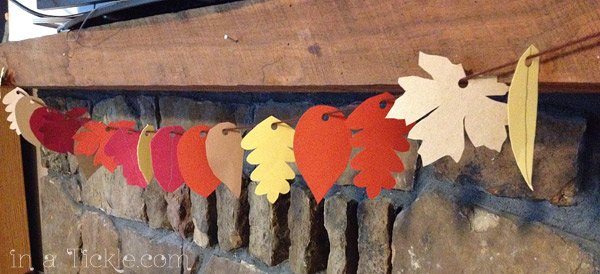
After all the leaves were on the string, I helped him put it up on the mantle. He proudly spread out the leaves and posed with the girls for a picture.
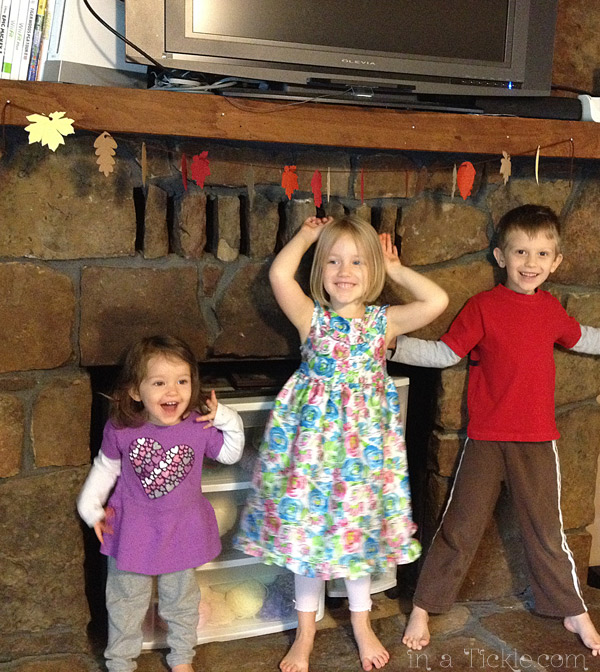 Do a simple fall craft with your family. It doesn’t and shouldn’t be perfect–just made 100% by you!
Today I was playing around with some watercolor techniques described in the book The Watercolorist’s Essential Notebook: Landscapes by Gordon MacKensie.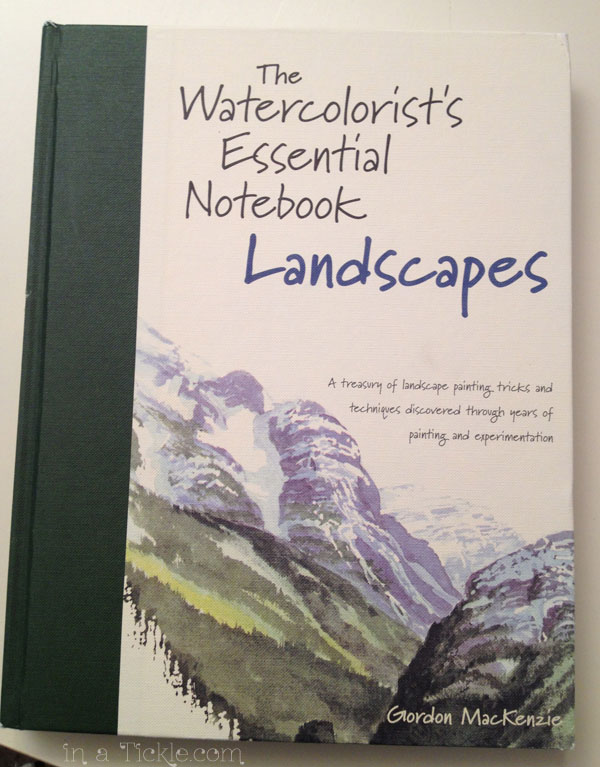 I saw an exercise that looked like it would be really simple to do– negative painting. Negative painting (or drawing) is just painting (or drawing) the space around the subject instead of the subject itself. This exercise was to paint the spaces between a group of trees. So I started painting with a light green color the spaces between the tree trunks and branches. Sounds simple until you start doing it. It would be so much easier to paint the tree trunks and branches and just leave the space between. For some reason negative painting feels like I am doing it backwards. I think I am going to have to do a lot of exercises like this to train my brain to see this way!
After painting the spaces with the light green, I used a darker green/blue shade to paint the spaces of the trees behind my front trees. Using an even darker shade, I painted another layer of spaces behind the second batch of trees forming a third row of trees. It was not easy! Now in looking at my finished painting, I can see several areas where my spaces do not make sense. (Sorry, I was so wrapped up in painting spaces, I forgot to take pictures of the process.)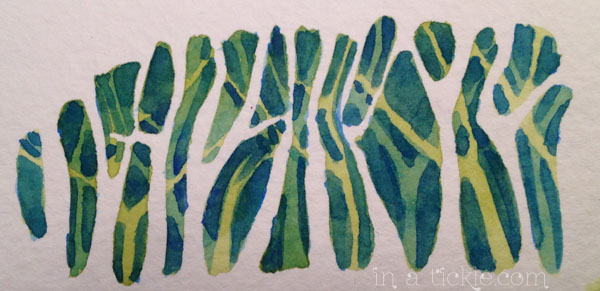
 I think I want to try this same exercise with pencil and shade in the different values of my spaces. I need to master negative drawing/painting because according to Helen South,
A sound understanding of negative space drawing is critical for watercolor painting, as a watercolor is built through a progressive overlaying of negative-space areas, working from light to dark.
Have you tried negative drawing? It is a good exercise in observation. Find something in your house like a plant or chair or lamp. Don’t draw an outline of the object itself. Draw the spaces that are around the object. Have fun!
The wind blows where it wishes, and you hear its sound, but you do not know where it comes from or where it goes…
~John 3:8
We have the advantage now of technology to help us see where the wind is coming from and where it goes. I came across this map that was put together as an art project showing in motion graphics the location and direction of the wind across the United States in near real time. It is fascinating to watch and if you look at the map at different times of the day, the wind patterns can look totally different each time.
After I showed the map to Melinda the other day, she was doodling with the kid’s markers and decided to draw a doodle inspired by the wind map.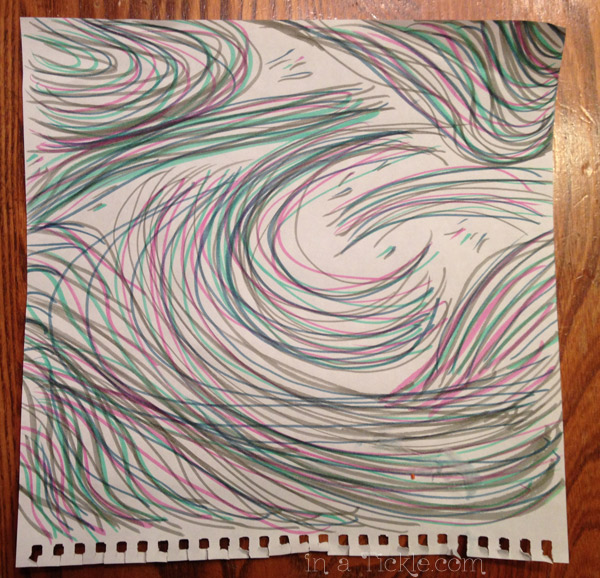 After picking all the rest of my garden produce this evening (lots of green tomatoes and small peppers) because the forecast says freezing tonight, I decided to pull up the wind map and see where all that cold air is coming from. Well, I know where it is coming from because I used to live up north in it, but I wanted to see what the map looked like. A unique looking wind pattern caught my eye near Chicago. It reminded me of an exotic bird. (And look at all that massive cold air blasting into the midwest!)
 I decided to doodle a design inspired by the wind map. Here’s my exotic bird:
 Pull up the wind map on your computer and grab a pencil, markers, or crayons. What do you see in the wind? Be inspired and have fun doodling!

I have a confession to make. I love creativity. I love crafting. I don’t always love doing it with my kids. I’m terrible. I avoid it because of the mess. Glue is not my friend. My Princess likes to draw with glue, and that drives me bonkers.
I hate putting together great craft projects or finding stuff online to make with them and realize that I am going to have to do majority of it for them to get it finished. Is telling them exactly what to do helpful for their creativity?? I don’t think so. Is finishing it myself helpful for their creativity? Who actually did the project then?
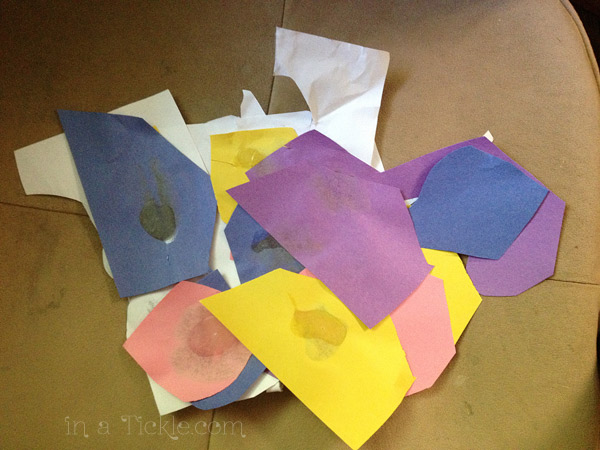
When we got most of the playroom put together (I promise there will be a post someday. We have been waiting to get a couple big things done before writing a post about it. Be patient, please). I put out most of their craft stuff where it was accessible. One day I came into the playroom to a pile of cut up papers glued together. My kids had made their own art time. They were so proud of what they had done. And I had a revelation!
I don’t have to make craft time happen. I don’t have to make an elaborate craft for them to do (or really for me to do for them and put their name on it).
I just have to let them create.

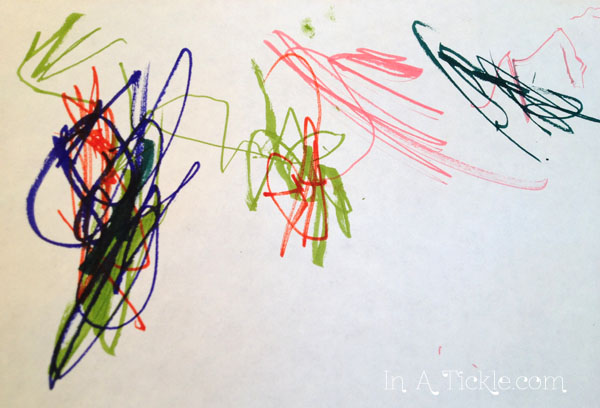
I was making some cards and the kids decided they wanted to do some too. They liked all the stamps and punches.
All I have to do is give them supplies and leave them be. Or make supplies available for when they get the creative inspiration.
Next time you have your kids make a craft, make a vow of. . .
No parameters
No guidelines
No hovering
Just freedom to create whatever they can think of.
Disclaimer: know your child’s limits. If they are known to eat glue or cut their hair with scissors etc. keep a close eye on them but don’t interfere unless safety is an issue. For instance, Miss tickles has not learned how to use scissors yet so I keep those on the higher shelf.
Miss Tickles loves to use markers to draw (even though she sometimes gets carried away and colors on herself).
Some of the most surprising creations have come from just letting my kids do their thing. I don’t want to dictate what they do because, unfortunately, they are most often more creative than I am because I have lost some of that freedom with age and responsibility. Don’t put so much pressure for perfection, pressure to look just like the picture on pinterest, that you stifle the natural creativity of your kids. Some projects are not going to fit with their ability or interest. If we are so set for it to look just right then it’s not going to be fun for anybody.
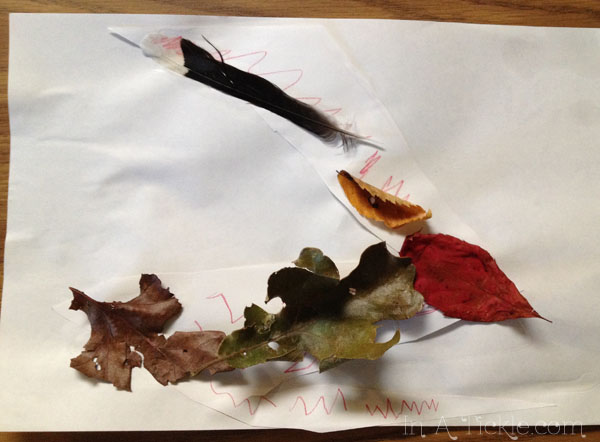
Ninja Boy had taken a hike with daddy and picked up different leaves and a feather along the path. Without any prompting, he got out the craft supplies and made this!
You’d be surprised some of the things they can come up with by just giving them the supplies and absolute permission to use their own creativity and not have to follow a step by step project all the time.