End of Summer Cousins Camp

Pa and Grandma’s house was a bustle of activity the month of August with all of the grandkids visiting. That’s why you haven’t heard much from Melinda and I for a few weeks! Here are a few pictures to give you a peek at some of our Cousins Camp fun…

Grandkids


Canoe-Picnic

Picnic and Canoeing

Ballet-Class

Dance Class

Tea-Room

Mother Daughter Sister Lunch at the Tea Room

Painting

She said she was “painting from the heart”

Mower-Rides

Mower rides with Pa

Sprinkler-Time

Sprinkler Time

Unloading-the-dishwasher

So much fun to help Grandma unload the dishwasher!

Watercolor-painting

Painting Concentration

Mountain-Climber

No mountain too high for this little climber

Sons-of-the-Silver-Dollar

Loved watching Pa sing at Silver Dollar City

Tall-enough-to-ride

Am I tall enough to ride?

Stockade

Troublemakers, Malcontents, and Lollygaggers!

Twin-Sleepover

Sleepovers in the RV!

And noisy boys!


Please Fasten Your Seatbelt

Family in front of RV

In case you are new to the blog and don’t know what my family is up to, you can visit BecauseFamily to find out about our ministry and how we took our family on the road full time.

On our first big trip in the RV, we realized that at times the road can get bumpy and jostle everyone around a little. We are thankful to have an RV that has seat belts at the dinette and couch to keep the kids buckled while we drive down the road. Because we have a bathroom available, they get up to go if necessary. We slow down a bit more to make it easier to stay upright while this happens. It’s easy with kids for them to decide to get up without being told it’s ok, and we didn’t want that to happen during a time that would be less safe.

We were joking that there was turbulence, and we were turning the “Fasten Seat Belt” sign on like in an airplane. This gave us a fantastic idea!

We had some push button lights for the kids to use in their beds, so we bought another one.
PushLight

We could just use that the way it is and let them know that they need to fasten their seatbelts when the light is on. But what is the fun of that??

I took a red and a black sharpie and went to work.

SeatBeltPushLight

I used a velcro command strip to attach it to the front of the RV where the kids will see it.

SeatBeltLightOff

When we “take off,” “land,” and “experience turbulence” the kids know they must stay buckled and cannot get up to move seats or go to the bathroom. So far it is working perfectly!

SeatBeltLight


Learning to Quilt One Block at a Time: Foundation Paper Piecing

My plan to sew a quilt block each month fell apart after the first three months. Here is it the month of August and I just made the quilt block for the month of April. I am following lessons through a free online course offered through Craftsy called, 2015 Block of the Month. Right now I am just learning the techniques and not putting together a finished quilt as the instructor is doing. Because of that I am using scraps of various fabrics I have for each block I make. You can see the other blocks I’ve made here, here, and here. In this lesson I learned how to do foundation paper piecing for making blocks.

The lower part of this block (the basket base) was put together using the same techniques I learned in the previous lessons. This block design is called a Pine Needle Basket.

Pine-Needle-Basket-Quilt-Block

The top half of the block (the basket handle) was put together by sewing pieces of fabric together onto a paper pattern (the foundation). The pieces must be put together in the proper sequence in order to make it work— I felt like I was putting together a puzzle! This is what the back side of the block looks like after sewing the fabric pieces to the paper. Because the fabric is sewn to the paper with very small stitches using the sewing machine, the paper is easy to remove because of the perforations.

Pine-Needle-Basket-Quilt-Block Back

After I finished this block, I wanted to try foundation paper piecing on another block. This website has many free patterns to download and I chose the Flying Kite Pattern to try in a small four inch block. It went together quickly and I want to try more designs!

Flying-Kite-Quilt-Block

Foundation-Paper-Piecing-Flying Kite

If you want you learn to sew quilt blocks, but the thought of tackling a large quilt is intimidating, just start making some little quilt blocks using scraps of fabric you already have. Quilt blocks can be used in many ways other than to make quilts. Frame several blocks for wall art, make a pillow top, add a quilt block to a handbag, make a hot pad, placemat, or coaster. Get those creative juices flowing and you’ll find all kinds of uses for your “sampler”  blocks.

Turning Scribbles into Art

So you think you can’t draw? Can you scribble?

Inspired by a guest artist, Päivi Eerola, on the Documented Life Project, I scribbled (aimless drawing) all over my paper with pencil. After looking at the scribbles for a while I began to see an image of fish in the ocean emerge and started coloring the shapes with colored pencil.

Fish-Abstract

My 7 year old grandson looked at the drawings and watched a video by this guest artist, and gave it a try. He loves to draw in tiny details with pen or pencil and with little or no color. It was fun to see him enjoy some abstract drawing using her style of inspiration.

7-yr-old-abstracct-drawing

Last year for one of the documented life project challenges, I did something similar to this. I had my then 2 year old granddaughter “draw” something for me and I used it to make a picture. Here is what she drew for me:2-Yr-old-Drawing

And this is what I saw:

DLP-Week-13-J

Pictures Tell (Part of) the Story

How do you describe with words playground equipment made of metal and wood that spins in a circle, hangs from a single center pole, teeter-totters in ovals and circles, on which riders can sit or stand, so that others know exactly what you are talking about? There is a reason for the phrase “A picture is worth a thousand words”. What I have just described to you is located in the park in Wilsey, Kansas. It looks like this:

Wilsey-Park-Merry-go-round Witches Hat

It was the most fun playground equipment I ever played on as a child and my children thought it was the best as well. Visits to my grandparents farm always included trips into town (their church is located right next to this park) and usually some time to play at the park. The businesses are now closed up with many buildings falling apart on main street, there is no longer a school—the few children are bussed to a larger town, but the church has a large new addition on the building. As mom and I drove around the town on our trip to Kansas recently, I was so happy to see the swinging merry-go-round still standing in the park. Oh, the memories it brought back! I jumped out of the car to snap a picture, but I really should have gone to play a few minutes. The temperature was 105 degrees that day and we felt like we melted every time we got out of the car.

But there is more to the story (history) of this piece of equipment than just the description and current photo.

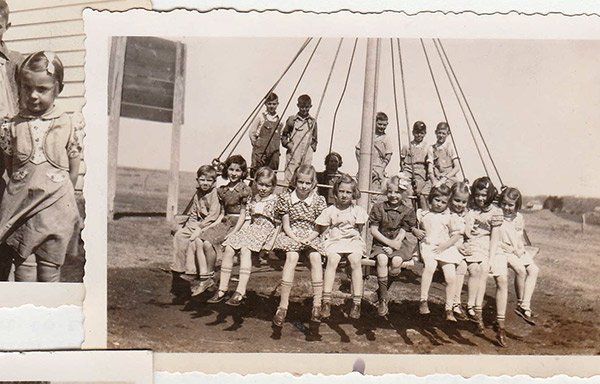
My mom attended a one room schoolhouse through 8th grade about a mile from the farm where she grew up. The school was built in 1912 on a hill with a good spring below it— and was aptly named Hill Springs. This swinging merry-go-round was originally located at Hill Springs school. Mom found a picture taken of her classmates sitting/standing on it. Mom is the third from the right and also in the cutoff picture on the left. When Hill Springs ceased being a school, the merry-go-round was moved to the park in town.

Hill-Springs-School-Merry-Go-Round Witches Hat

My grandpa and his brother also attended that school when they were kids. I don’t know though if this existed yet on the playground for him to play on as a child.

My grandma and grandpa met in high school (located in town) and after graduation grandma went to Normal Training and then started teaching at Hill Springs School while living with a family near the school. She and my grandpa wrote notes to each other and left them in a little crack in the bridge close to Hill Springs. Grandpa would go there everyday to check their little “mailbox” to see if she left a note. The family she boarded with moved away in the spring and she ended up living with my grandpa’s family for a few months. Since she had to sleep with my grandpa’s grandma, she chose to live with another family the next year. She taught at another school the year after that and even though she had one more year left on her certificate, she and grandpa got married and they would not hire a married woman to teach back in those days.

Curiosity led me to search online to see if this type of playground equipment had a name and it does— a “witches hat”. Now whether that was a nickname or an official name, I do not know.

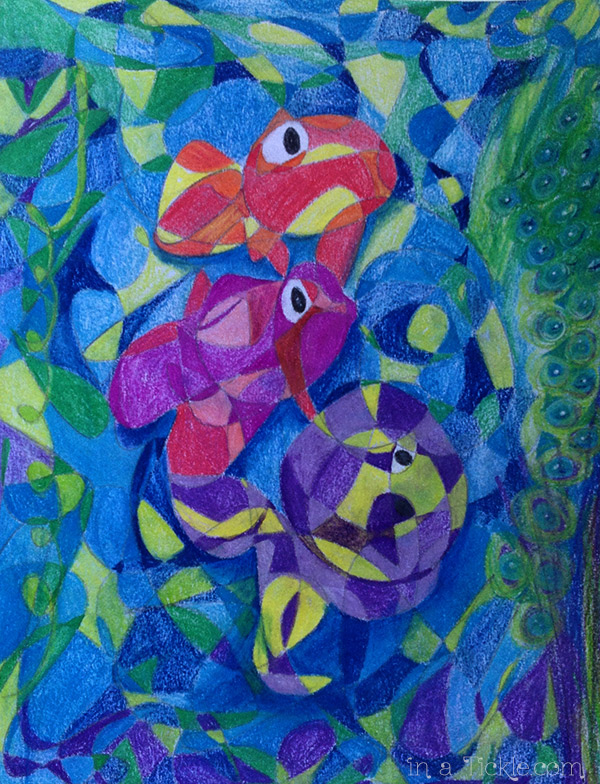
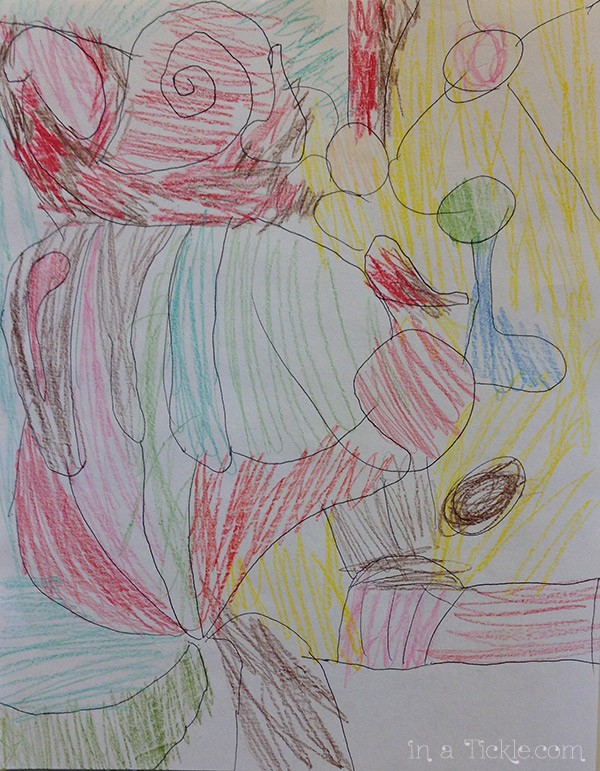
One of the art challenges for the month of June in the Documented Life Project was using photos and words with the journal prompt, “A picture is worth a thousand words”. I decided to use the photo of the “witches hat” as my inspiration. Mom did not have any pictures of me playing on it as a child (back then every single moment of your children’s lives were not documented on film like we do today!) However, I found a couple of photos of my children playing on it. In one of the photos my son is dressed in white pants— not his typical play clothes— we were visiting town for my grandma’s funeral. After putting my page together, I realized that the witches hat has been altered from the days when my kids played on it. Look closely and you’ll see the metal ring in the middle (which regulates how high it will swing around the center pole) is much smaller than before. I guess it had to succumb to the safety regulations of today’s playgrounds. It’s probably not as much fun to play on now.

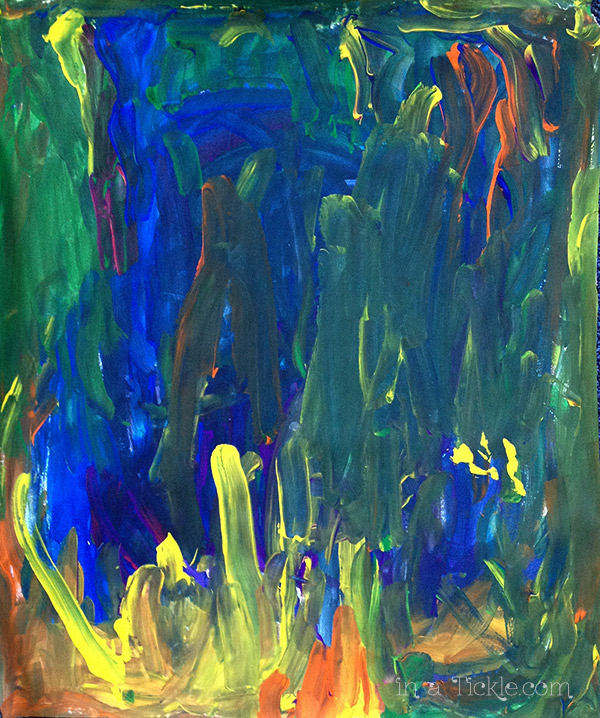
I used Gelatos and Inktense blocks with water to make a swirling design for the background— like you would see going around and around in circles, blurred grass and sky. The word PLAY was cut from a gelatin print and outlined with marker.

Merry-go-Round-Swing-Witches-Hat

Recording Memories Through Art

In keeping with the theme, Travel Journaling, for the month of June in the Documented Life Project, I used my trip to Kansas as inspiration for the art challenge of “recording memories”. The journal prompt for that week was “taking the road less traveled”. If you have ever driven through Kansas, you will find many roads less traveled. Kansas has the ranking of being #1 in the USA for having the most gravel roads. There are 78,000 miles of gravel roads in the state, or to put it another way, 58% of all of their roads are gravel roads. My grandparents lived on a farm on one of those gravel roads, many miles from the main highway. I remember as a child thinking that my grandpa drove so slo-o-o-o-w-ly on those roads. As an adult I understand why!

Through the years I remember hearing the story many times about the first time my dad came to visit my mom at her parent’s farm in the early ’50s. My parents met at college, so mom must have been home on a break. She gave him instructions to the farm, telling him to turn left off the main highway at the windmill. My dad counted about a dozen windmills after he left the closest town. He wasn’t sure where to turn, but he must have finally picked the right one because he showed up at her house. (And I’m not sure a cell phone would have helped had they existed because I had very little cell phone coverage in that part of Kansas in 2015!)

Mom and I drove down that highway and the windmill still stands. We took a left onto the gravel roads and drove to the old farmhouse (still standing and lived in by new owners.)

I painted a watercolor picture to record the memory of the windmill story.

Kansas Windmill


Illustrative Travel Journaling

The theme for the month of June in the Documented Life Project was “Travel Journaling” and the first art challenge was illustrative art journaling. I had no trips planned in the month of June and figured I would just use previous trips as my inspiration. Somehow June got away from me, as well as most of July and I had not even started the challenges for June!

Then my mom and I took a little trip to Cottonwood Falls, Kansas for a few days to help celebrate a 60th wedding anniversary of her cousin as well as a big family reunion on her mother’s side. We stayed in a lovely place called the Church Guesthouse which was an old Presbyterian Church built in 1885. It had recently been restored and renovated into a four bedroom guesthouse with two and a half baths, full kitchen, living area, porch, and sunroom. Several other homes in this town have also been renovated and turned into guesthouses by the same owners. I highly recommend checking it out if you are planning a retreat or family gathering in Kansas  (The Church Guesthouse). It would be a wonderful place for an art retreat!

Church-Guest-House Cottonwood Falls Kansas

I have been fascinated by the travel journaling of Leslie Fehling on her blog, Everyday Artist. She does little sketches of things that interest her in her travels, colors them with watercolors, and adds journaling to her pages. I used her as my inspiration to document the Church Guesthouse. I did not do sketches while on the trip, but I did take pictures to use as reference later. Someday I will sketch on my journeys!


Turkey Work

I learned a new embroidery stitch called Turkey Work, otherwise know as ghiordes knot. This stitch creates a plush pile on the surface of the fabric. The reason I decided to try this stitch is because I have a set of towels embroidered by my grandmother many years ago.

Vintage-Towels-with-Turkey-Work-Embroidery

The towels are getting rather dingy and worn looking but the stitch she used had me intrigued. It looked almost like a chenille design but many washings have probably made it look that way. After much searching online, I finally decided Turkey Work was the stitch she used.

Turkey-Work-Embroidery

I used an inexpensive white towel to try to replicate one of her designs using cotton yarn I had on hand. I think if I had been able to use light and dark shades of yarn like she did it would have looked better. I just wanted to see if the stitch would work! I am not sure if it was the quality of the towel, the thickness of the yarn used, or the size of my needle, but when you look closely, you can see that some lines of terrycloth are missing around my stitching. Several times a thread from the towel would become tangled in the yarn as I pulled the needle through. This picture is after I took the embroidery hoop off the towel before washing.

Turkey-Work-prewashing

After washing the strands of cut yarn were not quite so wild. I also had to do a little more trimming of longer strands after washing.

Turkey-Work-Embroidery-after-washing

The way the stitch is made creates its own knot so the cut strands of yarn stay in place. If you want to learn how to make this stitch, follow the instructions on this video.

Tissue Paper Texture in Mixed Media

The art challenge for week 22 in the Documented Life Project was “textured paper”.  To start, I brushed watered down school glue onto my page and laid a sheet of randomly scrunched up tissue paper on top of the glue. I pressed the tissue down with my fingers, brushing additional glue under the overlapping pieces of tissue. Then I brushed glue over the top of the whole thing and let it completely dry. Here’s a darkened closeup picture of the glued tissue paper:

Tissue-Paper-Texture-Closeup

After the glued tissue paper was completely dry, I studied the texture to see what kind of picture might emerge from it.

Tissue-Paper-Texture

I saw a gnarly tree in the texture, so I used Gelatos to color my page, blending the color with water. The underlying base of tissue paper texture adds unique features to the finished art piece when using the Gelatos.Textured-Paper Tree-Mixed-Media

Free Online Art Class for Kids of All Ages

acrylic-by-3-yr-old

Acrylic Painting by 3 year old Miss Tickles

Are you looking for fun things to do with your kids this summer? Spend a week exploring creative art with online video lessons from painter, illustrator, and creativity workshop instructor, Carla Sonheim, joined by artist-teachers Lynn Whipple & Diane Culhane. Everday from July 27-31, 2015 they will post a video lesson for you to watch, and then you get to create. The materials needed are simple basic art supplies and you can complete a lesson/project in about an hour or less. The lessons are free and the class materials will be online and available for you to access at your convenience at any time.  However, you do need to sign up!

Kids Art Week

If you don’t have kids or grandkids or neighbor kids to create with, you have permission to sign up for the class and do them by yourself. It’s OK for you to find the kid inside of you and enjoy playing again!