Paint Deals: Thoroughly Thrifty Thursday

Thoroughly Thrifty Thursday

This past weekend, Melinda and Michael finally had the opportunity to start working on the transformation of their garage. In case you missed the post, here’s what it started out looking like:My Messy Garage

And one day soon you will get to see more, but here is a sneak peak to give you a hint at what is happening:Sneak Peek

As you can see in the “before” garage picture, there are some cabinets on the walls left over from a kitchen remodel several years back. They really have not been as useful as they could be for cabinets, so Melinda decided to remove the cabinet doors and just have open cabinets. The dark colored wood was not inspiring for the soon to be playroom, so it was off to Lowes to find paint.

In an earlier post, we talked about checking the remnant bin at the fabric store when you are working on a project that doesn’t need a large piece of fabric. Well, we decided to check out the “remnant” bin in the paint section at Lowes. Mistint paint

Turns out there was a small can of mistint white semi-gloss paint that would work perfectly! And she saved over $10 buying it this way!cabinet paint

Next time you are planning a paint project, whether a room or piece of furniture or craft project, check out the mistint paints, or “oops” paint at your local paint store before heading to the paint chips. You just might find something that you like and will save a lot of money at the same time. Be sure to check what kind of paint it is, flat, semi-gloss, etc. to make sure it will be suitable for your project.

Now for another sneak peak at the finished cabinets:

Cabinets

The back of the cabinets are “wallpapered” with scrapbook paper to add fun!

Grid Drawing: Draw With Me Wednesday

Draw with me Wednesday

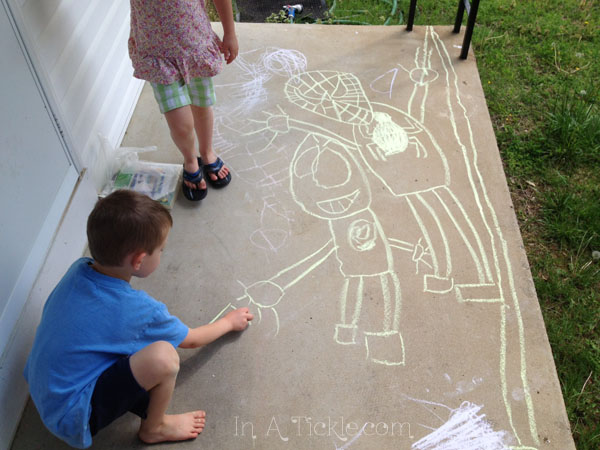
Ninja Boy was working on a super hero activity book the other day. One of the activities was to draw a side view of a face on a large grid of squares while looking at a smaller drawing of the face, with smaller squares.Ninja Boy drawing from a grid

I have used that process many times when I wanted to enlarge a design from a small image to a much bigger image, for instance, to make a large sign, poster or wall mural. The process breaks the image down into smaller segments that are easier to draw and still keep the same proportion in the enlargement.

This process of using a grid to draw is not new. Many artists in the Renaissance period used a grid to help them draw proportions correctly. The artist, Albrecht Dürer, is one who is credited with making a drawing grid, named the Dürer Grid, which was a wooden square frame on which strings were placed to form a grid of equal sized squares. The grid was placed between the artist and the subject of the drawing. The artist had paper with similar squares on which to draw. You can see pictures and read more here and here.

Suppose you are working on a creative project and find a teddy bear shape that you want to cut out of fancy paper, but it is not the size you need. A drawing grid is a great “tool” to use when you want a different size image and don’t have access to a copier or scanner to be able to enlarge or reduce the image size. Today we are going to practice drawing with a grid to enlarge or reduce an image. Don’t worry, the practice pages we are going to work on are not near as complicated as the one Ninja Boy did for his first attempt! For five years old, I think he did a great job.Ninja Boy's finished grid drawing

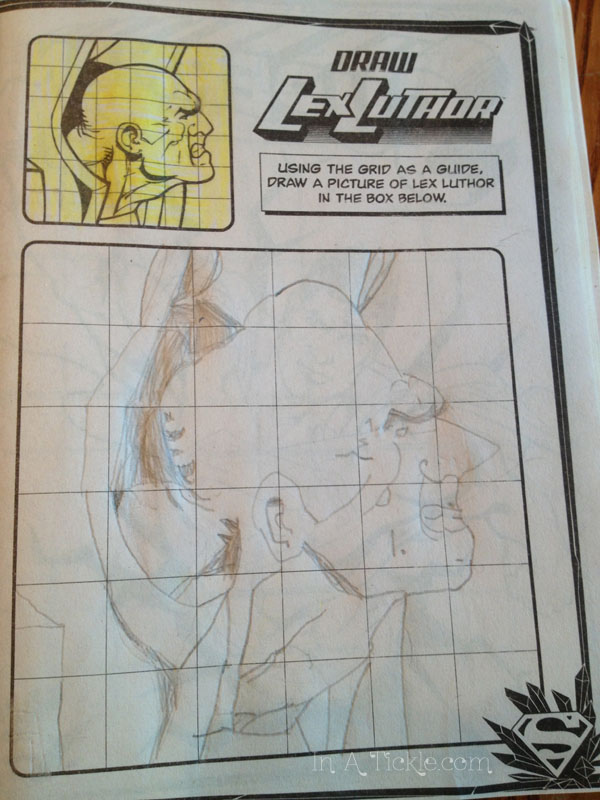
I found some simple drawings in coloring books for you to use. On the original picture, I have placed a grid for you. If you find it easier to keep track of where you are, you can number or letter each square across the top and side of the image and then do the same on the squares of the blank grid.

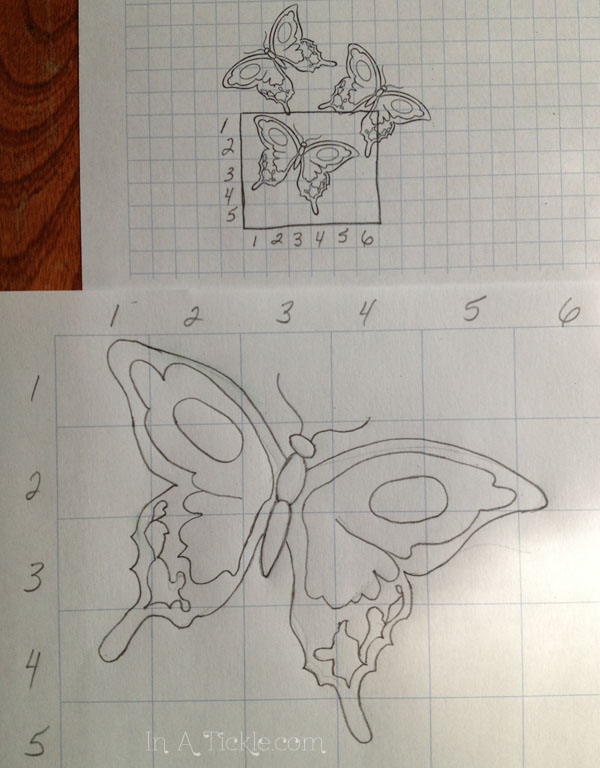
This first image is of butterflies. Notice that I have three butterflies on the original image with a grid of quarter inch squares. I only wanted to enlarge one butterfly, so I drew lines around the outer edges of the squares surrounding the butterfly positioned the way I wanted. I enlarged the butterfly on a sheet with one inch squares. You will find the pdf files of the images at the bottom of the post, which you can print to try drawing yourself.

Grid enlarging butterfly

Start with one box and draw the lines you see in that box on your enlargement. If the line starts at the top left corner of one square in the original drawing and goes to the middle of the bottom edge of that square, do the same on your enlargement. Since you are working with only one small square at a time, it is easier to estimate with your eyes where the middle, or fourth of the way down the edge, etc. would be. If you only want the outline of the object, just draw the outside lines.

Finished Butterfly grid enlargement

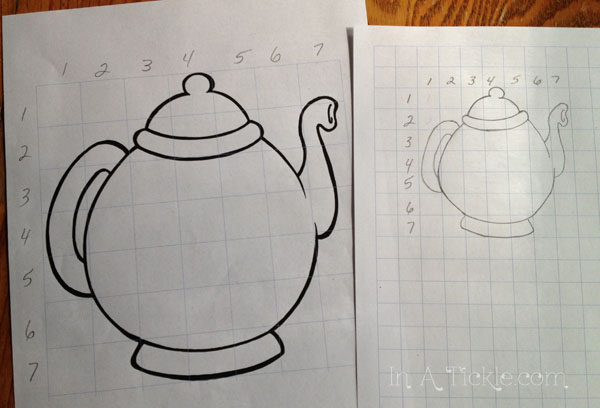
Let’s try reducing the size of an image. This teapot image is on a one inch grid. I did the reduced size on a half inch grid.

Teapot reduction grid drawing

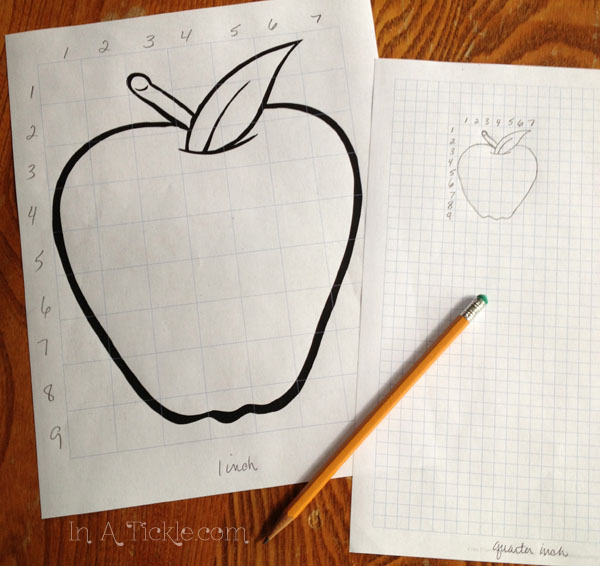
The original apple image is on a one inch grid and I reduced it in size on a quater inch grid for a much smaller apple.

Apple reduction grid drawing

I decided to reduce the frog image from a one inch grid to a half inch grid.Frog Reduction grid drawing

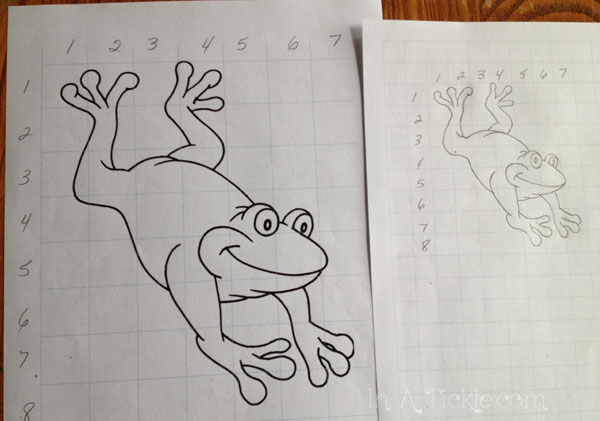
You can print off any size grid you want with this handy online tool. I used this tool to make a graph to put the grid lines on the original pictures for you. Of course, if you had a scanner to put your image onto your computer to begin with you would not need to reduce it or enlarge it by hand. You could easily do it with the computer, that is unless you are making a very big enlargement!

But we are assuming you don’t have one and need to do it by hand. So on any original image that you want to enlarge or reduce, you can measure the sides and draw straight lines every one inch (or whatever size you want) horizontally and vertically. Print off the size grid you desire for your final image and start drawing.

Sheet  Protector Drawing Grids

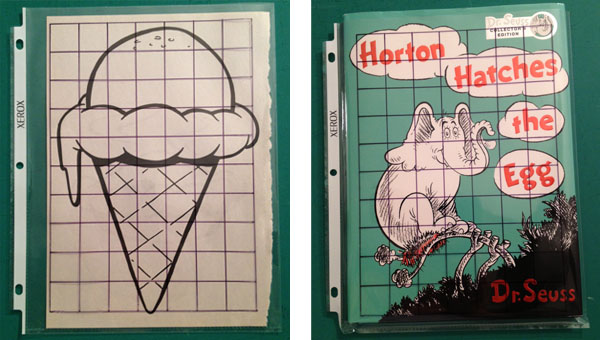
You could even stick a book inside the sheet protector, or lay the sheet protector grid on top of an image (but you might have to tape it to hold it in place.)

If you don’t want to draw lines on the original image, you can make a drawing grid that you can use over and over. Just print off one of the grids and slip it into a transparent sheet protector. Using a fine permanent marker and straight edge, trace the lines on top of the sheet protector. Now you can slip any image into the pocket and you have an instant grid on top of it! While you’re at it, you can make several sheet protector grids with different sized grids and then they will be ready to use whenever you need one.

Now it’s your turn to try out grid drawing. Print out these files and have fun!

1. Butterfly Image
2. Teapot Image
3. Apple Image
4. Frog Image

Grids:
One Inch Grid
Half Inch Grid
Quarter Inch Grid

Small Square Canvas: Transform it Tuesday

Transform it Tuesday

Hope you all had a wonderful Memorial Day weekend. We spent 4 days working our tails off in the garage, while the kids got some much needed Granny Time. Not the most relaxing for us, but at least it was a super productive weekend. Sneak peek coming Thursday!

Today’s transformation starts with some clearance $1 section wall decor from Michaels. At the beginning of the year, Mom came across these small square canvases that had pictures of fruit on them. There was no appeal for the picture itself, but she knew there was potential in the small squares. Plus she got them 50% making them only $.50 each!
Small canvasesBow Holders for the girls…

Bow Holder with canvas and ribbons Bow Holder with canvas & ribbonsName spelled out in letters for a baby gift…

Name Letter PlaquesI used scrapbook paper and mod podge to cover the squares. I free-handed the letters, but it probably would have been a lot easier if I had printed some off of the computer as templates.Name Canvas

Simple and inexpensive transformation that looks absolutely adorable! It’s amazing what you can transform with a little bit of scrapbook paper and mod podge.


Memories That Last

This weekend is one of those three day weekends that our nation celebrates, and I would venture a guess that many do not even know why. Lots of people who work in offices, government jobs, banks, schools, etc. have the last Monday in May off. The rest get to work their tails off in retail businesses holding big sales for all the shoppers, or entertainment venues to keep people having fun all weekend, or restaurants to feed the crowds.

I live in a tourist destination and thousands of people pour into our area to “get away” for a long weekend. This is the first year in a long time that I am not one of those working in retail during the big sales weekend. Don’t get me wrong, I have nothing against families getting away together to play and enjoy spending time together, but the purpose of the Memorial Day observance has gotten lost in the shopping, entertainment, BBQs, boating, camping and so on. For many school has ended (or will be soon) and the big weekend represents the start of summer. In the midst of celebrating fun times, we need to take time to reflect on the purpose of Memorial Day in order to appreciate the freedoms we have in America.

Memorial Day used to be observed on May 30th, so the day of the week it fell on changed every year. In 1971, our government changed the day of observance to the last Monday of May, creating a three day weekend. Memorial Day originated after the Civil War to commemorate those who had died serving in the war. After World War I, the day was to honor any Americans who served and died in any war. It was originally called Decoration Day because people cleaned up the grave sites and placed flowers on the graves to honor those who died.

There has been a push to restore the Memorial Day observance back to May 30th. “Changing the date merely to create three-day weekends has undermined the very meaning of the day. No doubt, this has contributed greatly to the general public’s nonchalant observance of Memorial day.” ~VFW 2002 Memorial Day address

Flag

Take some time this weekend to remember what the holiday represents. Here are some links to help you:

Quiz About Memorial Day

7 Things You Didn’t Know About Memorial Day

12 Interesting Facts about Memorial Day

History.com

Why Do People Wear Poppies on Memorial Day?

While you are creating memories with your family this Memorial Day weekend, establish in their minds some memories that last about why they enjoy the freedoms they have in our country.

(Melinda and I are going to take a few days off and we will be back again next Tuesday with Transform it Tuesday!)

Stitch A Card: Thoroughly Thrifty Thursday

Thoroughly Thrifty Thursday

This past week, my other creative daughter was visiting, and somehow, we ended up at our local Micheal’s craft store not too long after her arrival. Imagine that! She knew she would be needing some thank you cards for her daughter’s upcoming birthday and wanted to make something creative and a little different. If she could save some money over buying ready made cards, that would be a bonus. She found a Sew Easy Starter Kit with the tools needed to make embroidery stitched designs on cards. Since she recently embroidered a pillow case for her daughter, embroidered cards sounded like a fun project to try. She also purchased a pack of blank cards with envelopes. Numerous other attachments can also be purchased to go with the kit to make these beautiful stich designs.

Melinda and I did not want to be left out of the fun, so we had a great time helping her make cards using her new tools. Yesterday she flew back home- with her tools! And we forgot to take a picture of the tools and the cards we made together! (We really are trying to get better at remembering to take pictures of everything we do, just in case we want to use them in a post. But sometimes we get caught up in the fun of creating and forget!)

We did not have the funds available to buy another set of tools, so we decided to see what we could come up with on our own. We already have lots of embroidery floss, needles, and heavy card stock paper on hand.

Since we did not have the foam matt to place under our cards as we punched holes, we improvised with a piece of folded up fabric. A folded up towel would have worked just as well. We drew our own simple designs on plain paper, placed it over the card, and punched holes with a pin. Then threaded a needle with embroidery floss and stitched. The back side of the stitching was covered with a piece of scrapbook paper.Father's Day CardFather's Day Card

Embroidered Father's Day card

Melinda added a white piece of paper with handwritten words to the front of the card.

We experimented with adding pieces cut out of scrapbook paper to some other cards we embroidered.Embroidered Thank You cardEmbroidered 2nd Birthday card

On this card, I used skinny ribbon instead of embroidery floss to make the flowers. It gives the embroidered card an elegant effect.Embroidered Wedding card


Maybe you have never gotten into card making because you did not have all the stamps, ink, papers and so on, but you like to embroider. Try your hand at embroidering cards instead of fabric! It is rather fun!

If you don’t want to draw your own designs, try some of these free patterns. If you are feeling extra bold after giving those designs a try, this site has beautiful intricate designs free for you to use, as well.

Save money on store bought cards by making your own!

Cacology in Writing: Write With Me Wednesday

Write with me Wednesday

I learned a new word this week: Cacology (kah-KOL-uh-jee), which means bad choice or use of words. Another definition I found was “poor choice of words or incorrect pronunciation; a failure to say something important.”

In my years of writing, I find myself consistently using “bad words” that my college comp professors would mark with their nasty red pens because they are so overused or unimportant to the point of the paper. One teacher in particular strongly encouraged us to never use the words “really” and “very.” In writing this blog the last month or so, I have really realized how very much I use those words. YIKES! Need to get myself some more creative word choices STAT!

One of the best ways to get your mind expanding to some better word choices is to make some lists. When you are reading a book, or an incredible blog like this one, if you see a particular word that causes you to pause and think, that’s really a very nice word (wink wink), pull out a notebook and write it down. If you hear a word said in a movie or song, write it down. If you hear someone say a word you have never heard of before, write it down then look it up. If you hear or see a word that you like, look it up on a thesaurus and see if a word that means the same thing is just as interesting.

I redecorated an old, unused notebook to store my new word lists:Words Notebook

If you buy or make yourself a notebook, you could make sections and categorize the words by how they end, like “-ing,” -ly,” “-ed,” etc. Or you could separate them by their parts of speech, like nouns, verbs, adverbs, adjectives, etc. like I did.Notebook Tabs

Then the next time you sit down to write a story, blog, or even facebook status/tweet, open up your notebook of interesting words and use one. If the most compelling word you can think of is “really” to describe something, PLEASE consult your notebook before pushing “enter.”

Now if you come across a “really” or a “very” in future posts, you will know that I too am human and struggle with using puny, weak words at times. You can call me out on it if you’d like (more motivation for me to NOT let them slip in).

A quick picture tutorial on how I decorated my notebook.Decorating Old Notebook


A few more words I discovered this week for you to add to your notebook too if you want:

  • Agrestik (ah-GRES-tik): rustic or rural, unpolished or awkward.
  • Grandiloquent (gran-DIL-ah-kwent): Using high-flown, pompous, bombastic words and expressions.
  • Jejune (Je-JOON): not interesting, dull, empty; childish; lacking nutrition

For the Children:

Want your kids to learn interesting words AND learn how to spell them? Download this adorable and FREE App

Endless Alphabet


What are some of your favorite words? Comment below.

Our Prayers Are With Oklahoma

As with so many across our country today, our hearts are broken for those in Oklahoma who experienced so much devastation and loss of loved ones from the storms yesterday. We have friends living near there and are glad they are ok. If you would like to help and are not sure how, please consider a donation to Convoy of Hope. They are a faith-based organization based in the midwest who are recognized as first responders in disaster relief in our country and all over the world.

“The Lord is a stronghold for the oppressed,
a stronghold in times of trouble.
And those who know your name put their trust in you,
for you, O Lord, have not forsaken those who seek you.”
Psalm 9:9-10

Every Creator Has a Beginning: Real Me Monday

Real Me Monday“Creativity is intelligence having fun.” -Albert Eisntein

Do you think that you have no creativity? I think you do. If you are intelligent at all, you have some form of creativity. Just let your intelligence have a little fun! If you want to be creative, you have to start somewhere. Maybe you are three (if you are and you can read this, you are amazing) or maybe you are fifty-three, but every creator has a beginning. I want to share with you My Princess’ beginning in the world of sewing. She doesn’t know much at all about it. However, she has a desire, and that is a pretty good place to start.

Birthday Lunch at the Tea Room

Birthday lunch at the tea room

We were about to go to lunch for her great grandma’s birthday. My Princess kept asking if we were going to give her a present. I told her that taking her to lunch was her gift, and her little mind could not fathom not giving her an actual present. I told her that great grandma didn’t need anything, and she suggested we make something for her dog. I thought that was a great idea! She helped by drawing a pattern and, with help, created her first design. The bunny dog toy! She was so proud of her creation and talks about it still.Bunny Dog toy

Now every time I am sewing, at some point she comes in and asks to stitch. We made her a little practice square using plastic canvas, yarn, and a tapestry needle. She loves to practice sewing!Plastic canvas


Create something and be proud of it! Don’t compare yourself to someone else’s art. Look at it and remember that you did it yourself! That’s something to celebrate.Finished dog toys

Create Art that Doesn’t Last: Weekend Wonderings

Weekend Wonderings

Create Art That Doesn't Last

I am often amazed by my children. One of the ways lately is how freely they create without caring who sees it or how long it lasts. This is clear in how much they like to draw with chalk on the driveway.

Kids drawing chalk heart

Lids chalk art


They know that it will get washed away with the rain or when mommy washes it off with the hose, but that doesn’t stop them. They love doing it.

I have been thinking lately about creating art that lasts beyond the physical. Art is not always about how long it lasts. It’s not about who sees it. I choose to be the kind of artist, like my kids, who can create for the sake of the process–for the joy and satisfaction it brings just by making it happen.

I’m inspired by artists who are willing to put so much effort into something that will not last physically because of weather or time, but only in an impression or a picture. Thankfully, with this digital age, even art that will eventually get lost, destroyed, or washed away can be captured by a photo.

Below are some great examples of art that will not last, but can make a very lasting impression if you happen to see it in real life or a picture:

Ever seen a statue with a sweater on it or a pole with a yarn embellishment? This is yarn bombing.Yarn Bombing

“Could you think of a better symbol of coziness than a nicely-knit scarf or sweater, draped over one’s shoulders? Well, some people around the world thought that our urban city horizons could use some warmth, too, and came up with yarn bombing – a sort of knitted graffiti, placed around all kinds of objects on the streets.”


There are sand sculpture competitions every year on beaches all around the coast. Those sand art sculptures will eventually get washed away, but that doesn’t deter these committed artists.Sand Art


Have you seen the 3D chalk art? AMAZING!3D Chalk art


Ice sculptures will melt, but they are beautiful!

Ice Sculpture Art


There are also artists who create amazing pieces of art with food!Food Art

Are we afraid to create something if we know it will wash away? Or can we enjoy the process and the moments of appreciation however long that might be?

In A Tickle chalk art

3 Proteins Mixture and EnchiLaura’s: Foody Friday

Foody Friday


A few weeks ago we talked about Quinoa and yummy ways to use it. One of the ways I used it this week was a few different dishes: Lettuce wraps, Chili, and My Hubby’s grandmother’s EnchiLaura’s.

3 Proteins Mixture

I started off by cooking the Quinoa and browning a mixture of sausage and beef. After everything was cooked, I mixed them all together, and I portioned them out for each meal to be seasoned separately.Quinoa Sausage Beef

One portion we planned to eat right away, so My Hubby added some chili powder, garlic powder, onion powder, cumin, salt, and pepper to the mix, as well as leftover orange pepper that was cut earlier for the kids to eat. After sautéing it all together till the pepper softened a little, we put them in some locally grown hydroponic Butter Crisp Lettuce leaves and topped with cheese and salsa. The lettuce wrap made for a nice change from regular tortilla shells. Very tasty.Lettuce Wraps

I didn’t take a picture of the chili I made, but you can use your favorite chili recipe and just add the quinoa in with the other meat.

EnchiLaura’s

My Hubby and his family used to live in New Mexico (and some still do). They LOVE mexican food, and have some traditional dishes from their own family members that we use often for family get togethers. One of these family tradition recipes is for EnchiLaura’s. They are like enchiladas only, My Hubby’s great grandmother, Laura, added her own twist to it.

Their traditional way to make it is with seasoned beef, corn tortillas, enchilada sauce, and cheese and then served with shredded lettuce, diced tomatoes, and a side of ranch style beans. I did it a little different this time.

Instead of using a pain with oil to fry the tortillas till they are soft, I spray the tortilla with olive oil and heat on both sides till hot. This makes the tortillas less soggy and drippy but still gets them nice and soft. I sautéed the 3 Protein mixture with some fresh spinach and the same spices that we used for the lettuce wraps. Layer the tortillas, mixture, and cheese until you have a stack as big as you want. Top with enchilada sauce (I used canned this time, but you could also make homemade) and cheese. You could add shredded lettuce, tomatoes, onion etc. to finish it off if you like but this was pretty darn tasty without it.
EnchiLaurasEnchiLauras